
How to Allow Clients to Create Their Own Accounts [Self Registration]
There are all sorts of ways to create client accounts in Foyer.
You can invite clients directly (via email or by importing from excel), have clients upload files via Foyer SafeDrop, and you can even have your clients create their own accounts.
Allowing your clients to self register can be a great way to lessen the administrative burden on your business.
Here's how you can enable client account registration and make your client portal more self-service.
Step 1: Enable Client Self Registration
If you haven't already, you'll need to enable one setting before getting started.
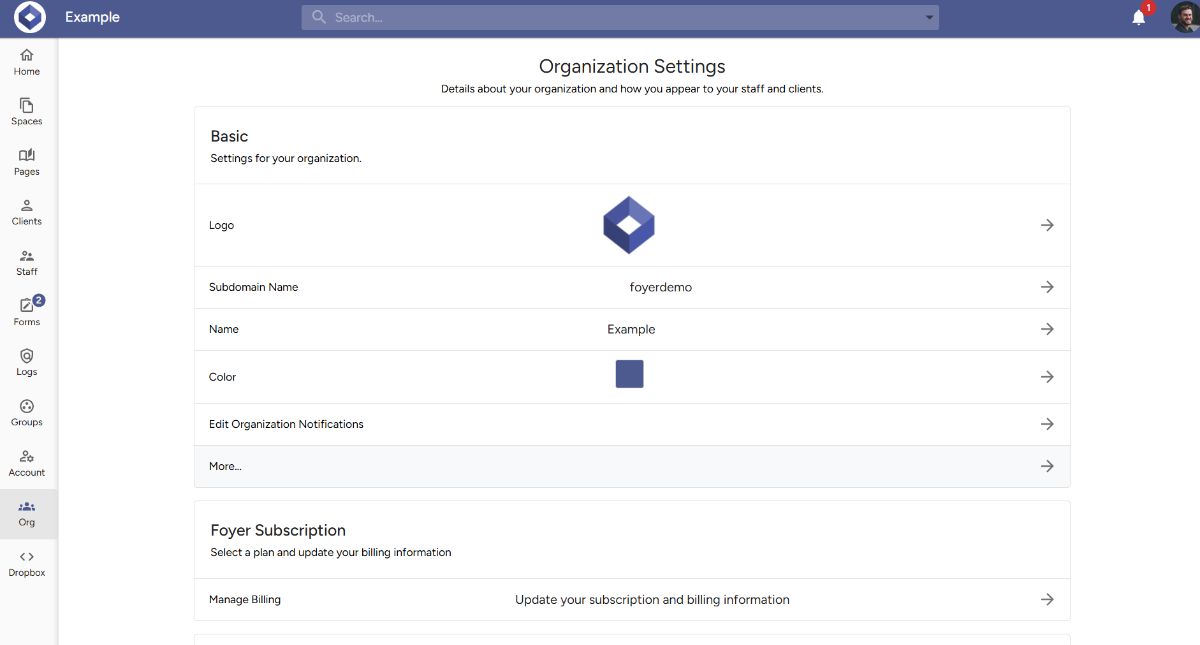
To enable client self registration, navigate to your Organization Settings. These can be found by logging into your Foyer admin account, clicking "Org" in the left drawer, and then clicking "More...". See the screenshot below:
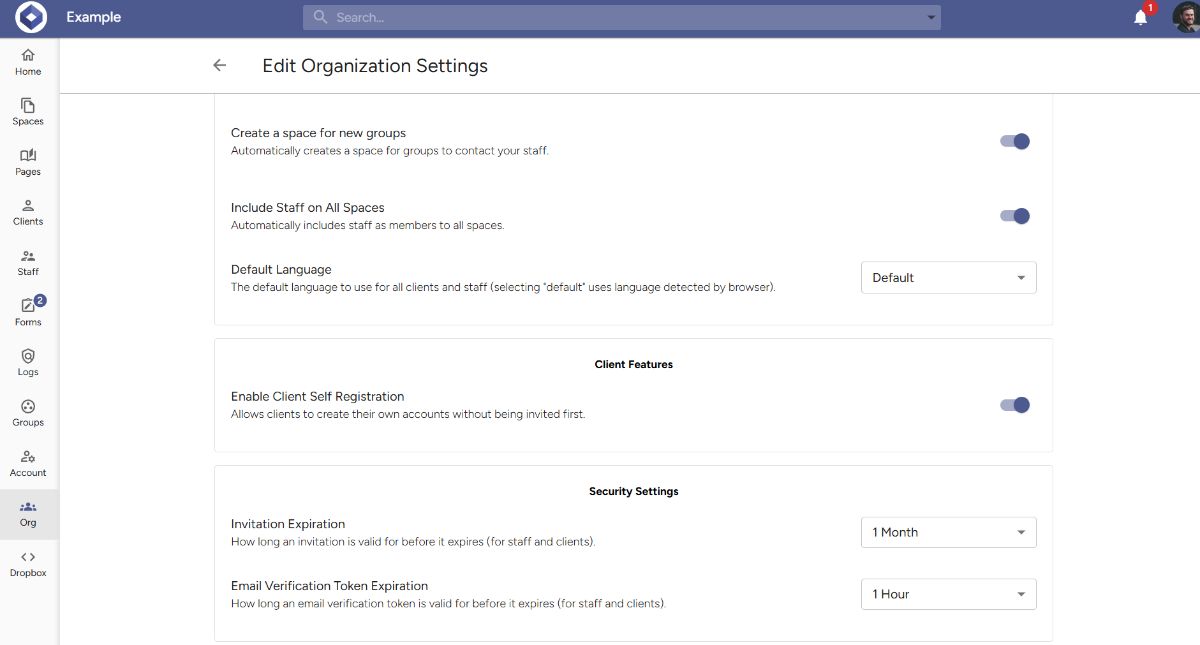
After clicking "More..." you'll see your Organization Settings. Scroll down and find "Enable Client Self Registration" and ensure that it is set to be on.
Step 2: Share Your Client Registration Page
With that setting enabled, you'll now have access to the client registration page for your client portal. You can find your client registration page by navigating in your address bar to the "/client-registration" page.
For example, if your organization is "example.usefoyer.com", then you can find your client registration page at "example.usefoyer.com/client-registration".
The page looks like this:
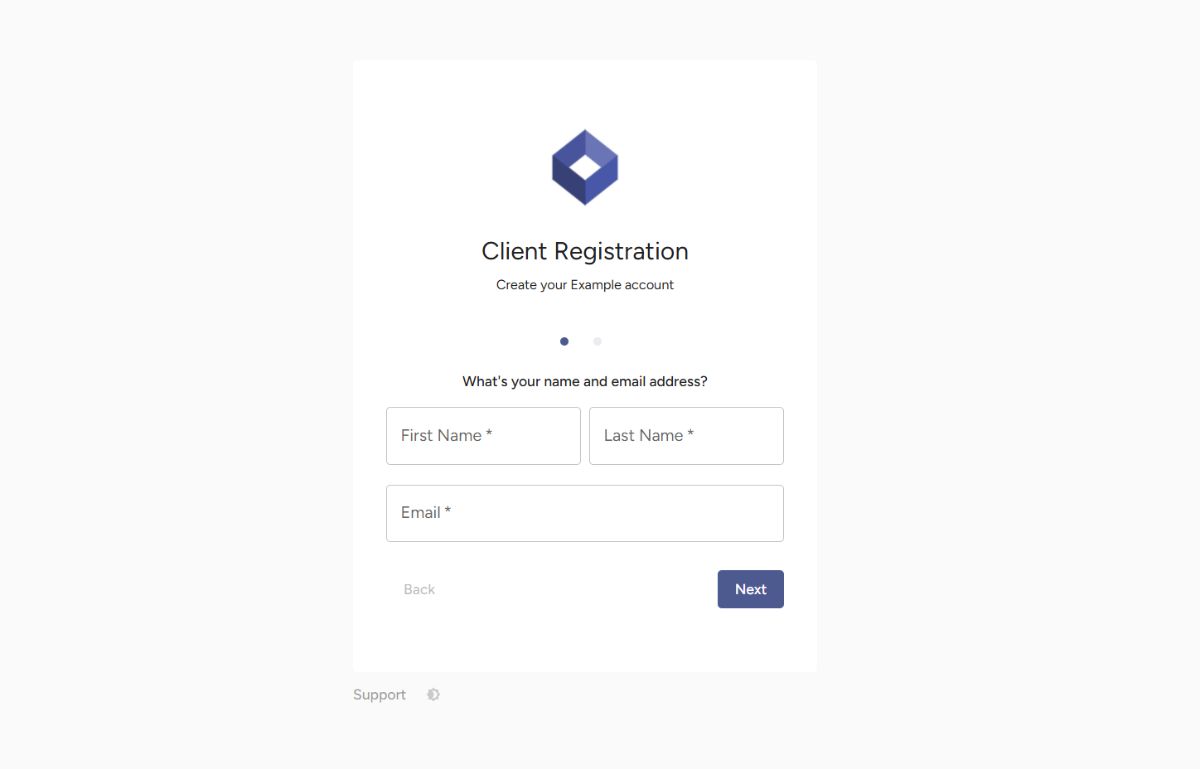
You can send this link to your clients (via email, or have it on your website), and that way your clients will be able to create their own accounts where they can login to share files with you.