
Clients
The Clients page is accessible exclusively to staff members upon login. It serves as a central hub where staff can invite clients, upload client information in bulk, and manage client registrations. When registering clients, staff can define details such as first name, last name, email, and other fields.
Invite Client
There are three ways to add clients to your client portal; manual and import clients.
Manual Invite Client
- Navigate to "Clients"
- Click "Invite Clients"
- Below are all the fields that are available to use for inviting a client
- First Name: First name of the client
- Last Name: Last name of the client.
- Send Invitation Email: Select whether the client should automatically get an email invite. Default is on.
- Make Default Space: Select whether the client should automatically have a space created for them and all staff members. Default is on.
- Phone Number: Phone number of the client
- Tags: Tags that can be used to group users on the clients page via search and columns functionality
- Groups: Select a group from the dropdown that will add the client to the Group.
Import Clients
One of the biggest headaches when moving to a new platform is moving your data. We are well aware of that!
That's why we have a quick and easy-to-use tool for importing your existing clients into Foyer. Whether you have 5 clients or 500 clients, getting them onboarded to Foyer is a breeze.
Step 1: Navigate to the Clients Page
To find the bulk client import tool, you'll need to login to Foyer using a staff account, and navigate to the clients page (found on the left drawer).
It looks like this (notice the "Import" button):
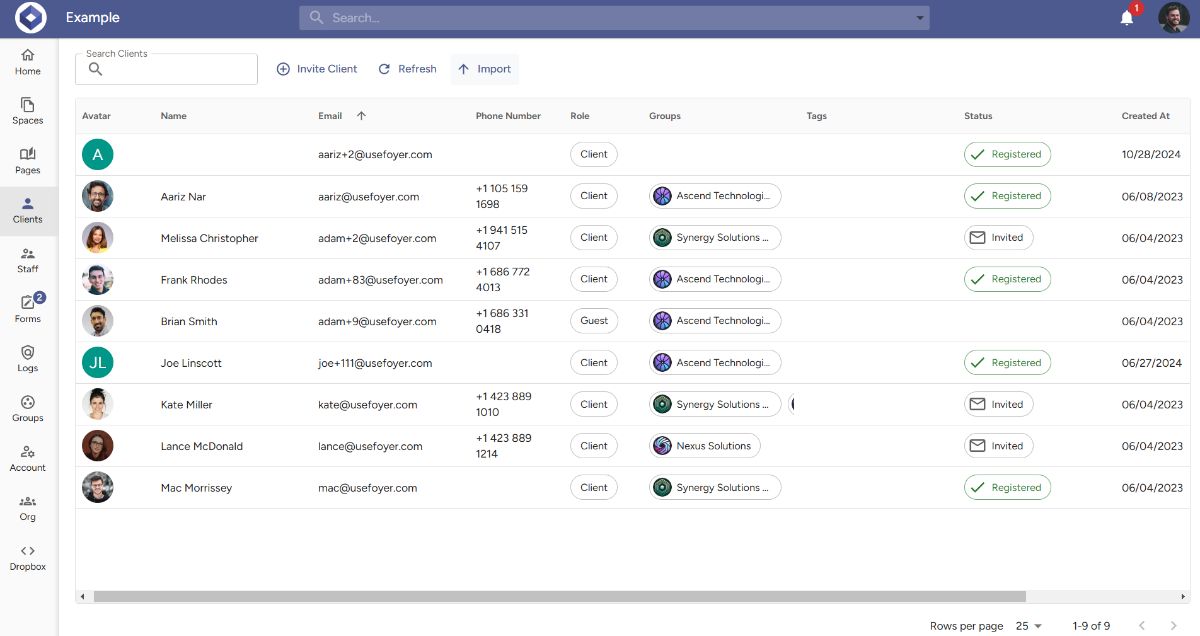
Go ahead and click that "Import" button on the top of the page and you'll see the bulk client import tool appear:
Step 2: Select a Client Data Spreadsheet
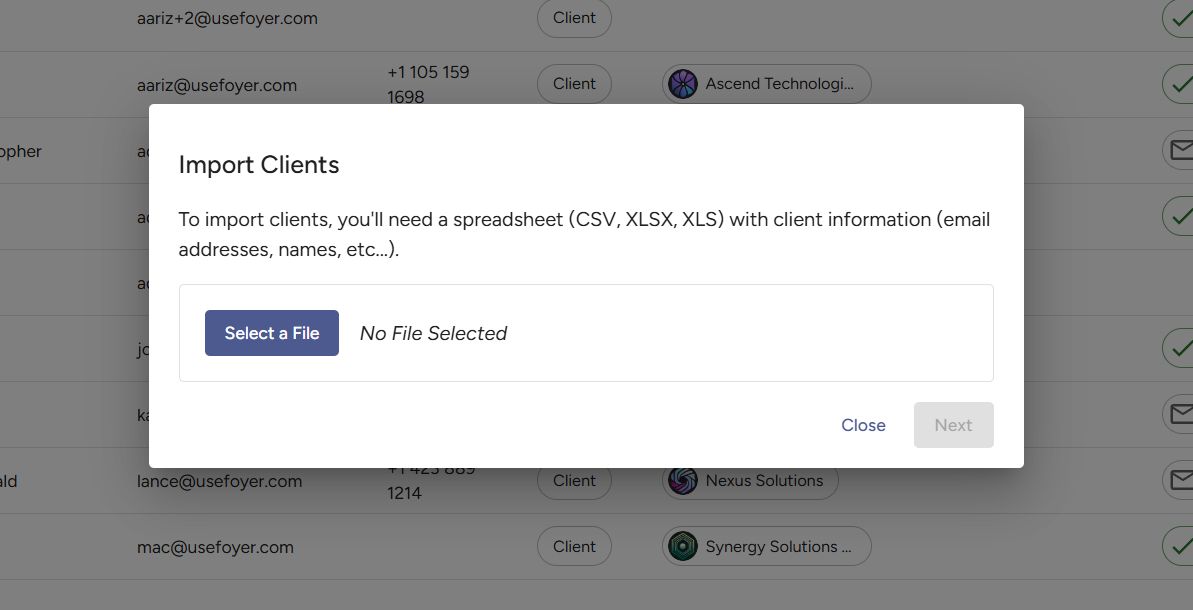
To import your clients you'll just need any spreadsheet file (CSV, XLSX, XLS) that has some basic client information in it (first name, last name, email address, etc...). If you don't have one already, you can check with your existing CRM to see if there's an option to export to a spreadsheet.
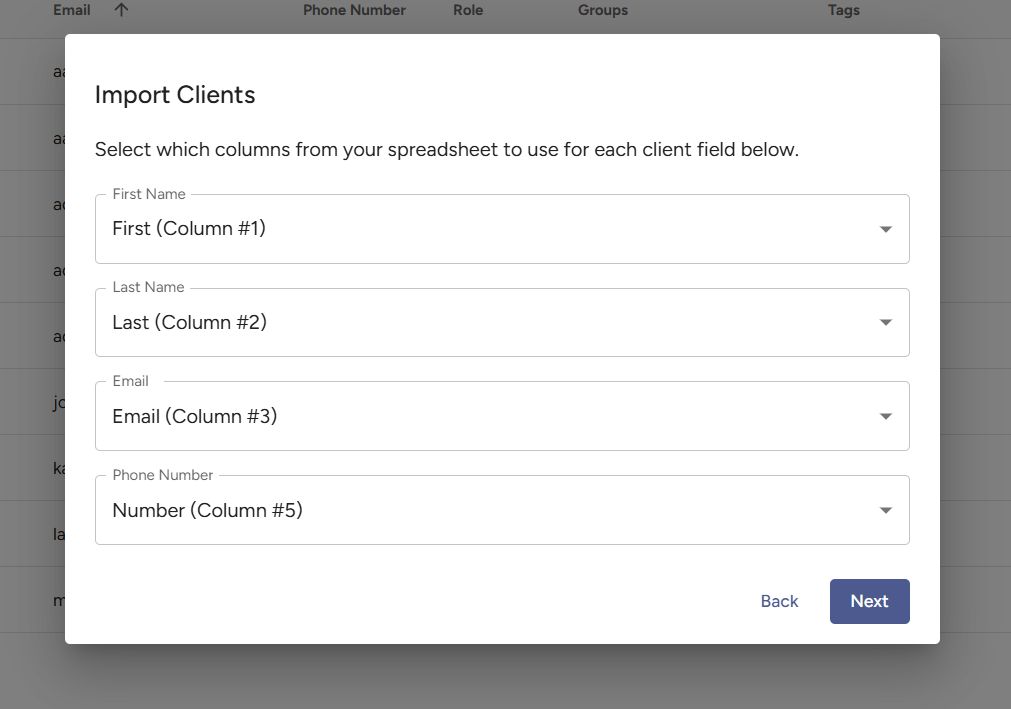
Foyer's bulk client import tool is smart in the sense that if your spreadsheet has multiple workbooks you'll be able to select which one you'd like, and if your spreadsheet has oddly named columns you'll be able to choose which column maps to each part of your client records.
Check out the example below where I chose a file that has things like "Number" which corresponds to the client's phone number:
Step 3: Map Your Spreadsheet Columns to Client Fields
Once you've selected your column mapping, click "Next" and you'll see a few important checkboxes:
Step 4: Choose If You Want To Immediately Email Clients
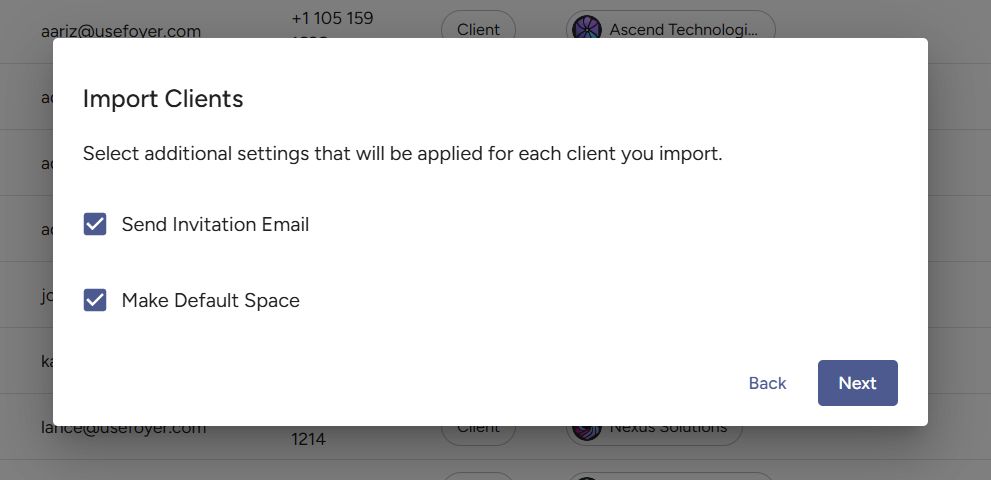
Before continuing, you'll want to carefully consider what your business's workflow is. If you select "Send Invitation Email", your clients will get an email from you inviting them to create an account.
If you do not want to send your clients emails, uncheck "Send Invitation Email". You can always send individual invitations later on.
For the "Make Default Space" this just means there will be a Space created in Foyer that has the client and your organization's Staff as members. To prevent this Space from being created you can uncheck that box. Note: the default space is not the same as a Foyer SafeDrop Space (SafeDrops will not be placed into the default space).
Step 5: Review Client Information and Import
Click "Next" and you'll see a screen where you can preview your bulk import before your clients are added.
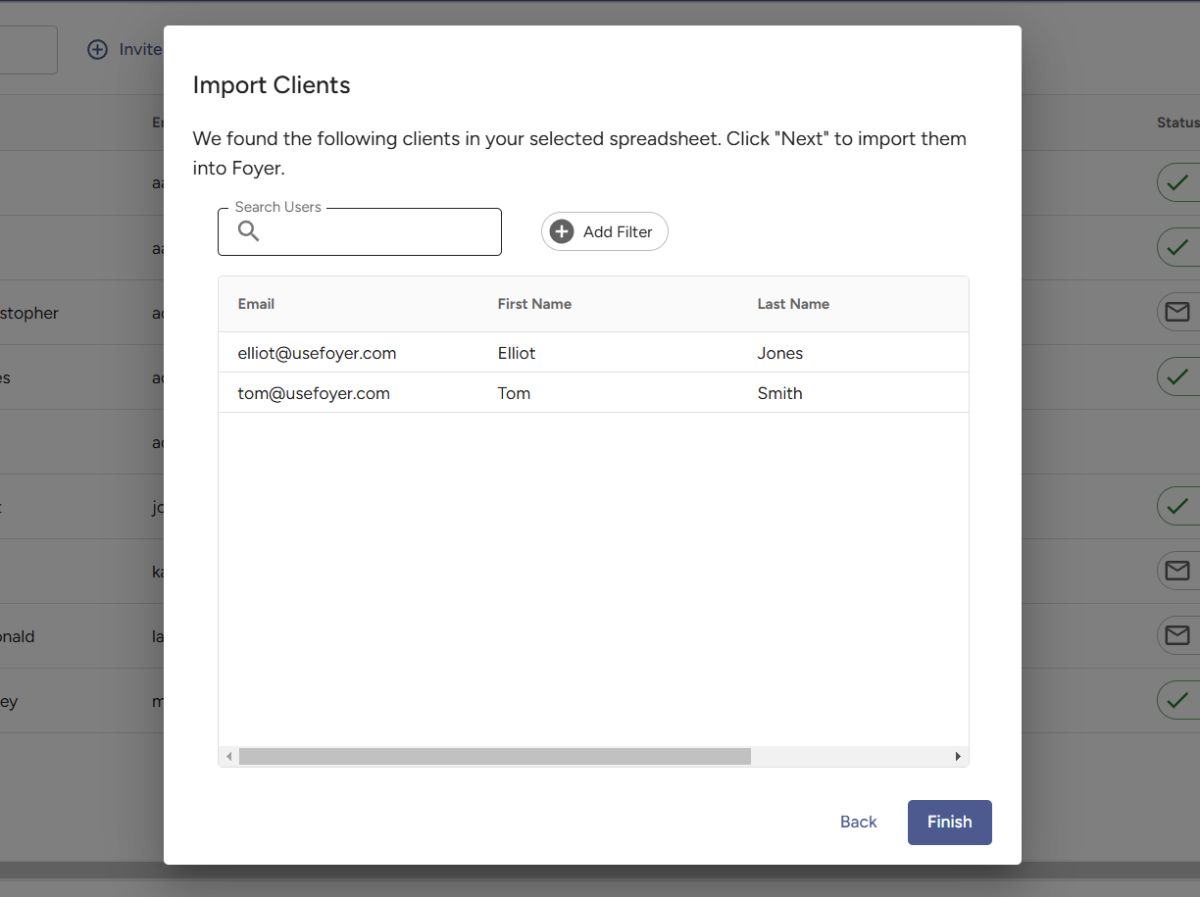
Make sure to look over the records to make sure they are accurate before continuing. If there's any issue, make sure you've mapped the columns correctly in the previous steps, and also double check that your spreadsheet is formatted correctly and properly loads in regular spreadsheet software (like Excel). That's it! Your clients are now in Foyer.
When you add clients in Foyer, one way to get their accounts set up is to send them an invitation email.
This happens by default and automatically when you add a client (when the "Send Invitation" checkbox is left enabled).
However, sometimes you may need to resend the invitation. A few common cases are when the invitation has expired (the default expiration for invitations is 1 month), or if a client can't find the invitation email (if it accidentally went to spam or junk).
For those situations, Foyer has a button where you can resend the client (or staff) invitation for any user.
Resend A Client Invitation Email
Step 1: Navigate to the Clients Page
First, navigate to the clients page. You can find this page by logging into Foyer with your admin account, and clicking the "Clients" tab in the left drawer. The page looks like this:
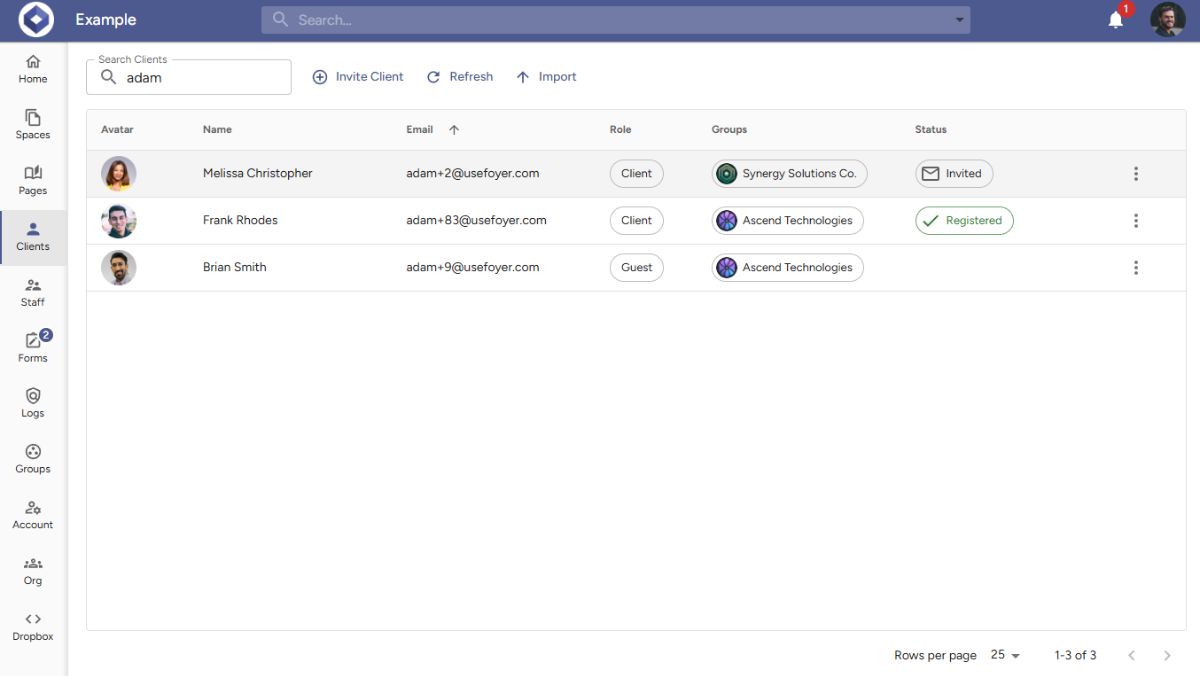
From here, you can find the client you'd like to re-send the invite to. You can use the search bar to search through your clients on the top.
Step 2: Click "Send Invite"
Click the 3 dots on the far right side of the client's record to reveal the options:
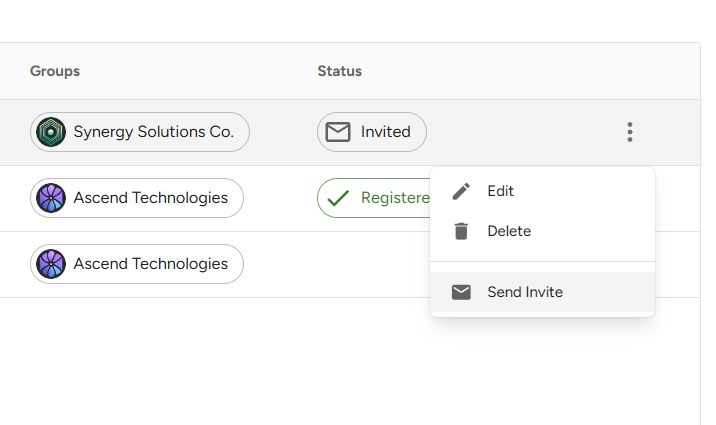
To re-send the invitation, click the "Send Invite" button. Your client will immediately be sent a new invitation. Any existing invitations that have been sent will expire, so make sure your client knows to only look for the latest invitation.
If you need to re-send an invitation for any of your staff users, you can do these same steps on the "Staff" page.
Client Self Registration
There are all sorts of ways to create client accounts in Foyer.
You can invite clients directly (via email or by importing from excel), have clients upload files via Foyer SafeDrop, and you can even have your clients create their own accounts.
Allowing your clients to self register can be a great way to lessen the administrative burden on your business.
Here's how you can enable client account registration and make your client portal more self-service.
Step 1: Enable Client Self Registration
If you haven't already, you'll need to enable one setting before getting started.
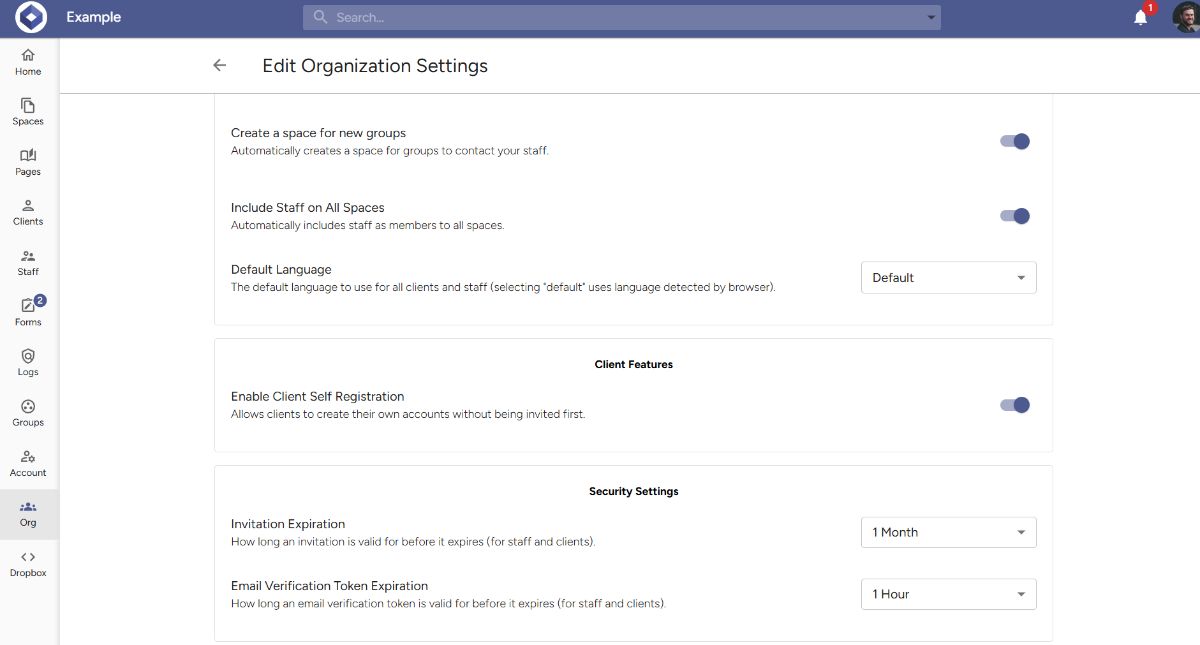
To enable client self registration, navigate to your Organization Settings. These can be found by logging into your Foyer admin account, clicking "Org" in the left drawer, and then clicking "More...". See the screenshot below:
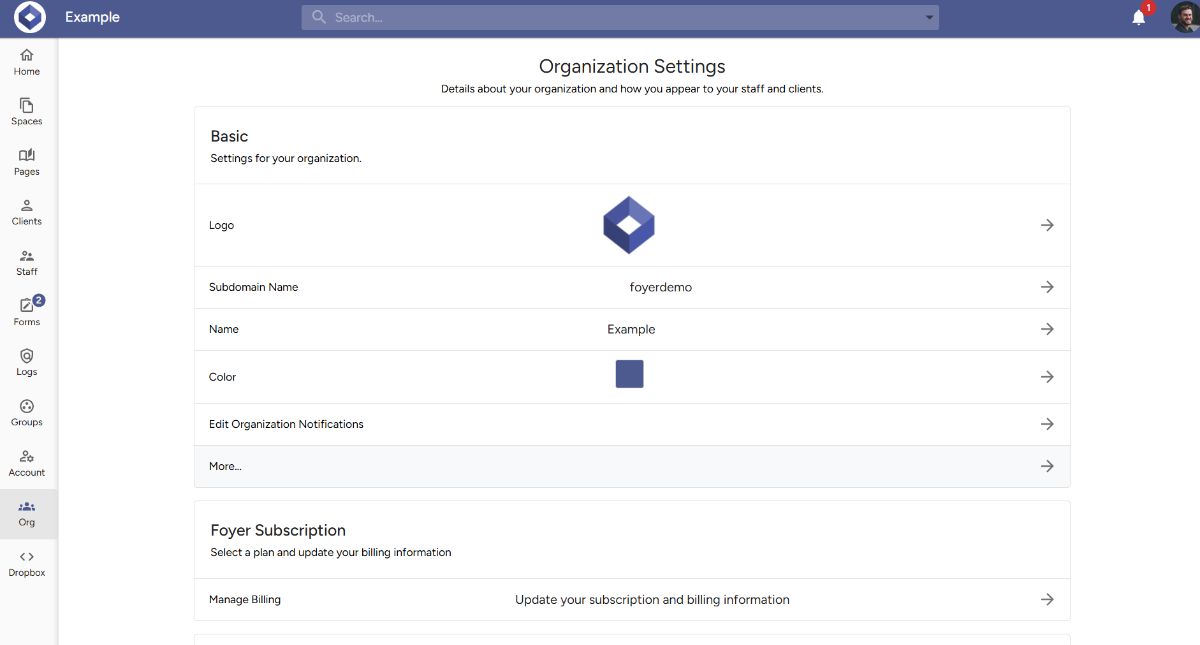
After clicking "More..." you'll see your Organization Settings. Scroll down and find "Enable Client Self Registration" and ensure that it is set to be on.
Step 2: Share Your Client Registration Page
With that setting enabled, you'll now have access to the client registration page for your client portal. You can find your client registration page by navigating in your address bar to the "/client-registration" page.
For example, if your organization is "example.usefoyer.com", then you can find your client registration page at "example.usefoyer.com/client-registration".
The page looks like this:
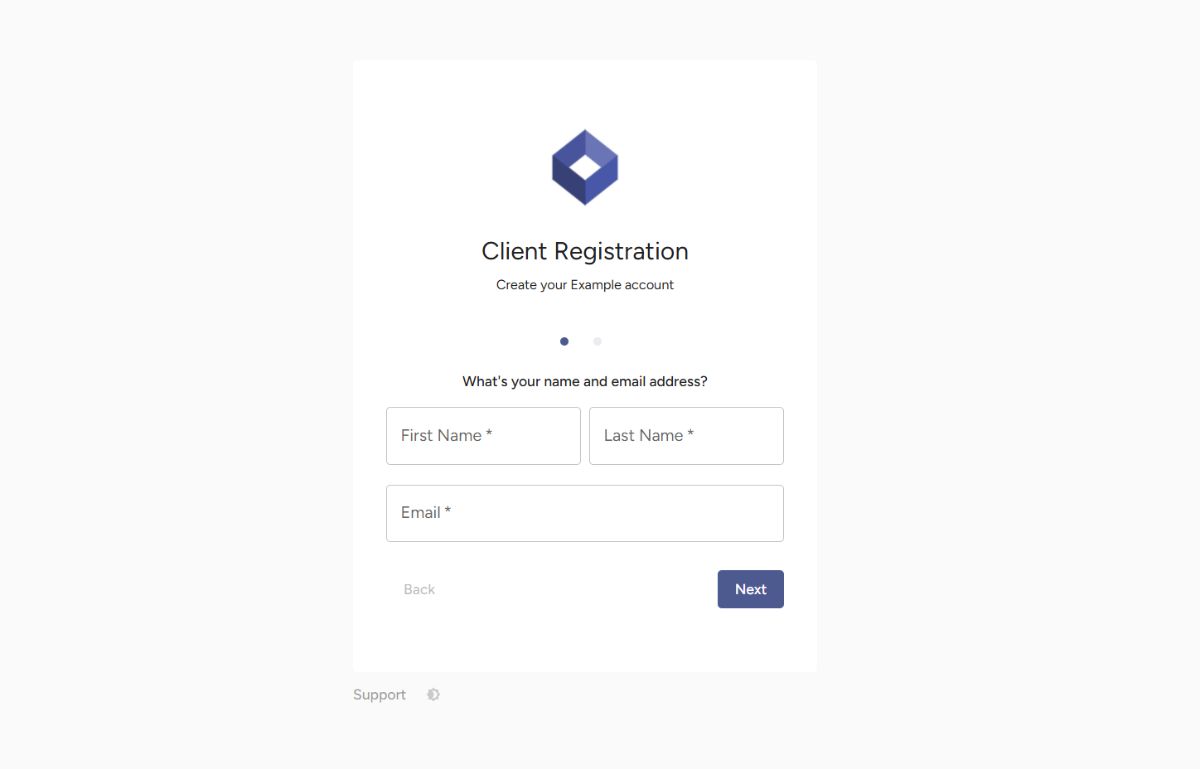
You can send this link to your clients (via email, or have it on your website), and that way your clients will be able to create their own accounts where they can login to share files with you.
Apps Customization
The "Clients" Menu item can also be customized with different logos and text.
- Navigate to "Org" and click to "Edit Foyer Apps"
- On the "Apps" page you can,
- Move the order in which "Clients" page appears for all users by clicking the two horizontal lines beside the 'Clients" box
- Click the vertical ellipsis and click "Edit App" to change the icon and label text as it appears to users.