
How to Send File Signature Requests with DocuSign
With our DocuSign integration, you can request file signatures for any file directly from a Space. This guide will teach you how to send file signature requests and includes the one-time setup of linking your DocuSign account to Foyer.
This integration works with only Docusign Business Pro accounts.
If you prefer to watch a video instead, check out this video below which goes over the same instructions we will cover in this guide:
Note: on 5/9/2024 we updated our DocuSign setup steps, and the video above is missing one section. Make sure to review the section below regarding adding a DocuSign Connect Key to your account.
To get started, you'll need to login as staff account for your organization.
The first step is to make sure you have added the clients or staff you'd like to sign the document to your organization. If you would like a client to sign, head on over to the Clients tab and invite a client. If you would like a staff to sign, you can use the Staff tab to invite a new staff. If you would like yourself, to sign there's no extra step necessary.
Already have the users added to your organization? Great!
To start sending file signature requests, you can create a Space with the parties you will be requesting signatures from. Some Spaces are created automatically. If you need to create a new Space, there is a button on the left side of the page.
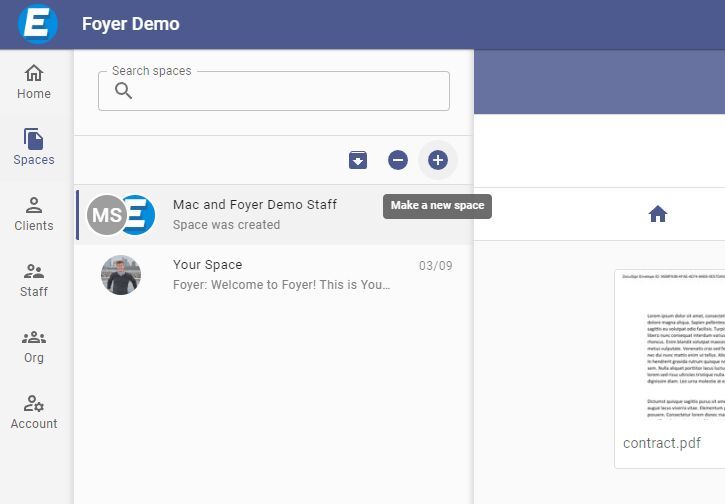
After clicking the "Add a Space" button, you will be able to add members and a title for your space. See our example below, where we choose one member and give a title of "Contract Signing". This should be clear to our client, Mac, that we intend on sending him documents to sign.
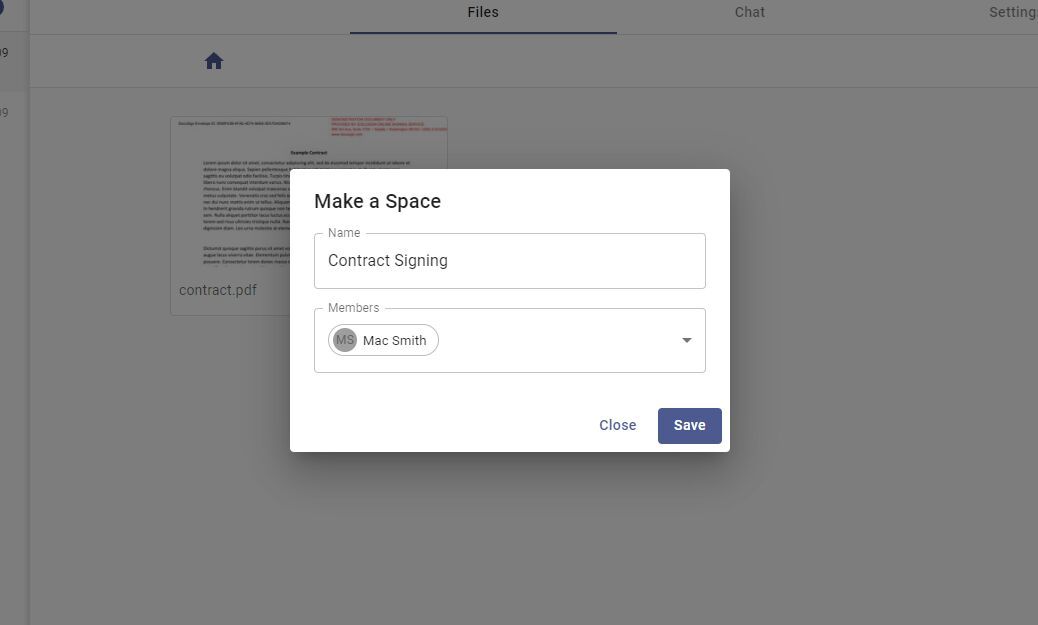
Go ahead and click "Save", and your new space will be added.
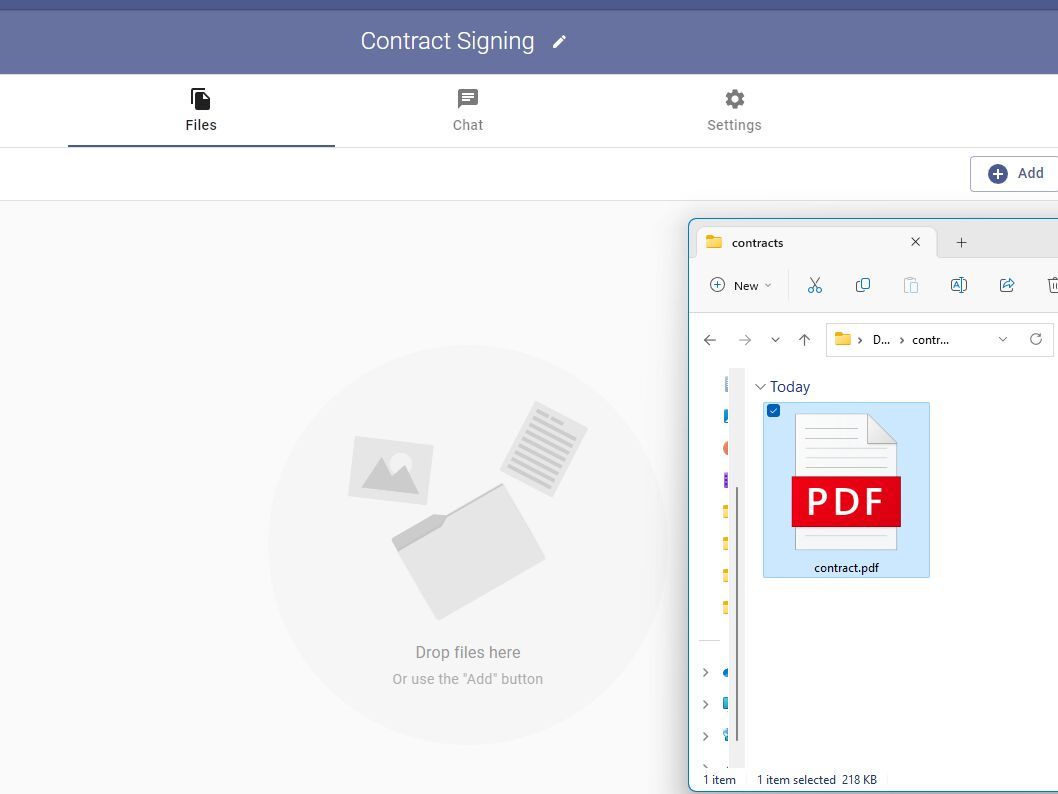
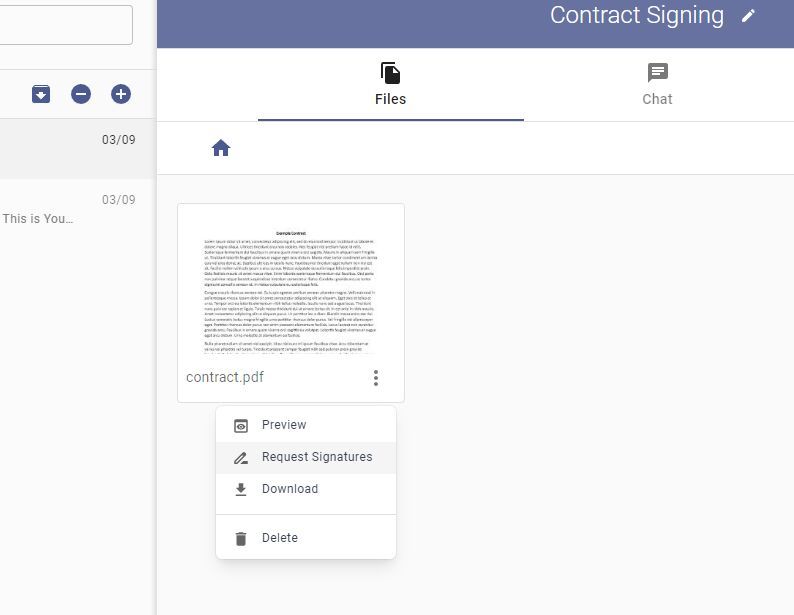
Make sure you have clicked on the Files tab, then you can select the document you'd like to request a signature for and drag and drop it onto the page.
You will see your file appear in the space. If you'd like, you can click on the file to preview it to double check the document. Let's start the signing process. Go to the document you uploaded, and click on the 3 dots (the option button) on the file. Look for a menu item called "Request Signatures".

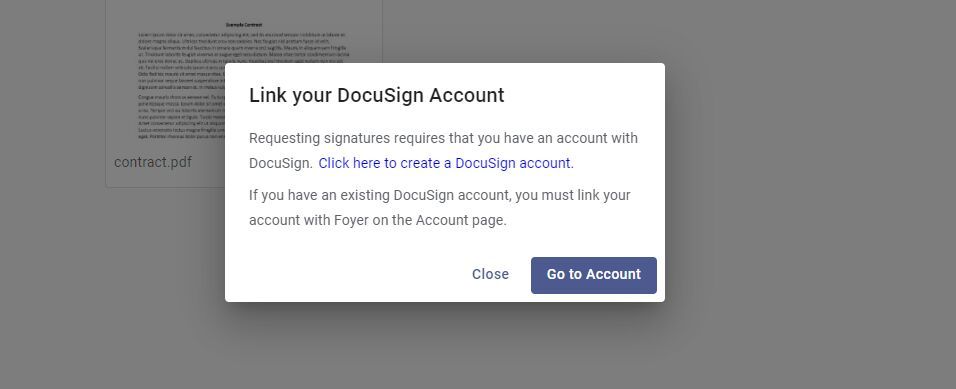
If you haven't yet linked your DocuSign account, you'll see a dialog box pop up telling you to link your DocuSign account with Foyer. If you have already linked your account, you can skip down to the "Choosing Signers" dialog section.
Linking your DocuSign Account
You will need your own DocuSign account to use our integration if you don't have a DocuSign account yet, you can start a free 30-day trial of DocuSign by clicking here. Once you have created your DocuSign account, go ahead and click the "Go to Account" button to link your DocuSign account with Foyer.
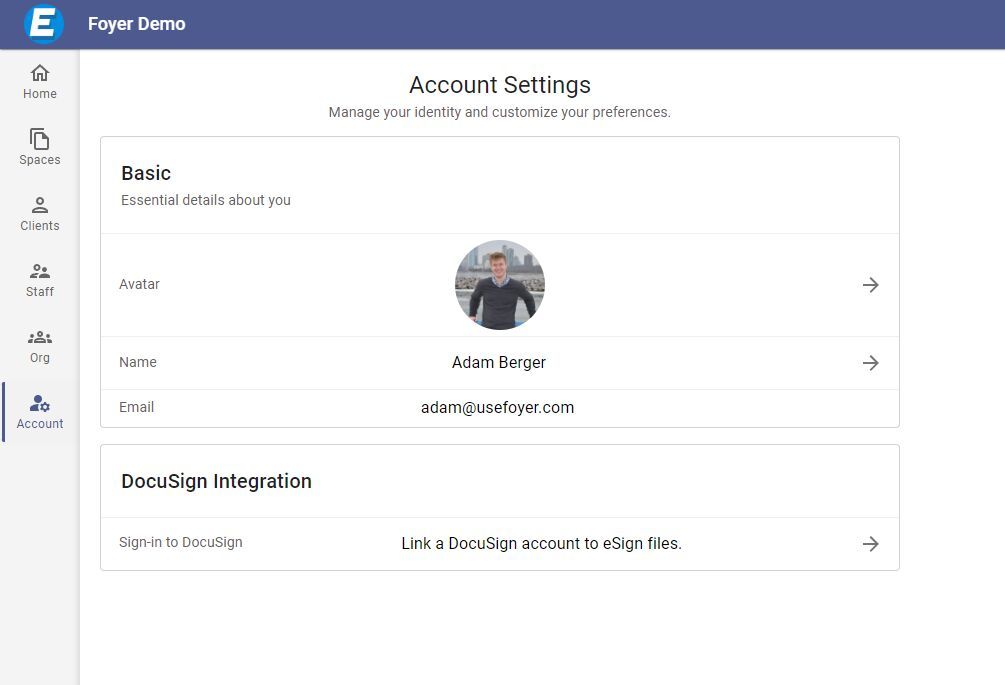
You will be brought to your Account page. On the bottom of the page you'll see a DocuSign Integration box. Click the "Sign-in with DocuSign" button to link your account.
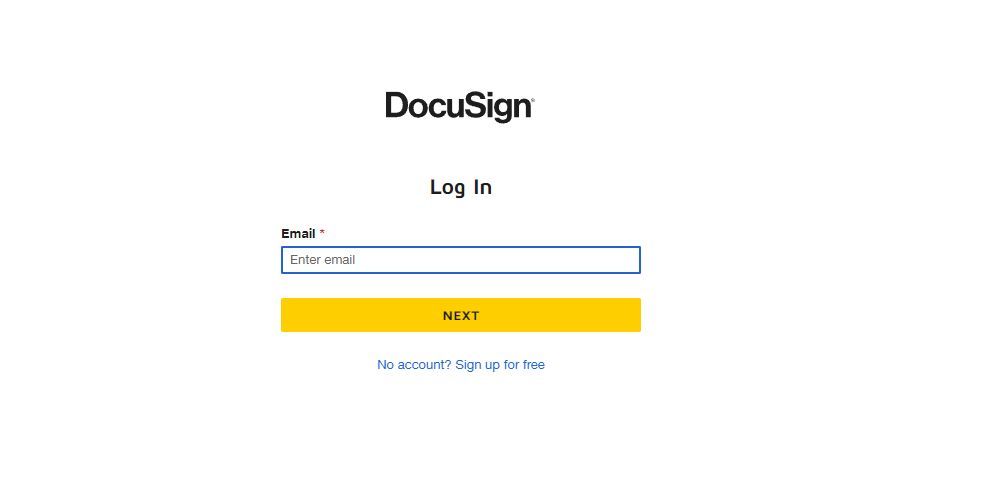
You will be redirected to DocuSign to sign in to your account. Login with the DocuSign account you'd like to use within Foyer.
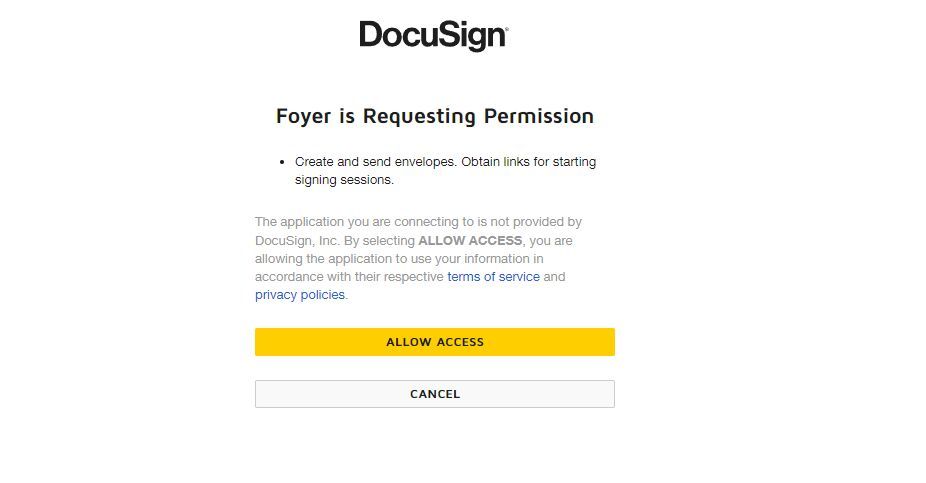
After you login, you will be asked to allow Foyer to gain access to your account so that we can create and send envelopes on your behalf. Click "Allow Access" and then you will be forwarded back to your Foyer Account page.
Now you'll see that the DocuSign Integration box has been updated to the status of "Connected". This means your DocuSign has been linked successfully.
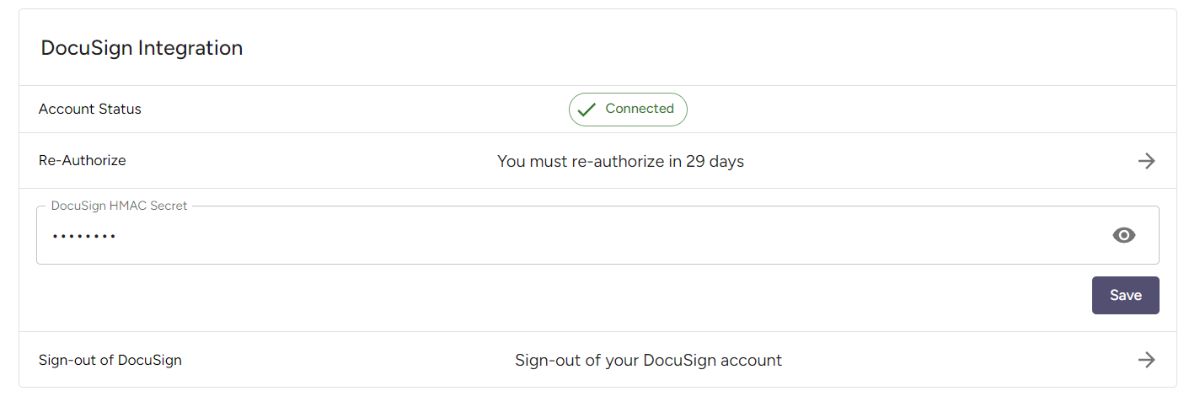 There is one more step you'll need to do to complete your DocuSign account setup: add your DocuSign Connect Key. We will need to find your DocuSign Connect key, and paste it under "DocuSign HMAC Secret" on the Account page.
To get started, login to your DocuSign account at: https://docusign.com
 Once you're logged in, you'll need to click on "Settings" on the top of the page. Then (on the left menu) scroll down and click the "Connect" menu item. This will take you to your DocuSign Connect page (see below).
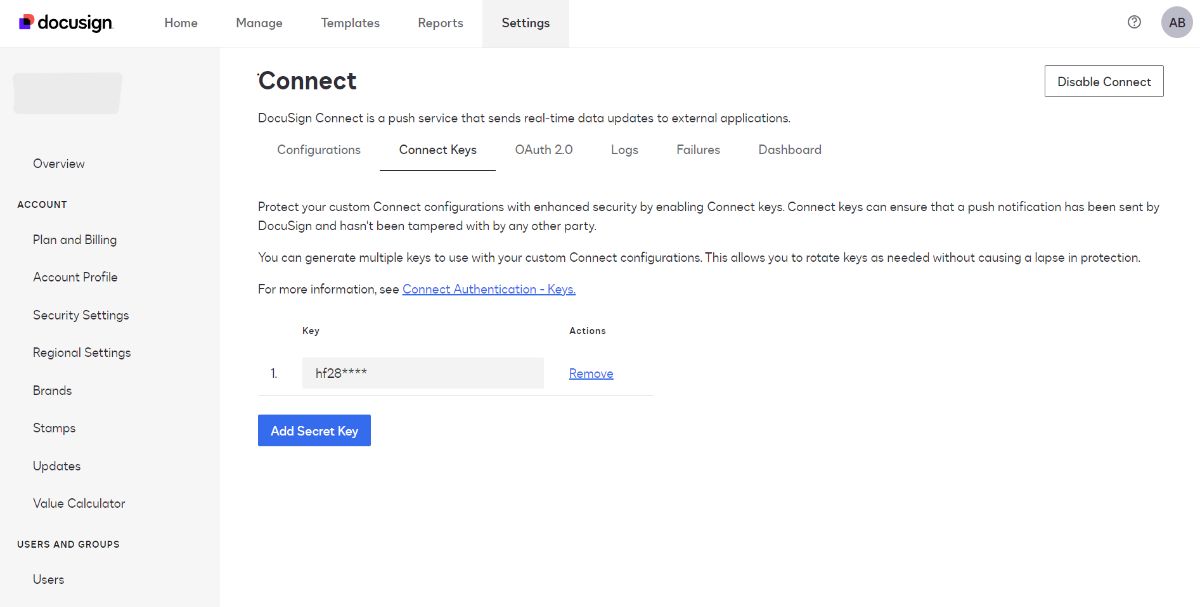 Here, you'll need to click "Connect Keys". You'll see a list of Connect keys on your account. If you have any unused keys, it's best to remove them first. Then, click the "Add Secret Key" button to generate a new Connect key. Copy the key, and return back to Foyer's account page, and paste it into the "DocuSign HMAC Secret" field (on the "Account" page) and click "Save".
Note: Foyer expects there just to be one key here, and you'll need to use the first key (listed as row 1). If you do have more than one key, you should remove all of the keys, and then just add one single key which needs to be copied and pasted into the Foyer Account page
Great! DocuSign should all be configured. Next we can make sure it worked by seeing if we can find a "Request Signatures" option on the "Spaces" page.
Return back to the "Spaces" page, and click the option button on the file you would like to sign. And you will see the new dialog appear.
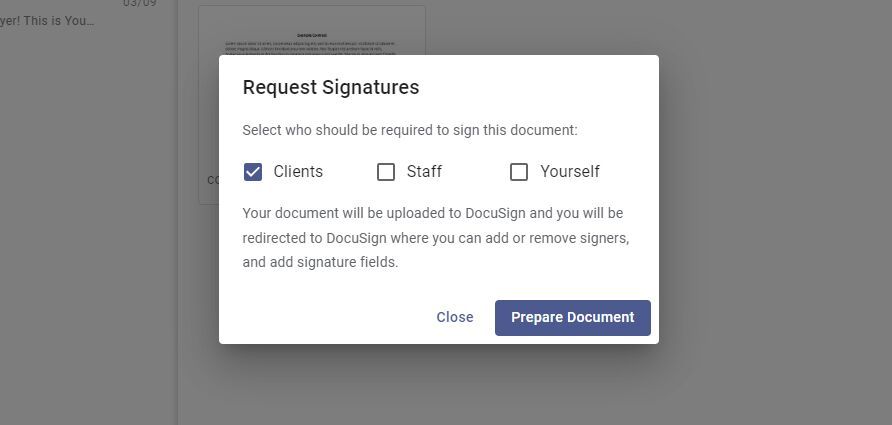
Choosing Signers
When you request signatures, you have to select which signers you'd like to add to the request. You can choose from Clients, Staff, and yourself. You are free to add one more more of these to your request. The default is Clients, this require that all clients in the Space you have selected sign this document.
When you are ready, click "Prepare Document" to send the document securely to DocuSign, where you will place signature fields.
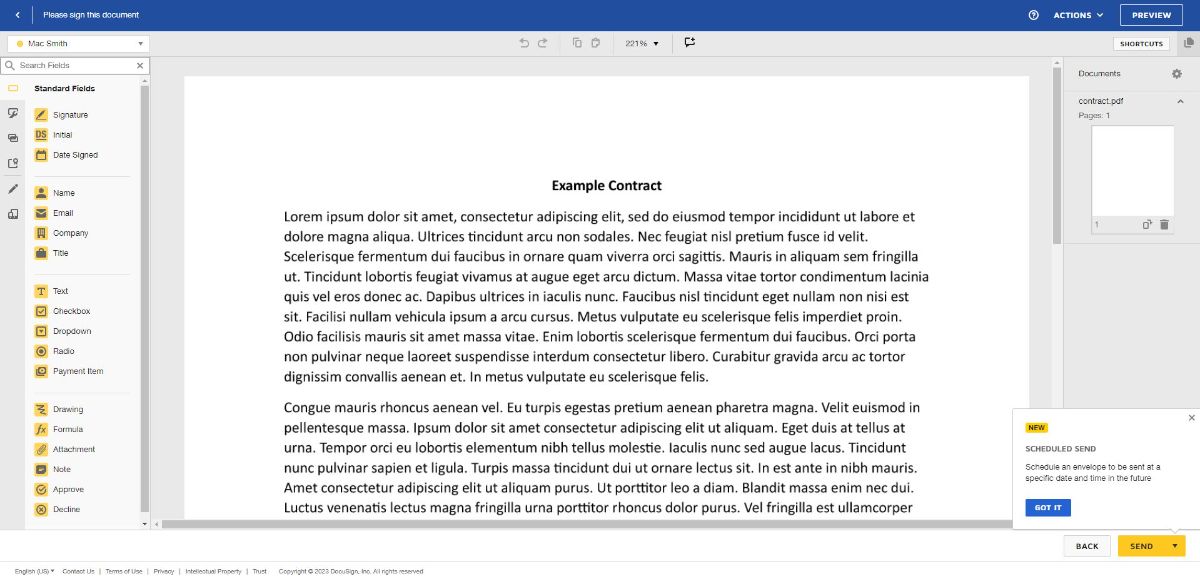
Here we can see the sender view within DocuSign for our contact. This is where you can tag the document using the fields on the left. You can use signature fields, date fields and more.
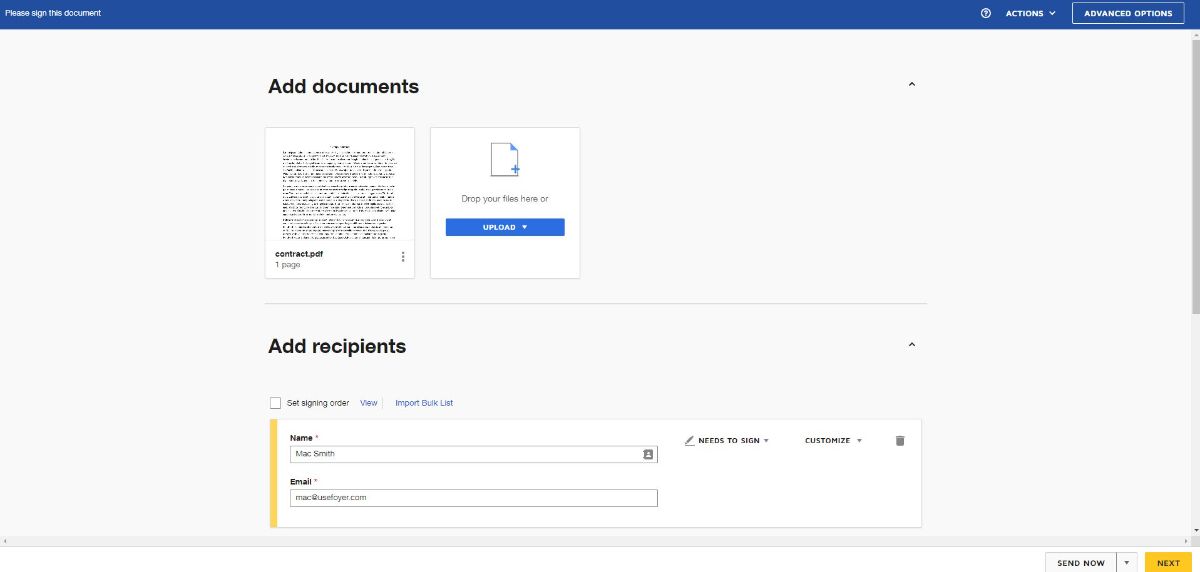
Optionally, you can edit the envelope details to add more documents, add more signers, and edit the email subject and message. To do this, click on the button on the top left of the page.
You will be transferred to the page below where you can edit envelope details:
When you have completed editing, click "Next" to return to the sender view. Place any signature fields and tags you need your signers to complete, and click "Send" when you are done. You will then be directed back to your Foyer Space where you will see a status indicator on your file.
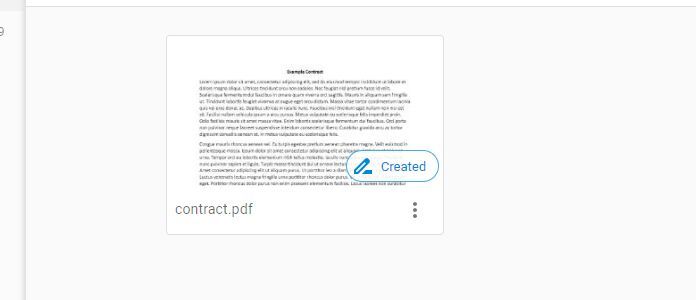
The status of your document will be automatically updated while DocuSign processes signatures. Typically you will see the following statuses:
- Created
- DocuSign is preparing emails to send to all signers
- Sent
- All signers have been sent emails asking to sign the document.
- Delivered
- DocuSign has received signatures from all parties and is processing the document.
- Completed
- DocuSign has completed processing the document, and is sending it to Foyer.
- Signed
- Foyer has received and securely uploaded the signed document with all signatures
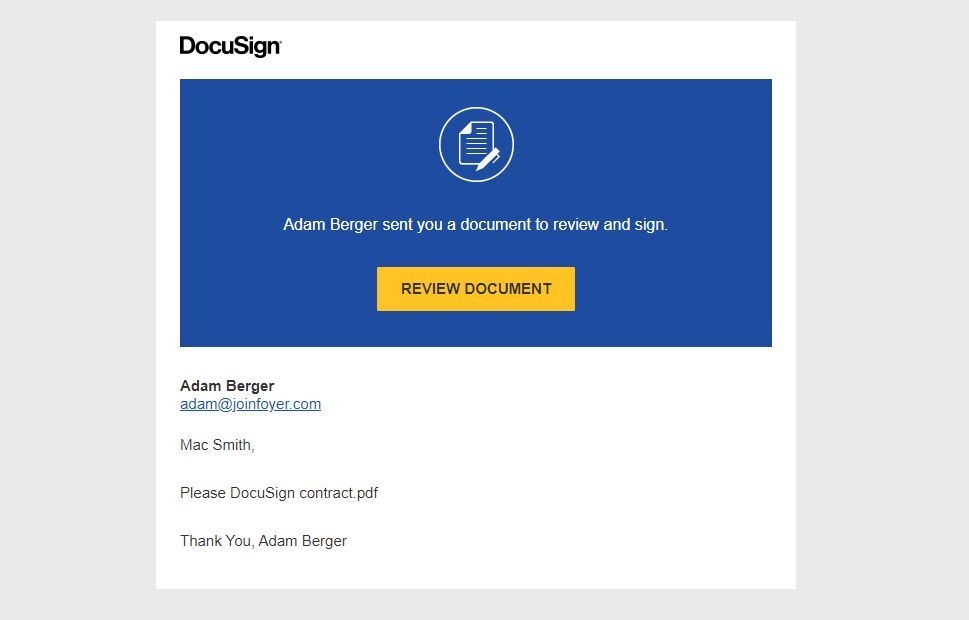
Now let's look from the signer's point of view. The signers will all receive emails directly from DocuSign with instructions on how to sign. Below is an example of one of their emails:
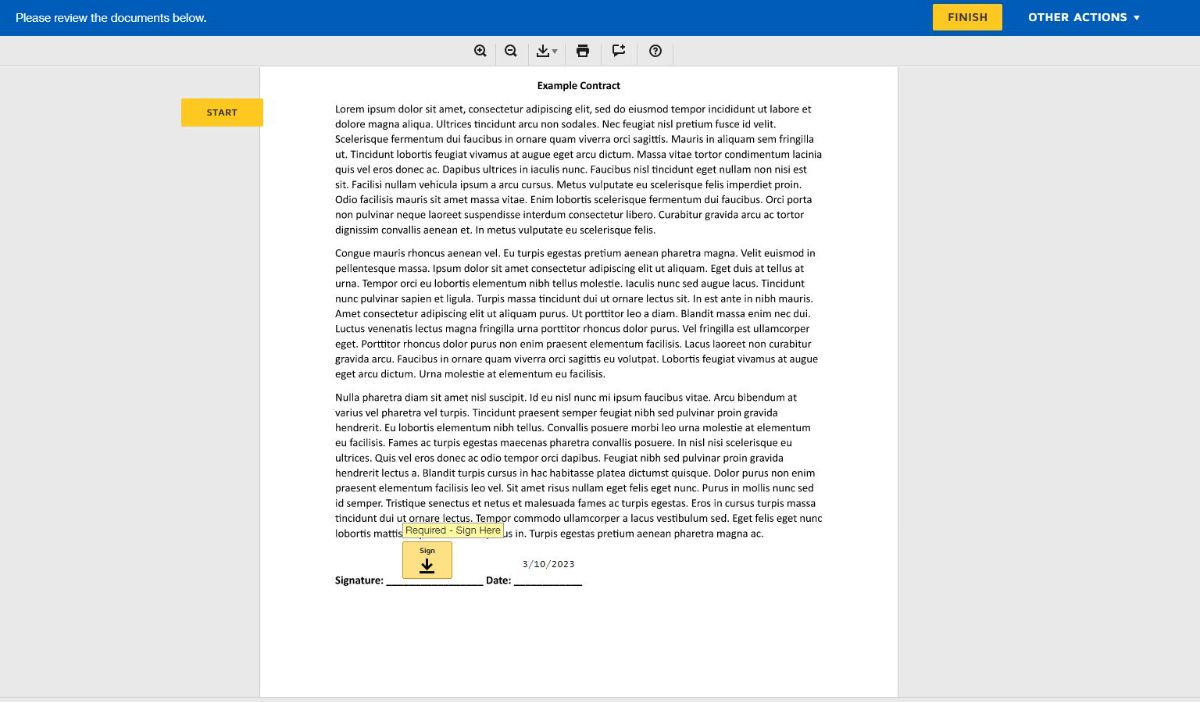
The signer see the following screen for signing the document:
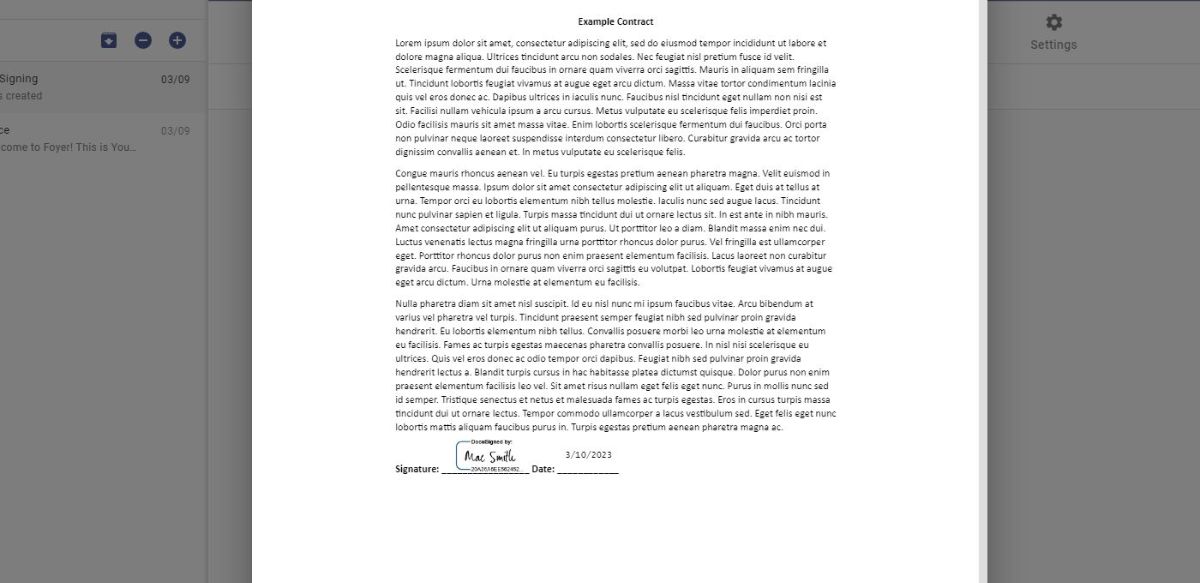
After all parties have signed, the document in Foyer will be automatically updated to include signatures. The staff that requested signatures just needs to wait for the status to turn to "Signed", and then preview or download the file, and that's it!
Below is what a file looks like in a Space when it is signed:
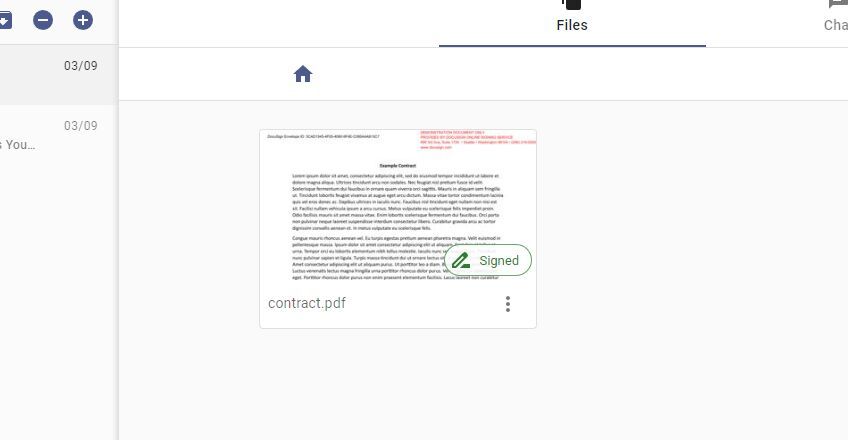
You can simply click on the file to preview it. Or use the 3 dots to open up the file options to download the file.
That's how easy it is to request file signatures securely with Foyer. I hope this made it clear for you. If you have any issues or any feedback, just email us at support@usefoyer.com and we will be glad to help.