Create a Box Client Portal for Your Website (In 5 Steps)
Box is a cloud storage service (similar to Google Drive and DropBox) that allows you to share files with anyone online. These services are especially useful for businesses like accounting firms, or law firms where you need to securely collect documents from your clients.
Just in 2020, Box introduced a new feature called "File Requests" that enables businesses to receive files from clients without needing to create an account.
In this article, we'll show you how you can make a Box client portal using this new "File Requests" feature.
Is a Box client portal the right tool for your business?
A Box client portal is great if you just need to receive files from clients, but if you're looking for a more streamlined and flexible solution, we recommend a proper client portal service.
Foyer's client portal features include key capabilities like client login, secure messaging, file storage, custom forms, internal knowledge bases, e-signatures, and more.
But, if you already have a Box subscription or all you need is to receive files, making a Box client portal is a great choice. Let's get into the details on how you can set yours up.
Step 1: You'll need a Box Business Account
Box only allows Business tier account to use File Requests. This might have been confusing if you tried to set it up before on a personal Box account because the File Request option is completely hidden for personal accounts.
If you want to try it out they offer a free trial of their business tier subscription, just make sure you cancel your subscription if you decide not to use it.
Step 2: Create a New Folder
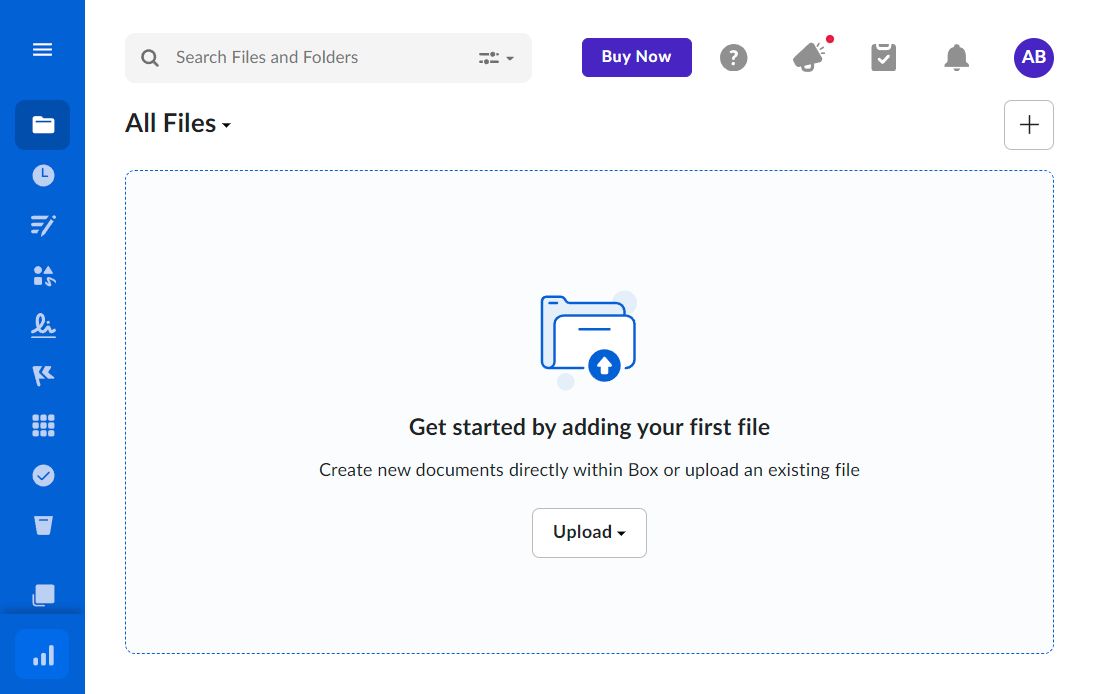
When you first login to your account, you'll see the file explorer this is where all your business's files will be shown, and it's also where we will start creating your Box client portal!
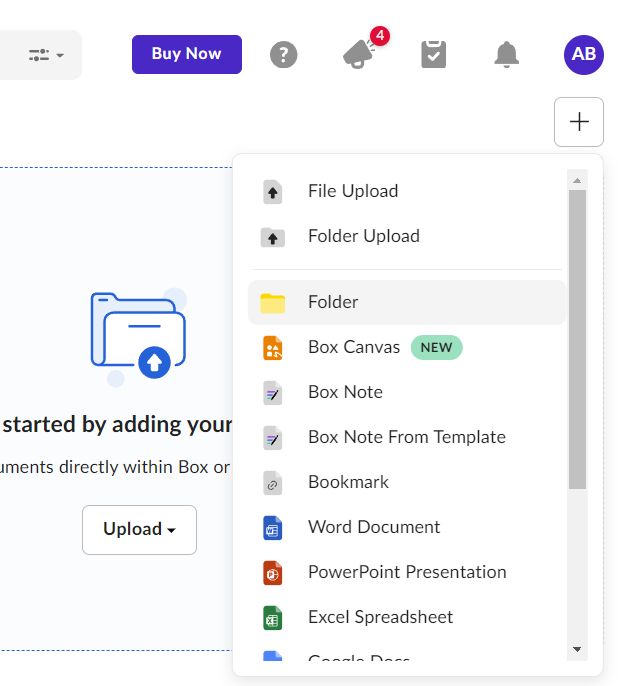
On the top right of the file explorer page, you'll see a plus sign. Click that, and you'll see an option to create a new folder.
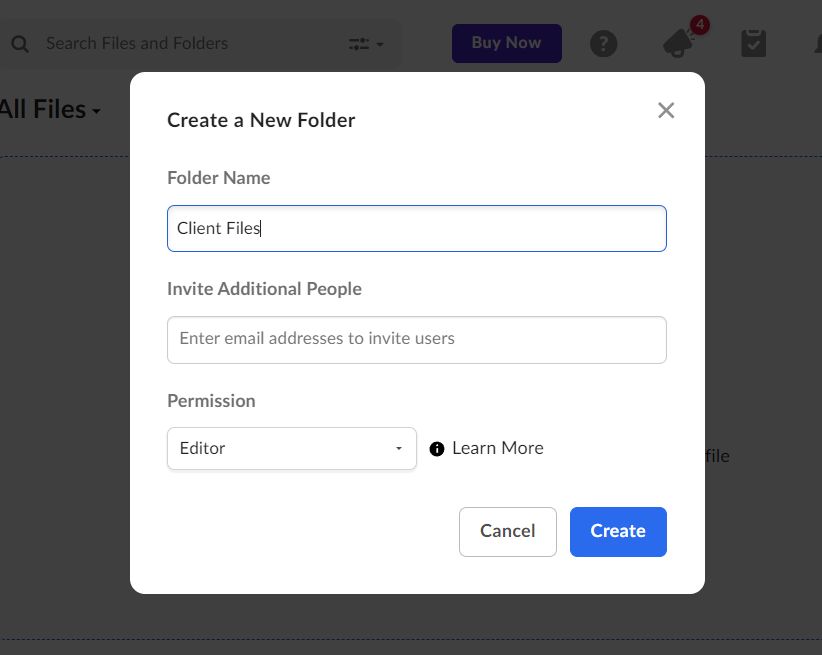
All the files you receive from clients are going to go into this folder. You can name it anything, we decided to name it "Client Files".
Step 3: Create a New File Request
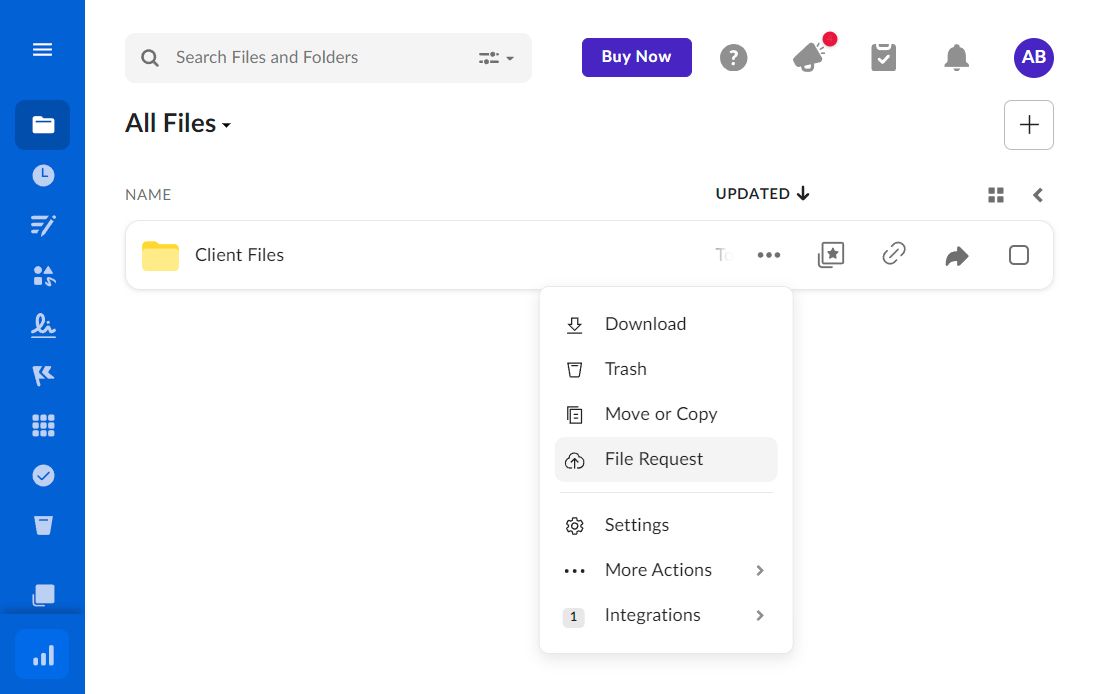
Now, hover over the folder you just created, and click the options button (the three dots). Then, click on the "File Request" option, and a new dialog will come up.
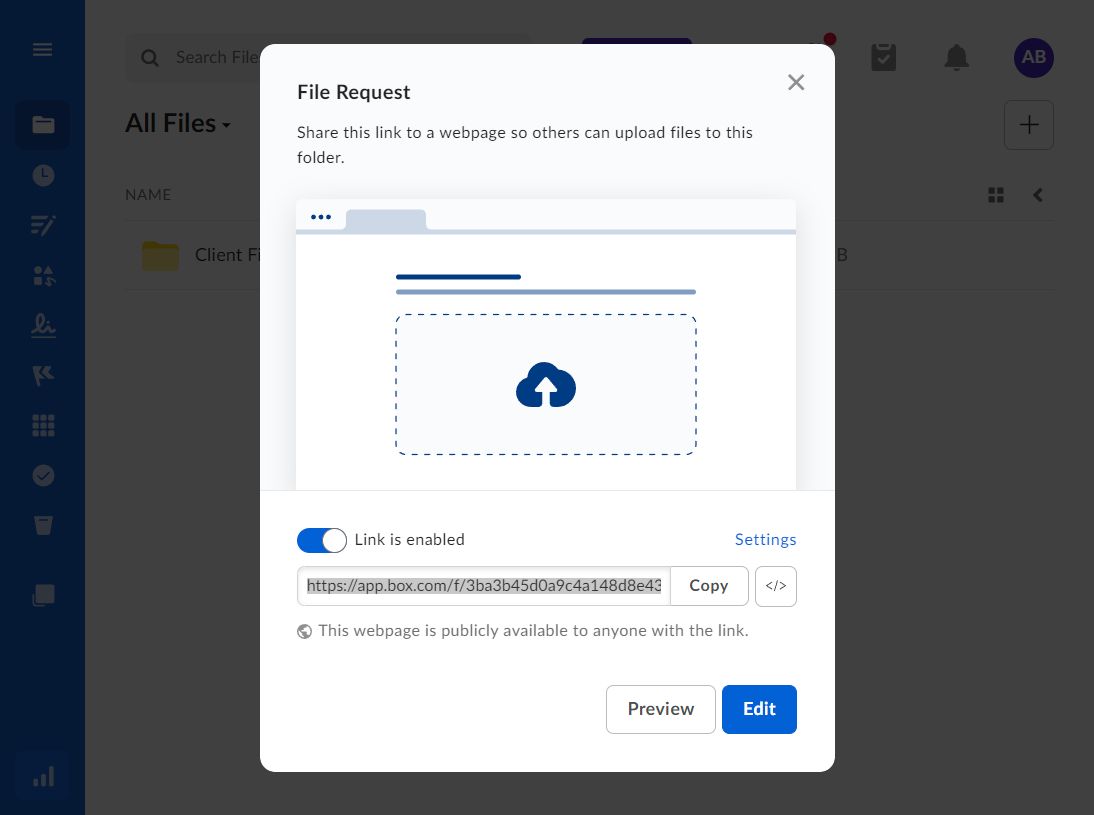
This dialog just tells us that our File Request link is now active and links us to the File Request Edit page.
Step 4: Customize Your File Request
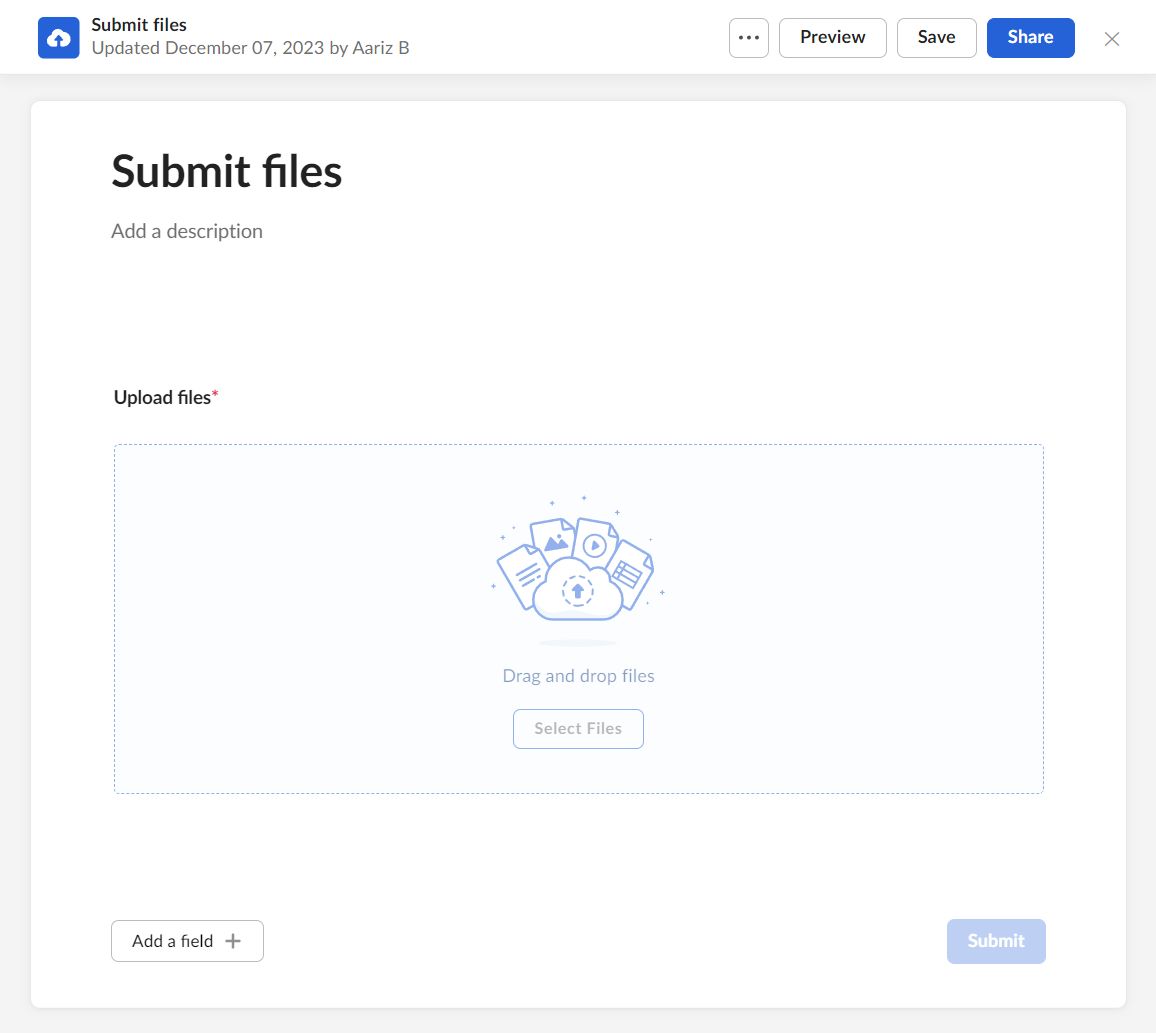
Box includes a powerful File Request editor that enables you to add fields and add your own custom title and descriptions. To access it, just click "Edit" on the File Request dialog.
Adding an Email Field to the File Request
To make this into a true client portal, you're going to need which client uploaded the files. To do that, you can add an email field to the File Request.
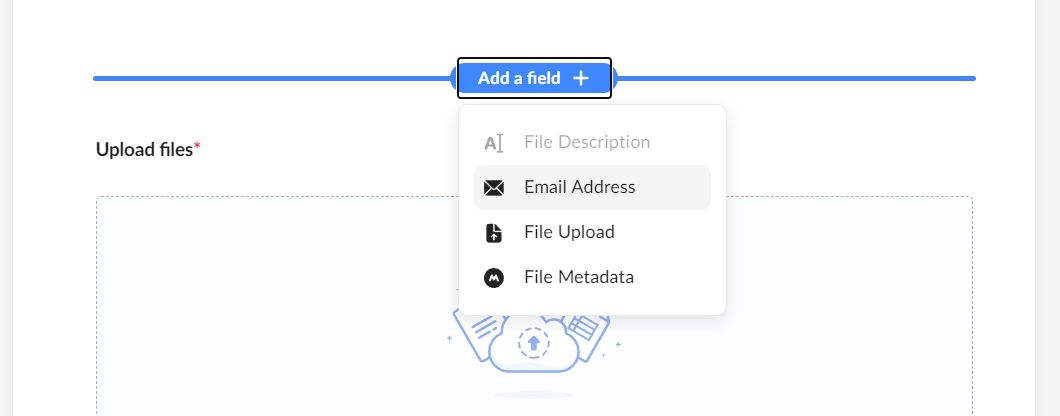
To add an email field, just hover in the blank space above the "Upload files" field. You'll see the "Add a field" option appear, and you can select the "Email Address" option.
Customize the Title and add a Description
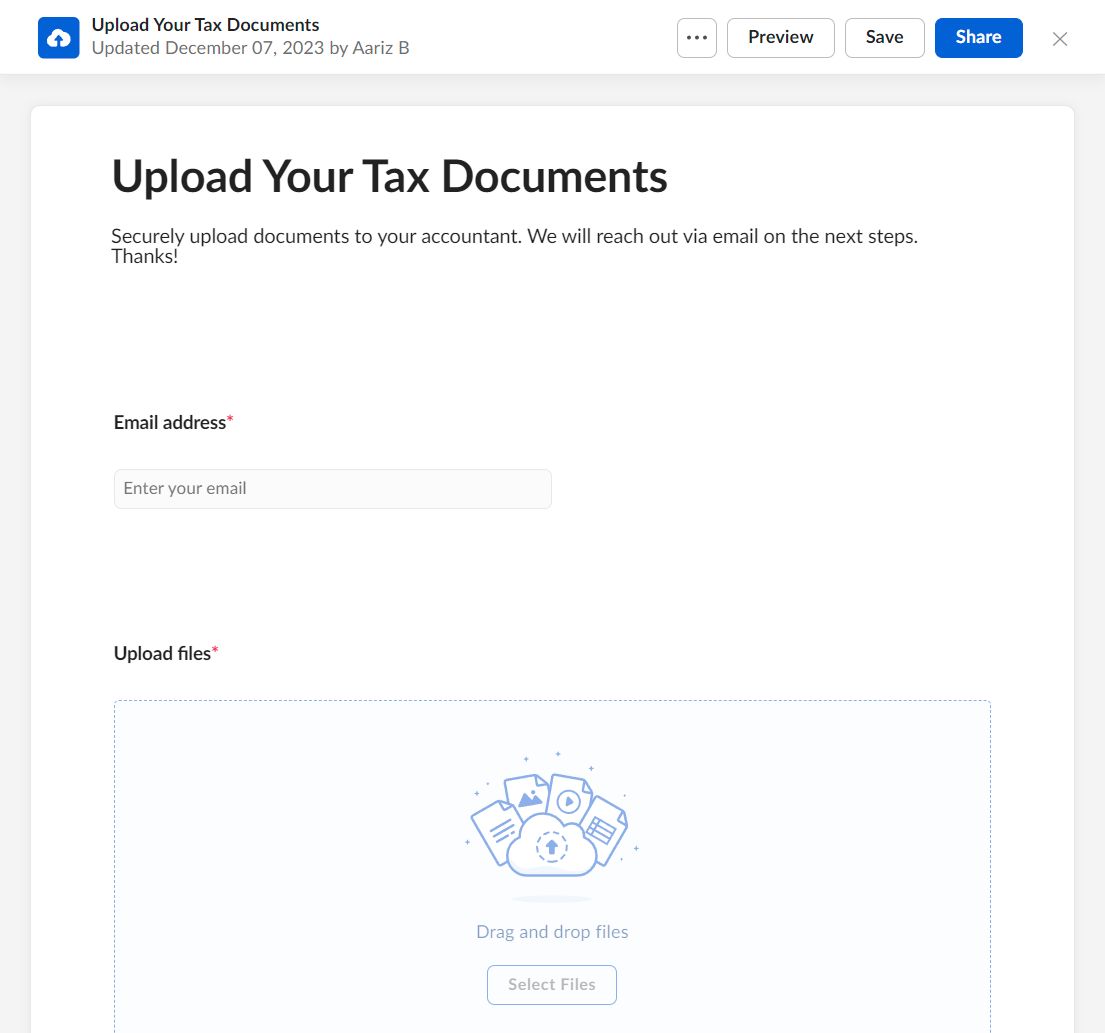
It's a good idea to update the default title, and to add a description. This will help guide your clients and it'll help Box fit in with the rest of your site.
Then, just click "Save", and now all we have to do is give your clients access to this File Request.
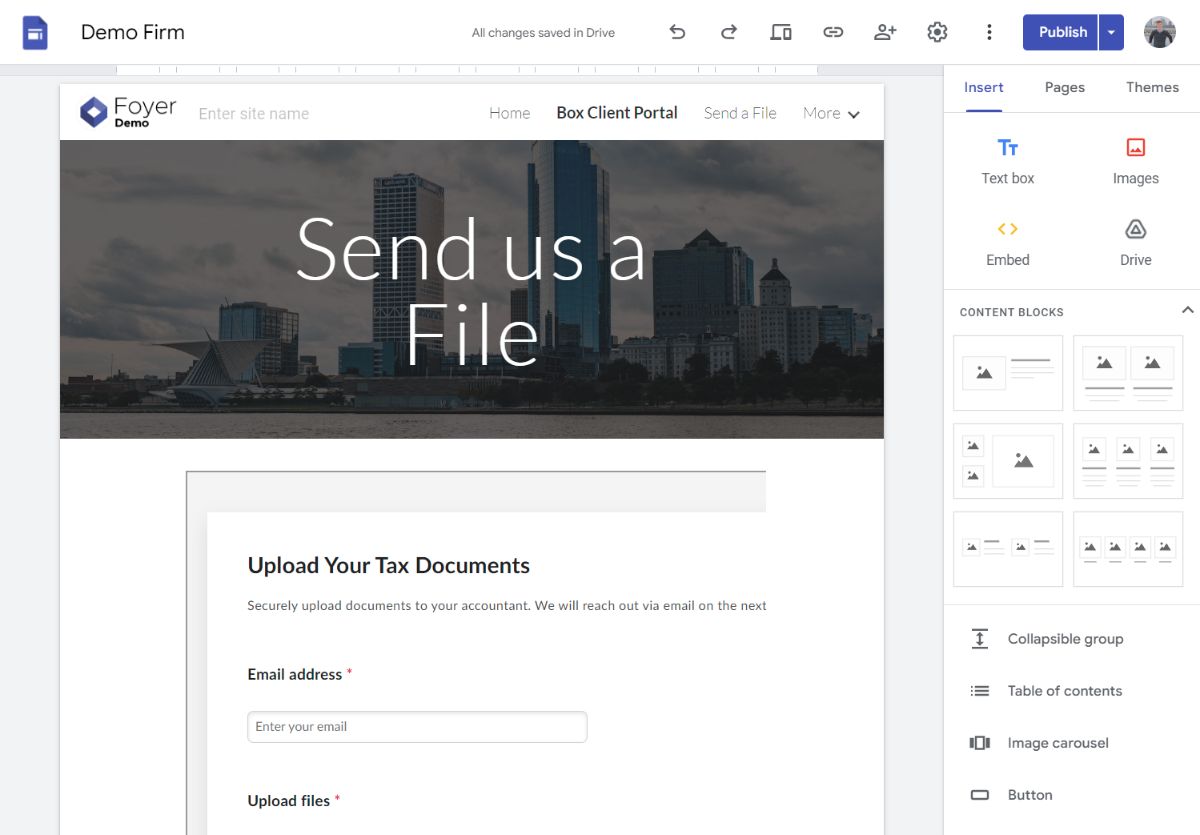
Step 5: Add the Box File Request to Your Website
There are two ways you can embed your Box client portal into your website. The first is by directly linking to the File Request, and the second is to embed into your website.
Both options work the same, but we suggest doing an embed because the less your clients have to navigate the better.
To get started, click the "Share" button from the File Request editor.
How to Embed a Box File Request on a Website
Embedding your client portal into your website is a great way to keep your branding consistent. It will require copying and pasting a code from Box into your website. But, don't worry! This is a no-code client portal solution. All you're doing is copy and pasting.
The steps to embed your File Request on your website will depend if your website is made with a website builder (like Wix, SquareSpace, or Google Sites), or if you have your site managed by a marketing agency or web design contractor. If you haven't set up your website yet, you can check out our guide to get started.
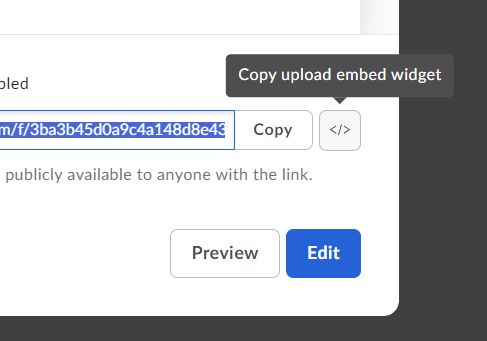
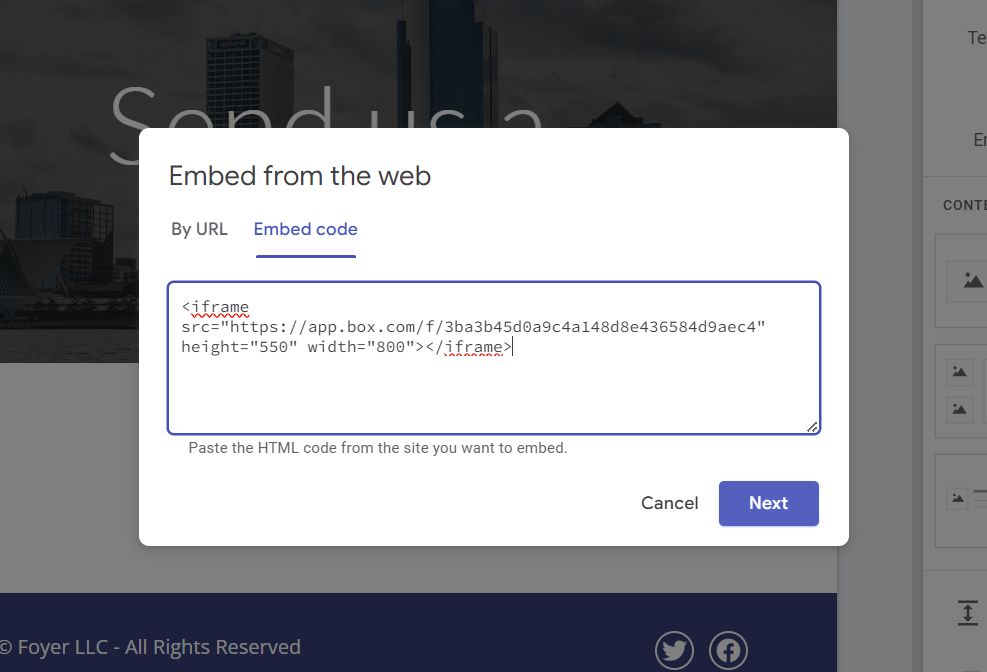
No matter how you have your website setup, you're going to need to copy the "embed widget". To access the widget code, click on "Share" in the File Request editor, in the dialog click on the "</>" button.
How to Embed a Box Widget Using a Website Builder (Wix, SquareSpace, Google Sites)
To embed your box client portal in your website, the exact steps depend on which website builder you use. However, the process will be very similar. I'll be going over how to embed in Google Sites, but you should be able to follow along in Wix, SquareSpace, or GoDaddy as well.
You'll want to navigate to the page you want to embed on (or create a new page), and find the "Insert" button to add a new element. Locate an option called "embed".
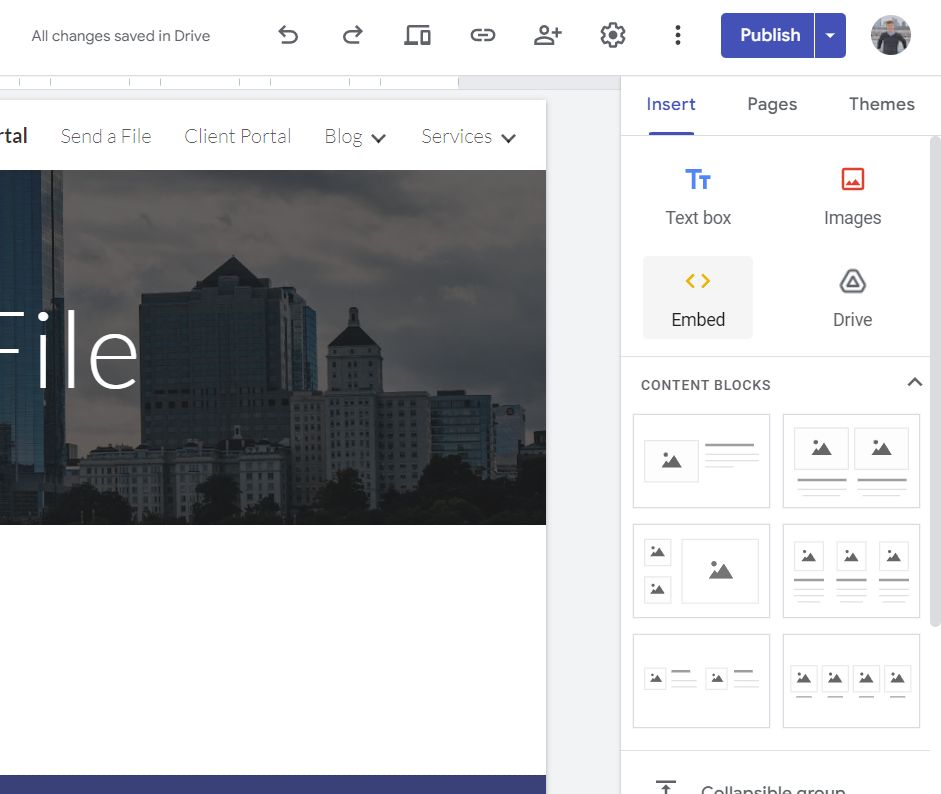
You'll be asked to either embed a link or for an embed code. Select "embed code" and paste in the "embed widget" code from Box that we copied earlier. From there, all you have to do is re-size the widget to your liking.
How to Embed a Box Widget If You Use a Web Design Contractor or Marketing Agency
If you don't have access to your site via a web builder, all you need to do is send the "embed widget" that we copied to your web designer or marketing agency. The link is publicly accessible, so you do not need to grant your contractors any special permission to Box to embed on your site.
How to Link a Box File Request on a Website
The easiest solution is just to send a link to your File Request page to clients. We suggest adding a link on every page of your site called "Send a File" that leads directly to Box.
The first step, is to copy your File Request link. You can find this by clicking the "Share" button on the File Request editor page in Box.

How to Link to Your Box Client Portal Using a Website Builder (Wix, SquareSpace, Google Sites)
To link to your box client portal on your website, the exact steps depend on which website builder you use. However, the process will be very similar. I'll be going over how to add a link using Google Sites, but you should be able to follow along in Wix, SquareSpace, or GoDaddy as well.
We will be adding a link to the top menu, to make it easy for clients to find the portal link.
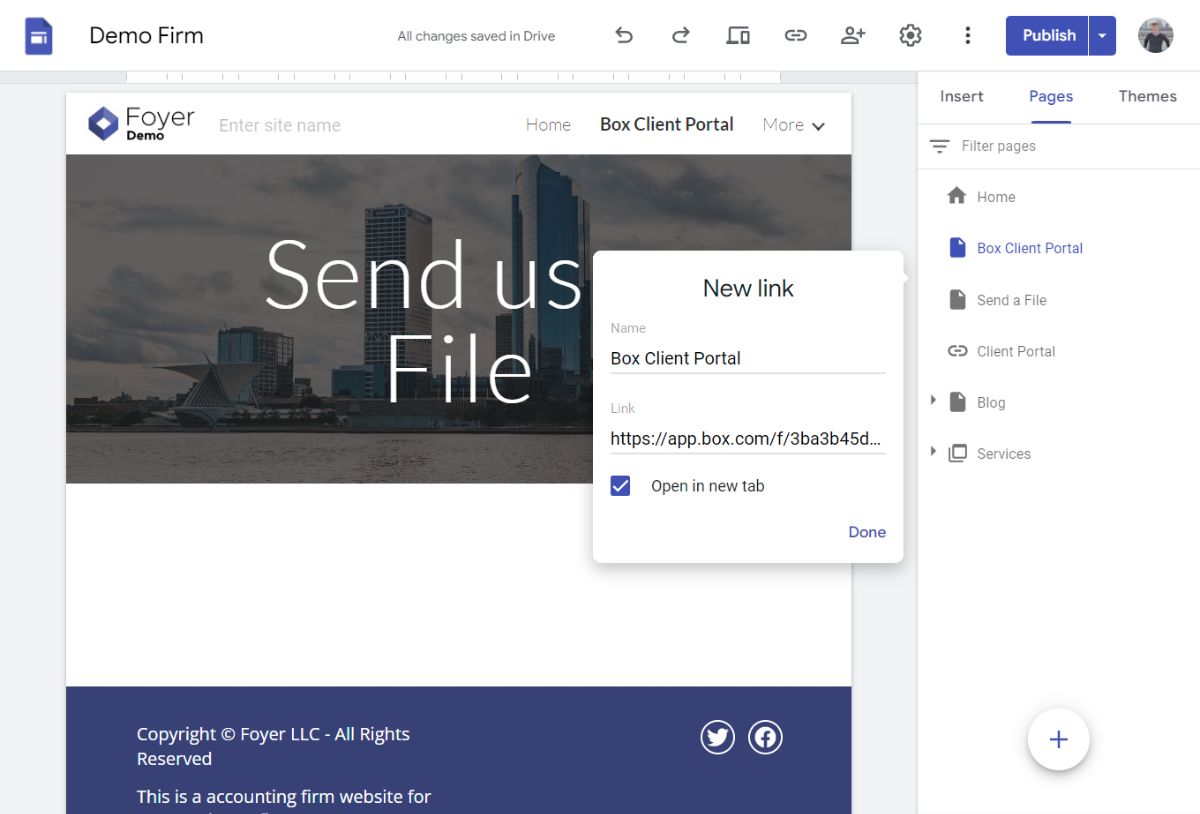
In Google Sites, you can click the plus button in the right drawer, and select the "Add Link" option. Then, a dialog comes up that lets you add a name that will show up in your top menu bar, and a link. Just paste in the link we copied from Box earlier. After clicking "done", remember to publish your site and double check that the changes are live.
How To Link to Your Box Client Portal If You Use a Web Design Contractor or Marketing Agency
If you don't have access to your site via a web builder, all you need to do is send the link that we copied to your web designer or marketing agency. The link is publicly accessible, so you do not need to grant your contractors any special permission to Box to use the link.
(Pro Tip) Include Your Client Portal Link In Your Email Signature
Having your client portal link on your website is great, but if you communicate with clients over email, it can be convenient to include it via email too. All you have to do is include the link we copied earlier in your email signature.
That's it! Now let's check out the client experience
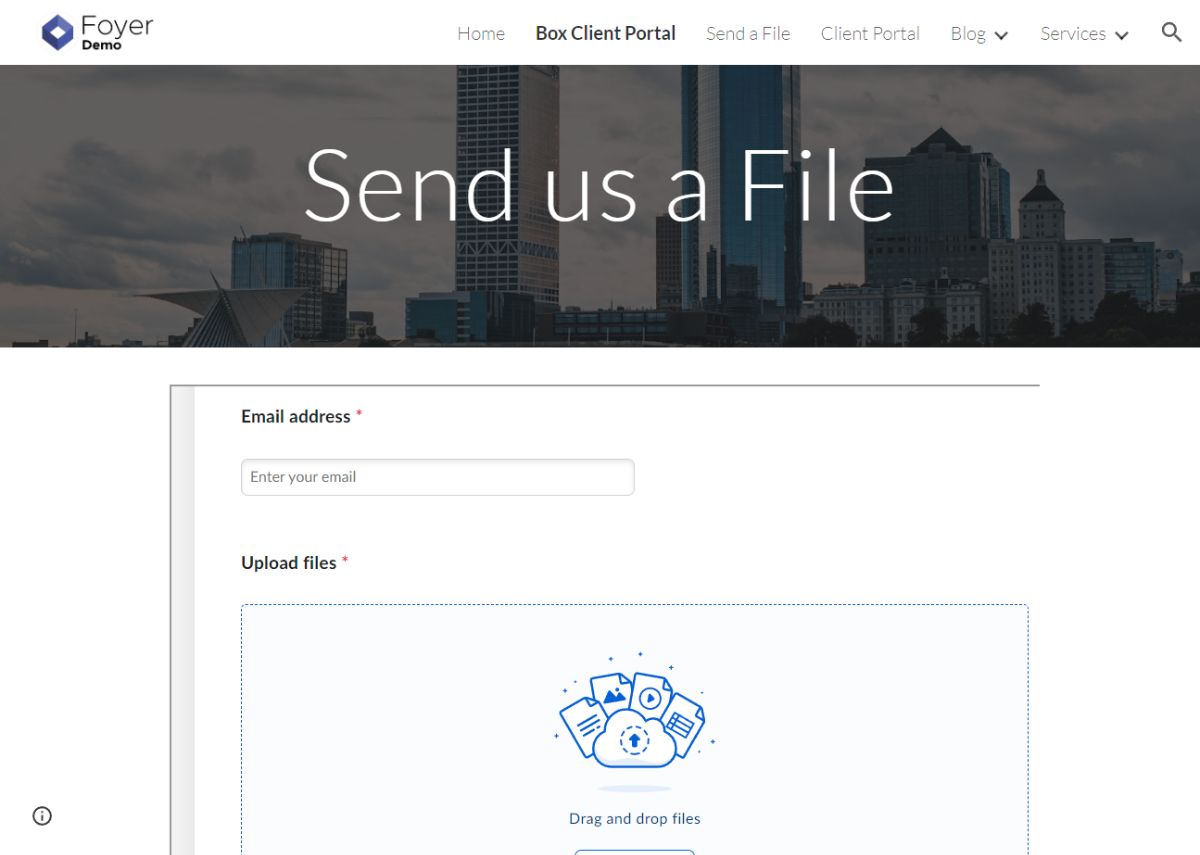
With your box client portal created and integrated with your website, we can try it out as if we were a client. We suggest starting exactly how a client would. If you embed your client portal in your website, start there otherwise you'll start directly from the File Request link.
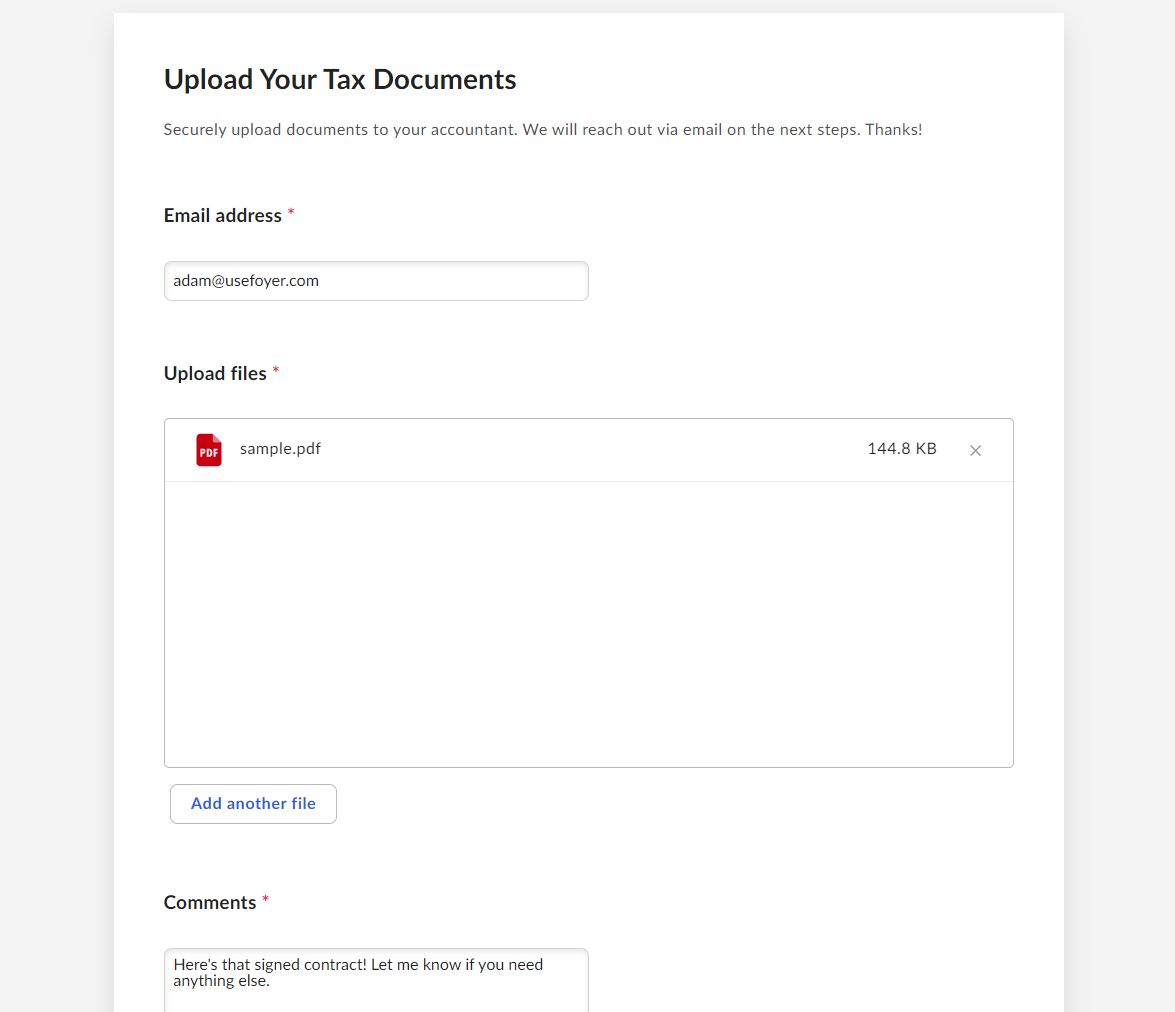
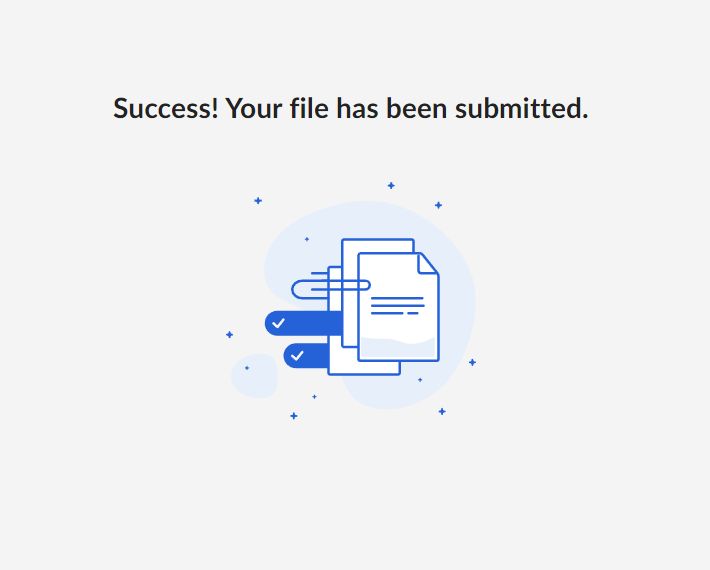
Fill out the File Request form, upload a test file and submit it. After submitting you'll see the client is brought to a "Success" page like the one below. They will need to navigate "back" in their browser to return to your site (or close that tab).
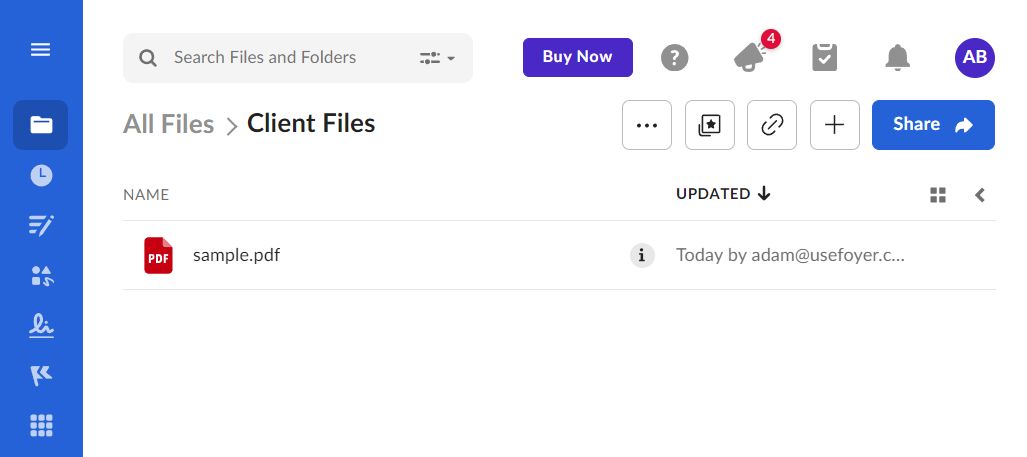
Now we can login to Box, and navigate to the original folder we made (we called it "Client Files"). You'll see that the sample file has been created, and the email of the uploader is visible in the "updated" column. That's how you'll know who's files are who's, because all your clients will be going to the same folder.
Your Box Client Portal is Online! What's next?
Your box client portal is live, and your business is all ready to securely receive files from clients! But, maybe you'd like to do more than just receive files from clients.
Box is fundamentally a cloud storage platform, and wasn't designed to be a client portal from the start. This means it's missing some key features you might be looking for. For one, you can't easily make accounts for your clients to login to download files securely from your firm. For example, if a client sends you a file to sign, this workflow doesn't allow for you to securely send the signed file back to the client.
Still comparing tools for a client portal, check out our breakdown of the top 10 best client portals to see how Foyer stacks up.
Box doesn't provide these features, but many client portals do. Foyer has all of the features mentioned above, and even more (e-signatures, custom forms, knowledge base builder). It's a more affordable option too being just $19 per month per internal user (with no minimum user requirements), while Box is $20 per month per internal user with a 3 user minimum.
Nevertheless, we have found plenty of happy business owners running their client portals with Box. Do you think you'll be one of those happy business owners now that you setup your box client portal? Send us a comment below to let us know what you think!