How to Share JPG Files [Email, Facebook, Google Drive & More]
![How to Share JPG Files [Email, Facebook, Google Drive & More]](/site/how-to-share/cover.jpg)
![How to Share JPG Files [Email, Facebook, Google Drive & More]](/site/how-to-share/cover.jpg)

In this guide, I'll cover the how to share JPG files (also known as Joint Photographic Experts Group files). I'll show you a few methods and their pros and cons. Then you can decide which way is the best for your situation.
The best way how to share JPG files will depend on:
- If you need to send large JPG files (the size of your file)
- If your JPG files contain sensitive information that needs to be encrypted
- If you need to allow others to send JPG files to you
JPG files are generally pretty small in size, which makes them easy to share.
Do You Need to Encrypt JPG Files?
Before sharing JPG files, you should always consider what kind of data they contain. Is there any sensitive or personally identifiable information (PII) in them like social security numbers or credit card numbers?
If they contain any sensitive data, you should really be using a secure file sharing service to share your files. Secure file sharing services protect your data using bank-grade encryption, while also giving you a platform to easily send JPG files.
If you're wondering what exactly "encryption" is, you're not alone! Encryption is simply a way to protect your files from unauthorized access. It's what keeps criminals and hackers away from sensitive information like credit card numbers, and social security numbers.
Unsure whether or not your JPG file has sensitive information in it? Your best bet is to just use secure file sharing service to be sure. It's much easier to use a low-cost secure file sharing portal (like Foyer), rather than risking data leaks. The penalties for mishandling sensitive data can be devastating to individuals and businesses alike (especially when it comes to HIPAA protected medical data).
How to Share JPG Files (Of Any Size On Any Platform)
Wondering how to share JPG files? Well, there are 2 common ways that have their own pros and cons. Let's first go over a quick summary of them, then we will dig deeper into each method.
- Upload the file to a cloud storage platform (like Google Drive, Box, or Dropbox), then just send a shareable link
- Pros:
- Cons:
- Requires third party account (Google account, Box account, etc...)
- You must have the email of every recipient (instead of recipients registering themselves)
- Missing security features like audit logging
- Upload the file to a secure file sharing portal (like Foyer), and invite everyone who needs access
- Pros:
- Shareable on any platform (e.g. email, Facebook, Instagram, WhatsApp, iMessage) via a link
- Recipients can register themselves (you don't need to know emails before sharing)
- Extensive security features (e.g. audit logging, multi-factor authentication, end-to-end encryption, etc...)
- Includes productivity features like e-signatures, secure email, encrypted messaging, and more
- Cons:
- Pros:
The most popular choice is to upload to a cloud storage platform, but if your JPG contains any sensitive data, I strongly suggest you use a secure file sharing portal like Foyer.
Share JPG Files Using Google Drive (Send JPG Files Anywhere)
To send JPG files, you'll want a cloud storage platform. I'll show you how to send JPG files using Google Drive, but other services like Box or Dropbox would work great too. To follow along, you'll need to create a Google account. If you already have one, then you already have Google Drive at no cost!
If you're using a free Google Drive account, you'll have 15GB to use. That should be good enough for basic use, but if you need more storage, check out their pricing page for more information.
To get started, visit Google Drive, and navigate to any folder.
To share just one JPG file, you can start by just dragging-and-dropping it into Google Drive.
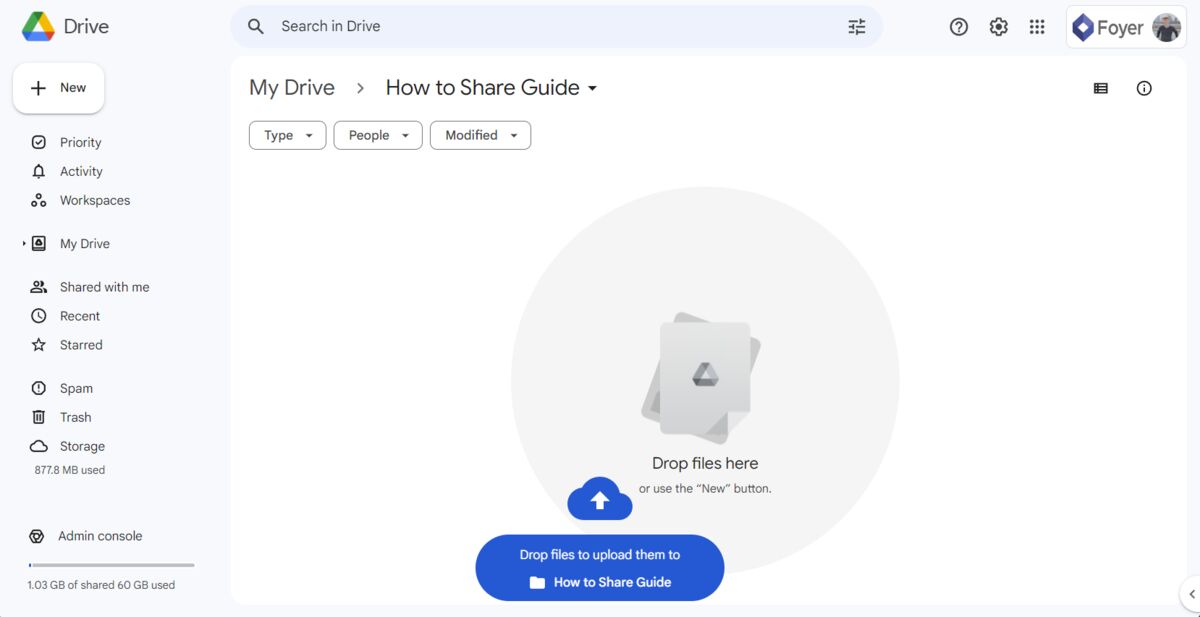
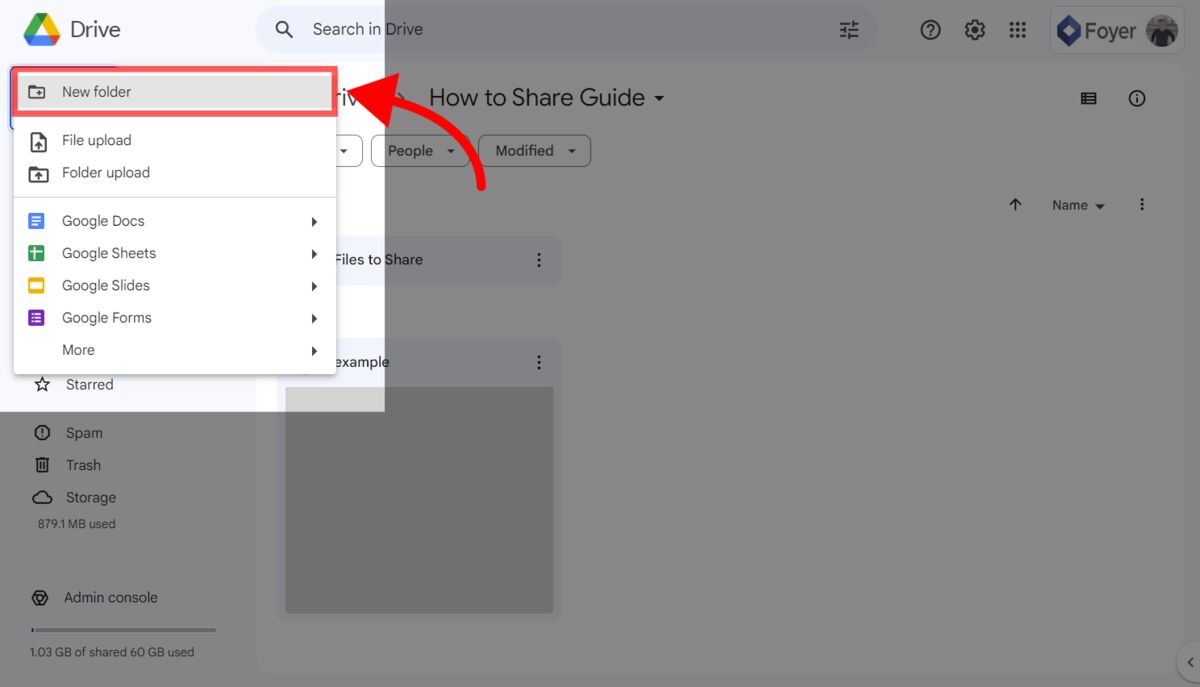
If you're sharing multiple JPG files, you should start by making a new folder, and then adding all your files to that folder.
You can add a new folder in Google Drive by clicking the "Add" button on the top left, then clicking the "Add Folder" option in the menu. From there, a dialog will ask for a folder name, and after clicking "Done" you'll navigate into your new folder.
Below you can see a screenshot of how to add a new folder in Google Drive:
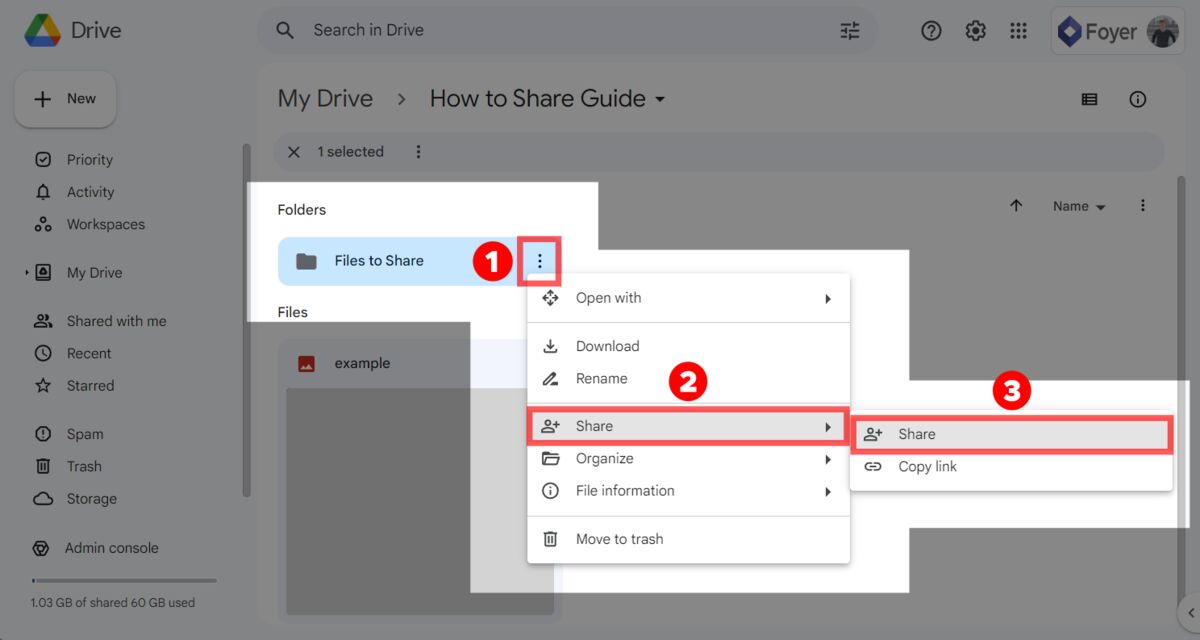
Google Drive lets you share both folders and files with anyone. I'll show you the steps for sharing folders, but the process will be the same if you're sharing a file too.
Start by clicking on the 3 dots on the file or folder you want to share. Then click the "Share" option, then again click the "Share" option.
After clicking "Share", a dialog will appear that lets you choose who you want to share the file with. Click on "Add people and groups", and type in any emails who want to share your JPG files with.
You can either "invite" people, which will send them a link via email to access their files, or you can copy the link and send it yourself.
Google Drive lets you choose between giving people read access or also modify access. You should always use the least amount of permissions required to accomplish what you need (i.e. don't allow people to edit if they don't need to).
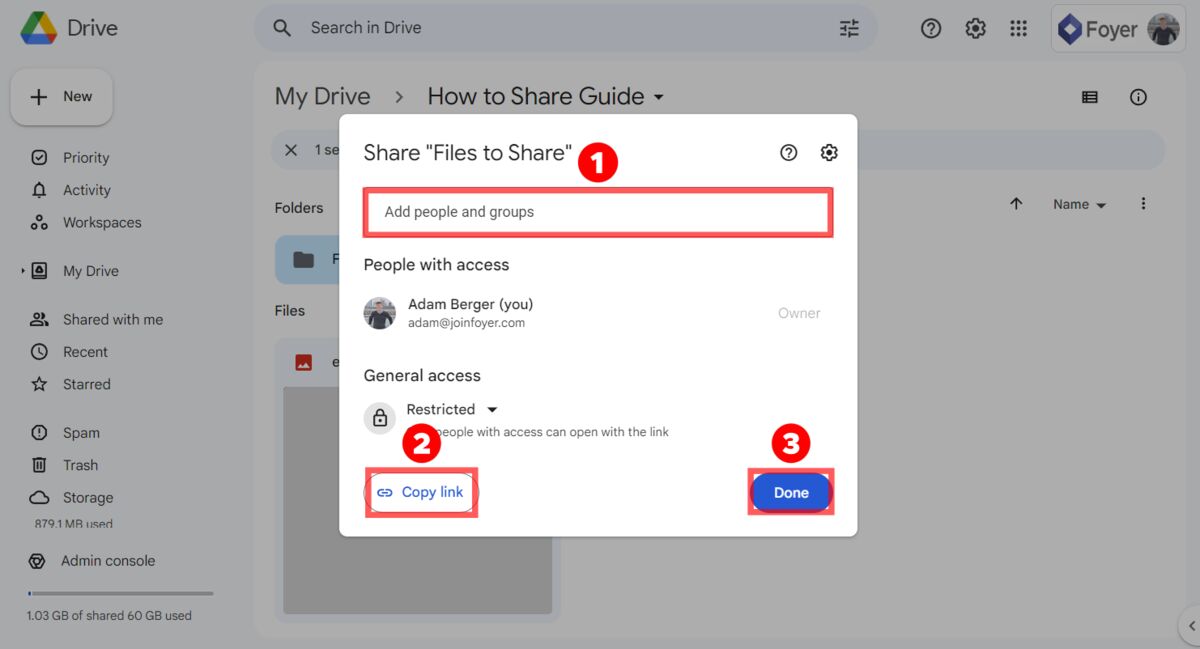
When you are done sharing your file, you can send the link anywhere, and only those who you've added can access.
For example, you could send this link in gmail, to send your JPG files, or even places like Facebook Messenger, WhatsApp, iMessage, Instragram, and more.
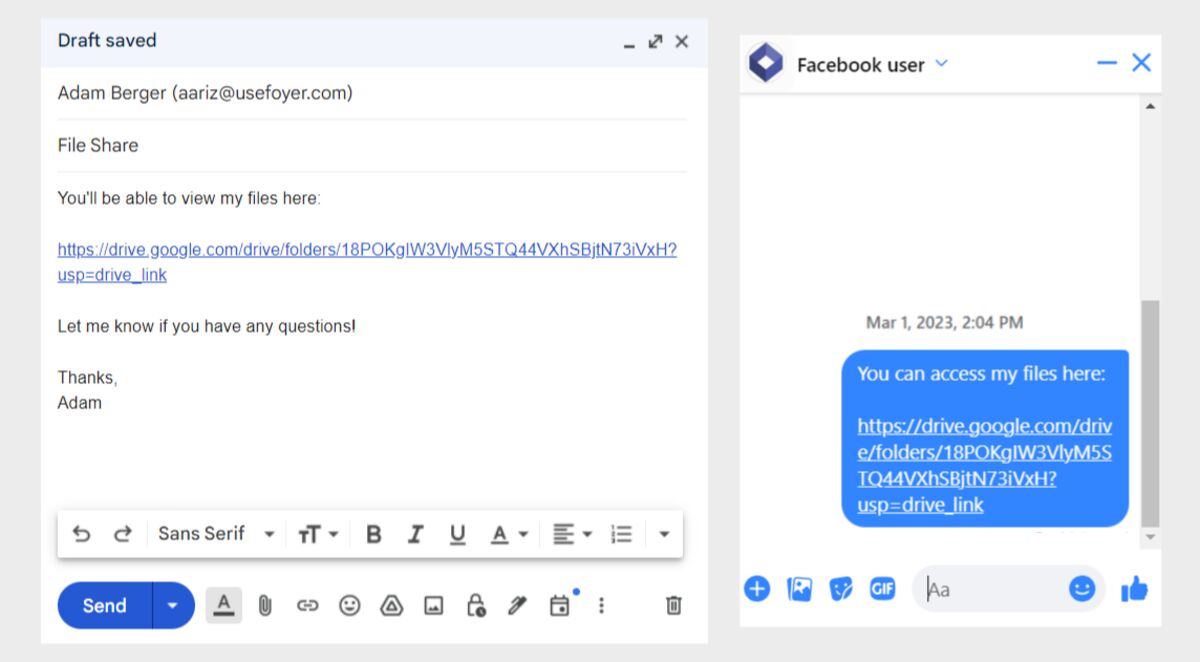
Your receipients will need a Google account, but most people have Google accounts anyway!
There's even another option where you can make a file "public" then share a link. That way, you don't have to add people or groups, all you do is share the link. To set a file or folder to "public", just click "Share" on it, then in the dialog under "General Access" change from "Restricted" to "Public". Copy the link, and send it anywhere.
Files and folders that are "public" in Google Drive don't require your recipients to have a Google account to access, but beware, they are truely public! Anyone with the link can download your files.
How to Send Large JPG Files
Most services like email, Facebook Messenger, WhatsApp, and iMessage all have restrictions on the size of files you can share. This can make it hard to share large JPG files.
But, you still can send large JPG files by uploading them to a cloud storage service (like Google Drive, Box, or Dropbox), and sending a link to anyone you want to share with.
From there, all the recipients have to do is visit the link, and click "Download".
If you're looking for instructions, just scroll up and use the Google Drive guide above! It works great for large files.
How to Share JPG Files with Gmail
The best way to share JPG files on Gmail (or any email provider) is to upload your JPG files to Google Drive, share the files within Google Drive, then include a link in an email.
This is an effective solution, because it mitigates the two most common issues when sending JPG files via email: the 25MB attachment limit, and security screenings.
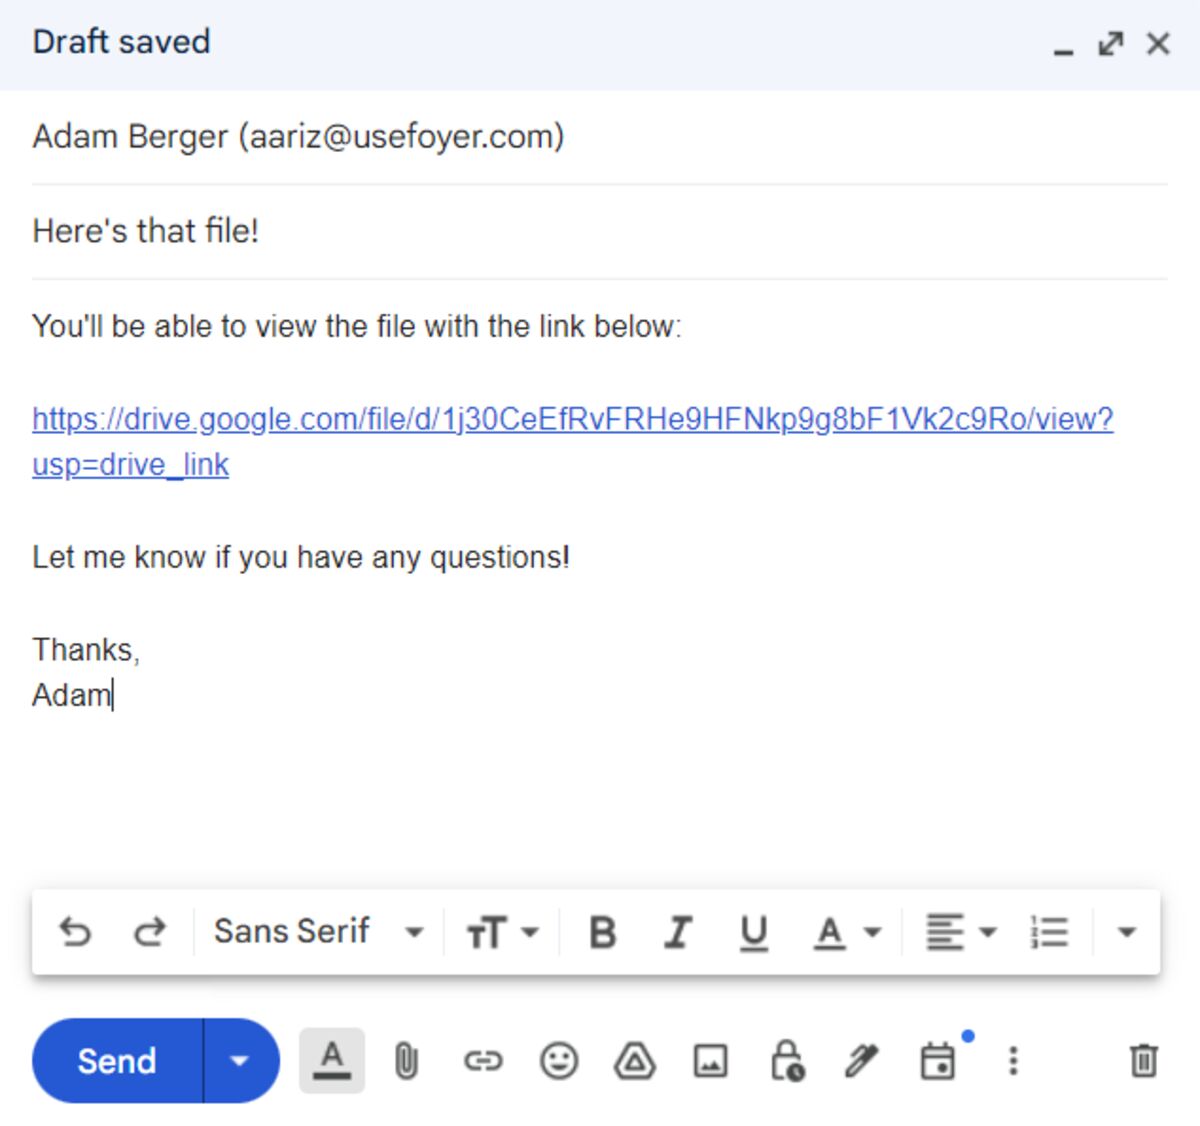
For complete instructions on how to do this, scroll up to our section on sharing JPG files on Google Drive.
How to Share JPG Files On Facebook
Just like sharing JPG files using email, the best way to send JPG files on Facebook (Messenger) is to upload your JPG files to Google Drive, share the files within Google Drive, then include a link in a message.
Facebook only lets you share JPG files that are a maximum of 25MB. To get around that, sending a Google Drive link is a the perfect option.
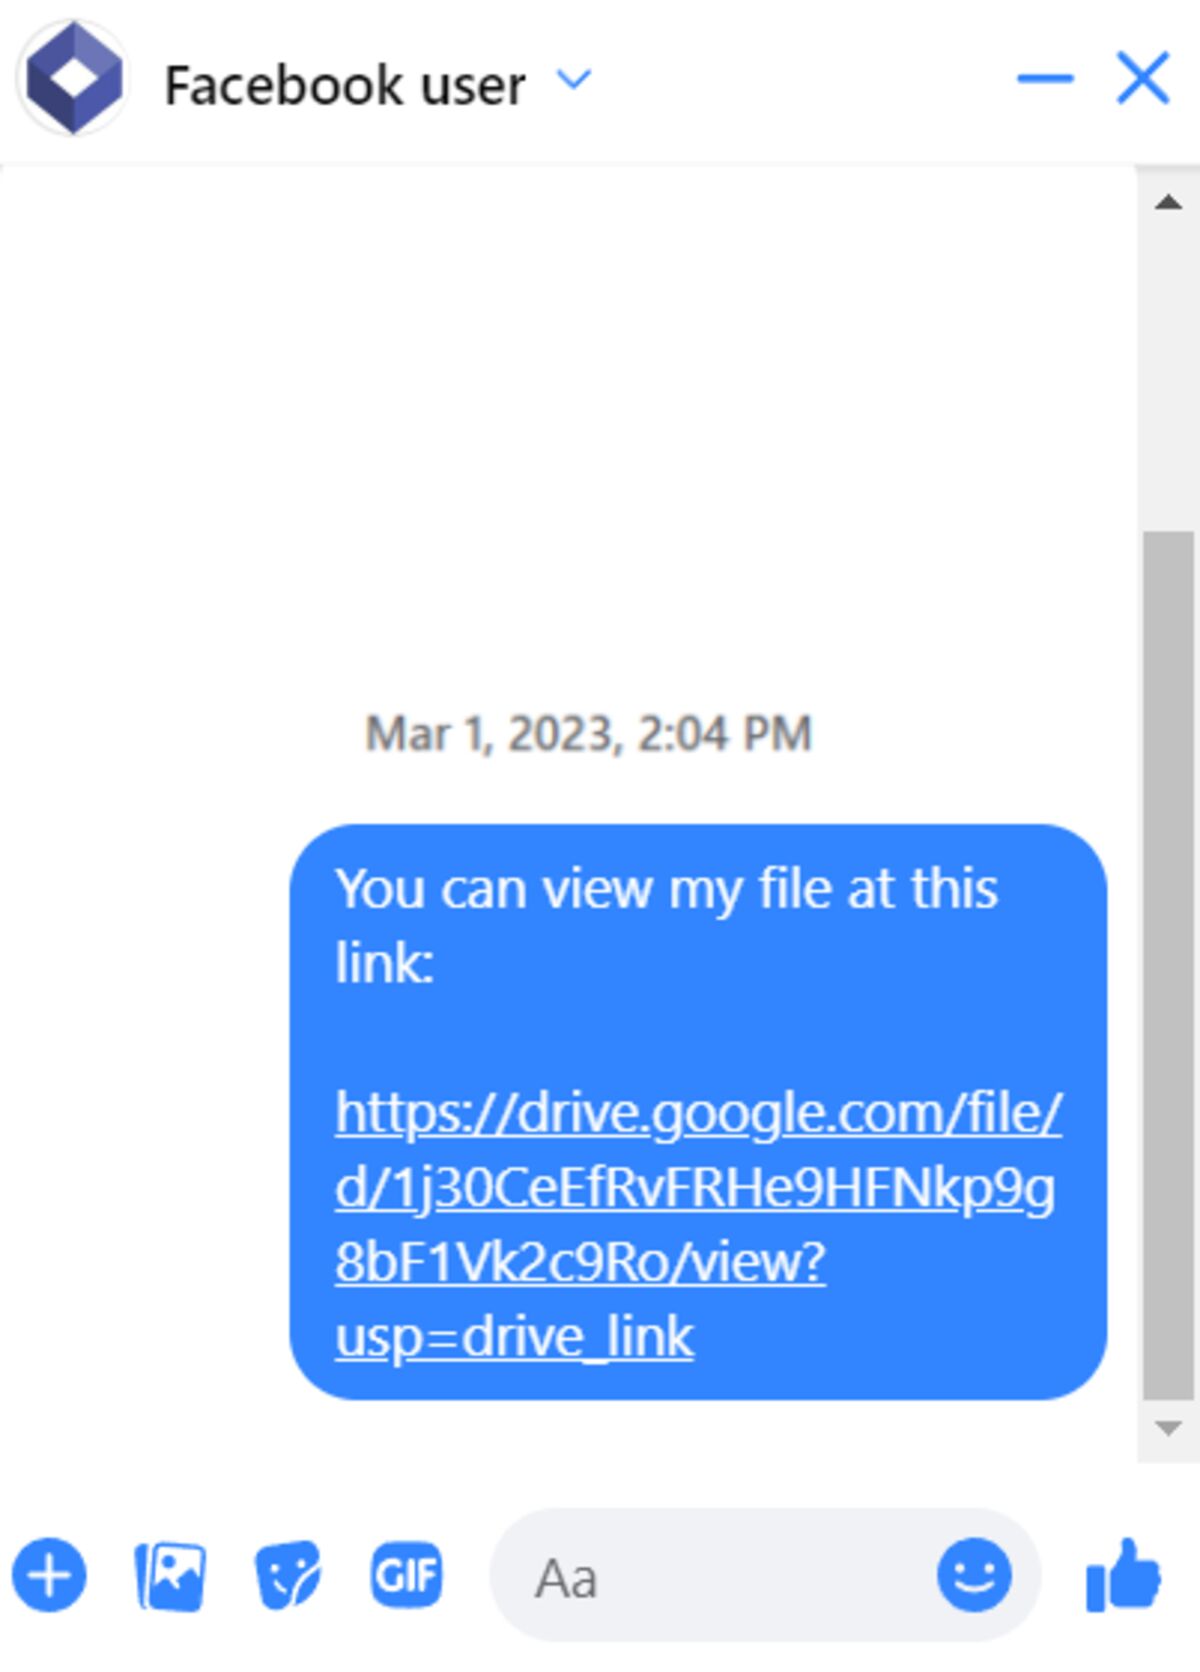
For complete instructions on how to do this, scroll up to our section on sharing JPG files on Google Drive.
Can you Send JPG Files Through Email?
The best way to share JPG files through email is to upload your JPG files to a cloud storage service like Google Drive, share the file within your cloud storage provider, then include a link to it in an email. If your JPG files are under 25MB, you can attach them directly as an email attachment. But, to be sure your files aren't lost due during security scanning, your best bet is sharing a link instead of using direct attachments.
Allow Others to Upload JPG Files to You (Using a Client Portal)
Most businesses have some kind of online portal for clients to login to send files and messages securely. These services are called "client portals". Whether you're an individual or a business, if you'll be sharing a lot of JPG files, this is a great option.
I'll show you how to accept JPG files from anyone using a Foyer client portal. With Foyer, you can share JPG files, but also files of any type and size As a bonus, you'll get access to other useful features: encrypted messaging, an integration with DocuSign for e-signatures, secure email, and more.
To get started, head to the onboarding wizard, enter your name, email, and business name, and your client portal will be created within 1 minute (there's no payment or commitment to use the trial).
Your portal will be accessible as a "subdomain" of Foyer, like this: example.usefoyer.com. You can choose which "subdomain" you want in the onboarding wizard.
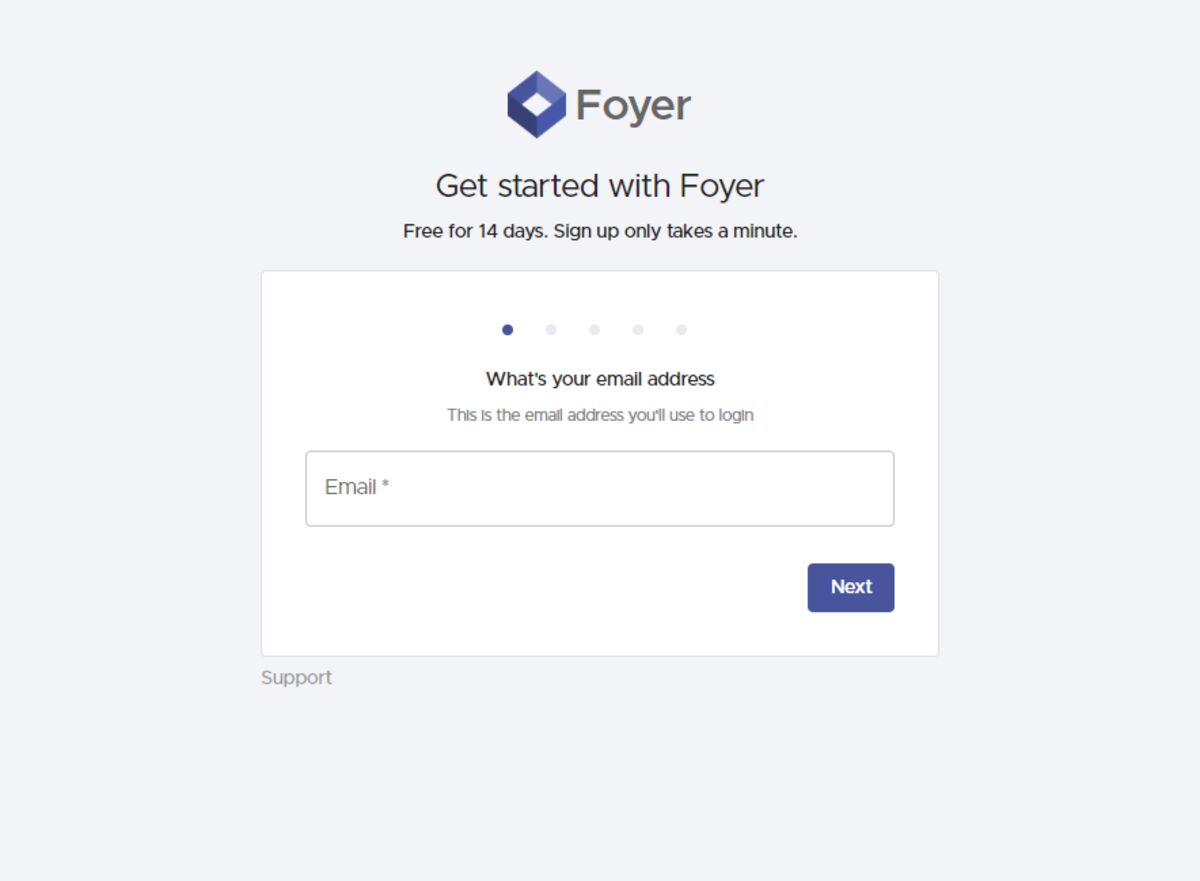
After making your client portal, you'll be automatically logged in. Feel free to check out all the features you have access to using the left drawer. In this guide, we are just going to cover how you can share files, but there's a lot more you can do too (e-signatures, secure email, internal knowledge base, and more)!
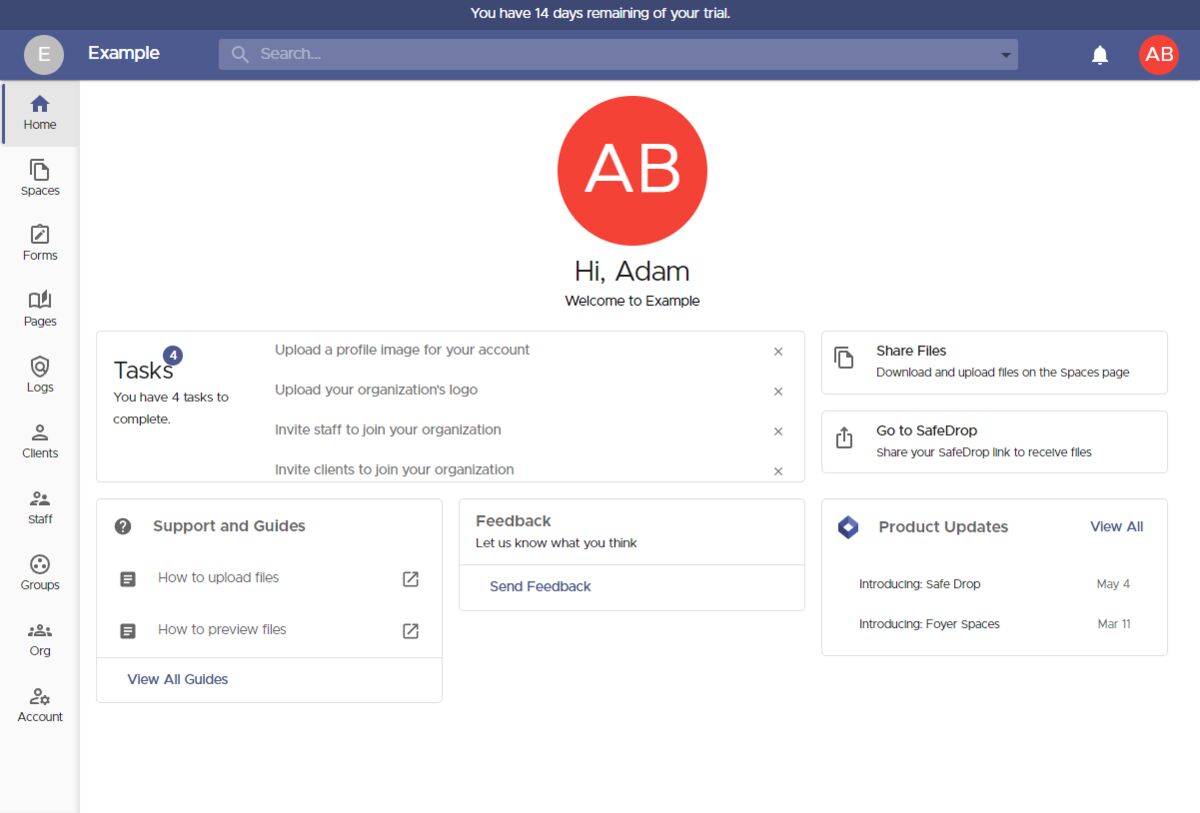
The easiest way to accept JPG files, is by allowing client's to register their own accounts and send you files using Foyer SafeDrop.
Every organization has a Foyer SafeDrop link included. To access yours you just use "example.usefoyer.com/upload" (replacing "example" with your organization's subdomain name). There's also a link to your SafeDrop page on your home page.
The SafeDrop page allows anyone to send you JPG files, and they don't even need to create any account! They just fill in their name, email address, and upload any number of JPG files, and you'll get secure access to them. Anyone who has sent you files can login to see the files they uploaded, and they can also download any JPG files you've uploaded to them via Foyer.
Foyer SafeDrop works on desktop and mobile, so you can just send the link on any platform (e.g. email, Facebook, Instagram, WhatsApp, iMessage), and anyone can upload JPG files to you. Here's what the Foyer SafeDrop page looks like:
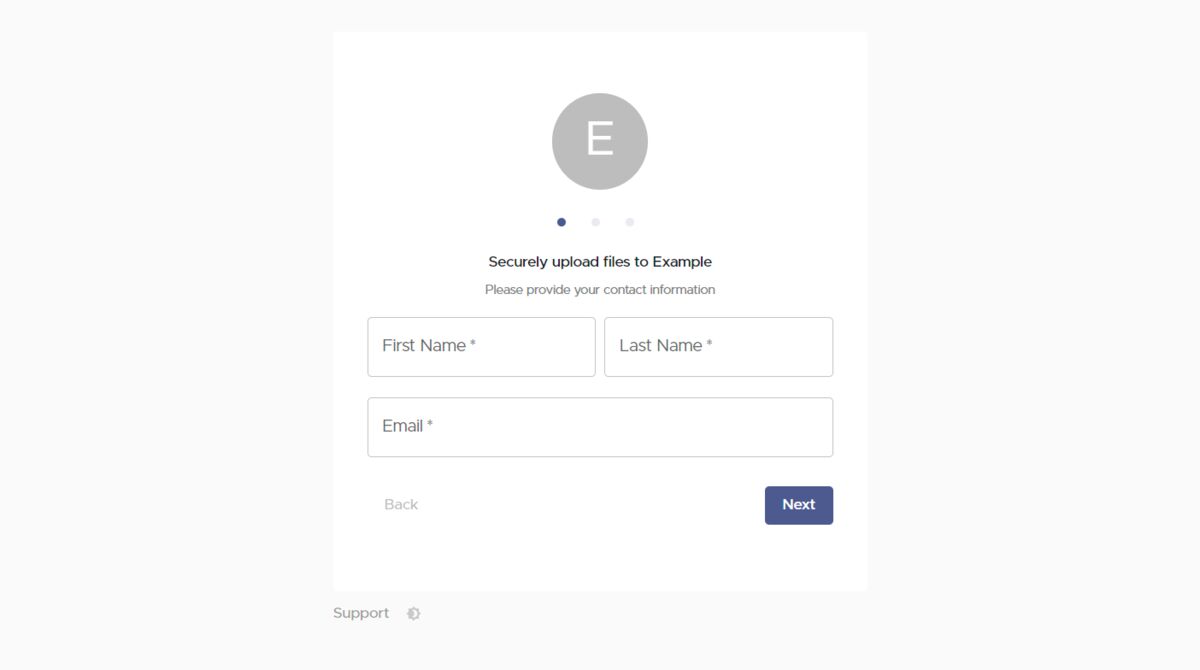
Any files uploaded this way will show up on your Spaces page (click "Spaces" on the left drawer to navigate to it), and have a name like "SafeDrop from ...". You and your clients will receive a notification for any files that are uploaded.
How to Share Files Related to JPG Files
Now that you know how to share JPG files, you may be wondering about a few other file types. You may find the following how-to guides useful:
- How to Share JPEG Files [Email, Facebook, Google Drive & More]
- How to Share PNG Files [Email, Facebook, Google Drive & More]
- How to Share GIF Files [Email, Facebook, Google Drive & More]
- How to Share BMP Files [Email, Facebook, Google Drive & More]
- How to Share TIF Files [Email, Facebook, Google Drive & More]
What's the Best Way to Share JPG Files For You?
If you just need others to download files, sharing a file using Google Drive could be the best way to share files. But, if you also need others to upload files to you, you should look into a client portal like Foyer.
I hope this guide helped you find the best way how to share JPG files. If you have any feedback, or have any questions about Foyer let us know by sending us an email at support@usefoyer.com. Thanks for reading!


