

Create a Client Portal with Calendly [How to Embed Calendly]
Allow clients to book appointments directly through your client portal using Calendly.

With Foyer, you can embed apps like Calendly in your client portal. So if you're looking for how to create a Calendly client portal, using Foyer is a great way to get started.
By creating a client portal with Calendly, you can centralize all your client and staff services into one place. That means you'll be getting less questions on "how do I access Calendly?" and can spend more time focusing on what matters: running your business.
Let's get right into how you can create a client portal with Calendly by embedding Calendly using Foyer.
How to Embed Calendly Into Your Client Portal
To embed Calendly into your client portal, you have two options:
- Embed a single Calendly page for all users
- Embed different Calendly pages for each user
In Foyer, these are called "Global" and "Per User" customizations respectively. The quickest way to get started is to use a global app customization (the same Calendly page for all users).
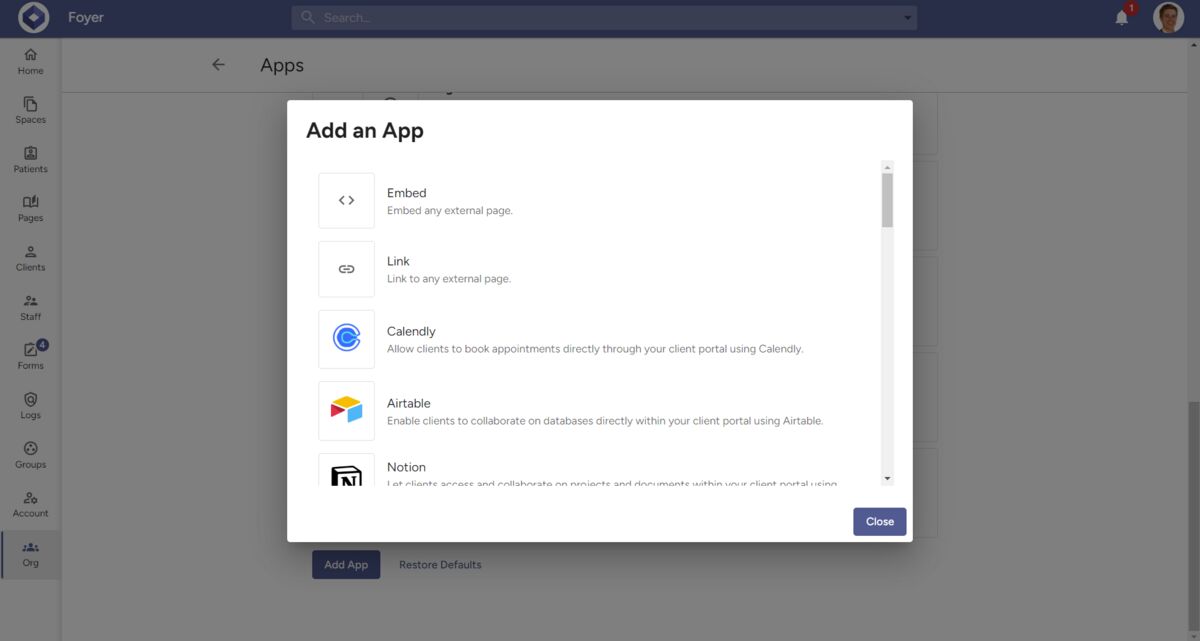
To get started, visit the Orgs page, then click "Foyer Apps". You'll see a screen similar to the one below.

Scroll to the bottom of the page to find the "Add App" button. After clicking, you'll see a dialog where you can select which app to add. There are two ways to set up Calendly as a client portal:
- Embed Calendly directly within your client portal
- Link to Calendly from your client portal
Embedding Calendly in your client portal is the most seamless way by keeping all your client interactiion right in your client portal.
To embed, you can use either the "Calendly" app or just the "Embed" app. To link to Calendly from a client portal (redirects directly to Calendly), use the "Link" app.
After adding the Calendly app, you'll see it appear on your list of enabled apps. To edit the app, you can click on the 3 dots on the new app's row, and select "Edit".
Then you can edit settings like the icon, label, routing (what web address the app is found at), visibility (who can see the app), and switch between "Global" and "Per User" customizations.
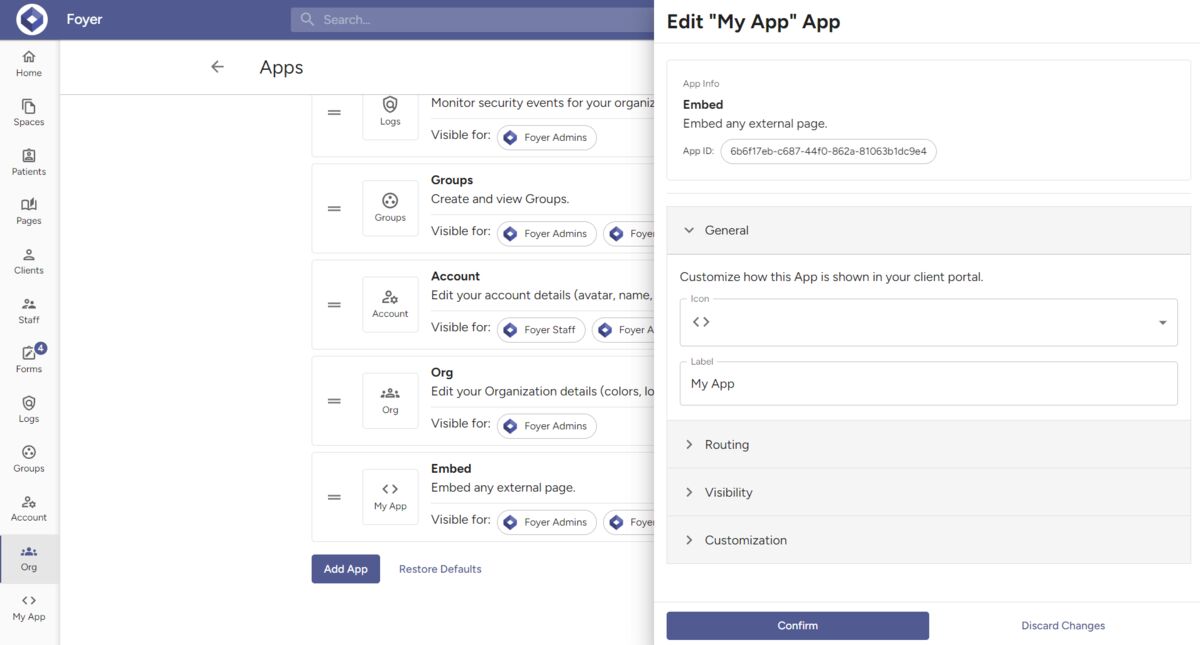
If you're looking to embed a different Calendly pages for each user, you'll want to go with the "Per User" customization. Otherwise you can keep it as the default: "Global".
The "customization" is where you can set the link or code (iframe) to embed Calendly into your client portal. You can edit the customization by clicking the 3 dots on your Calendly app, and selecting "Edit Customization".
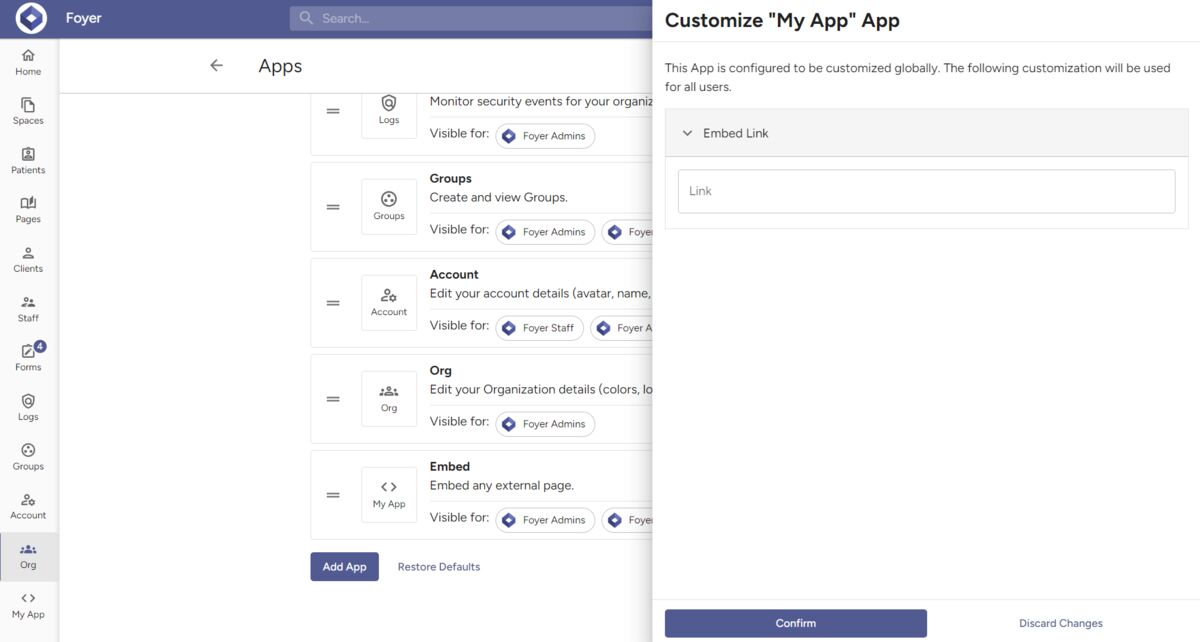
You can use Calendly support documentation to find which pages can be embedded. Then just copy either the page link or the embed code directly into your App's customization field named "Link".
Click "Confirm" and your changes will be immediately applied across your entire organization.
You can add any number of apps, so if you need to embed multiple pages of Calendly, just repeat the process.
How to Create a Calendly Client Portal
By embedding Calendly into your client portal via Foyer, you can create a Calendly client portal (see the instructions above).
To get started, you'll first need to onboard to Foyer. This is a simple process that takes just 1 minute. It's an easy way to get started with a customizable client portal that supports Calendly.
Once you have your Foyer organization, you can follow the steps above on how to embed Calendly into your client portal.
This way clients can login and access Calendly directly in your client portal. Every app you embed into Foyer will show as it's own menu item found on the left drawer. It even works on mobile (you can find any apps you add in the mobile menu).
You can use Foyer to securely exchange documents, send messages, create custom forms, and more, while creating dedicated pages for your clients and staff to access Calendly.
Conclusion
Using Foyer Apps is an easy way to set up a Calendly client portal.
By embedding or linking to Calendly from within your client portal, you get the benefits of a client portal (document exchange, messaging, custom forms, etc...), along with all the greatness of Calendly.
It's a win-win! I hope this guide has helped you set up Calendly as a client portal. If you have any questions or feedback, you can reach out to our Support team and we will be happy to help.

