How to Create a SharePoint Document Management System

In this guide, I'll walk you through setting up a SharePoint document management system for your business. We'll cover everything from how to choose the right version of SharePoint to creating a site, and setting up secure document management.
While SharePoint is not the best document management system, it can work for some businesses. Especially when you need it to integrate with other parts of the Microsoft ecosystem to create a Microsoft client portal.
If you're looking for a better solution, you should check out a dedicated secure client portal like Foyer that has document management, collaboration, white labeling features, and integrations with the Microsoft suite.
It’s important to note: SharePoint is designed for internal document management rather than public-facing websites. If you need to share documents externally, there are options like Microsoft Power Pages or dedicated client portal software such as Foyer.
For internal document management, though, this guide will take you through the process step-by-step, starting with selecting the best SharePoint version for your business.
SharePoint Online vs SharePoint Server for Document Management
Before you can start building your SharePoint document management system, it's important to choose the right version of SharePoint for your business.
Microsoft offers two primary options: SharePoint Online and SharePoint Server (on-premises). Each version has its own set of benefits, and the best choice for you depends on your business needs.
SharePoint Online (Part of Office 365)
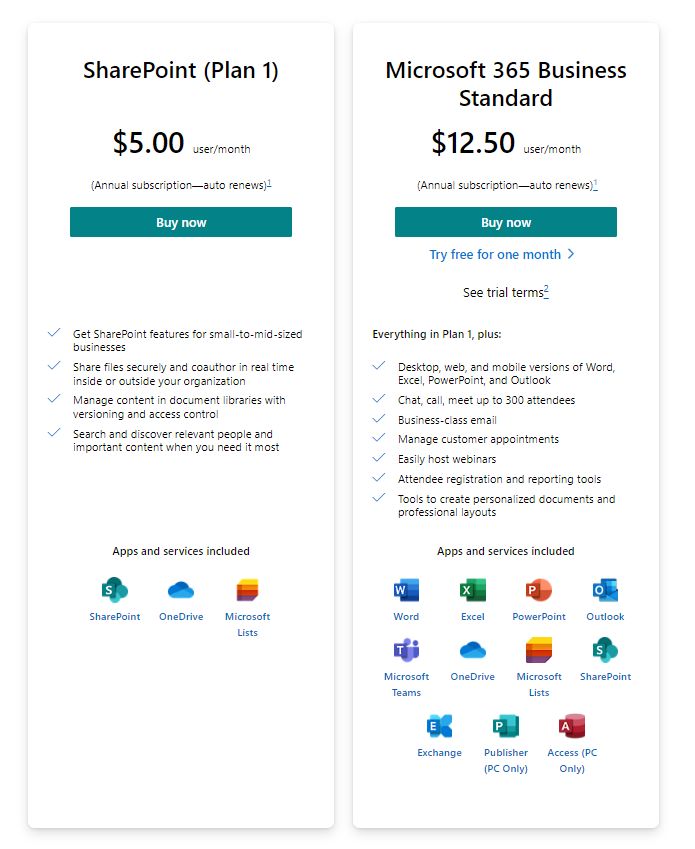 For most businesses, SharePoint Online is the best choice. It's cloud-based, which means Microsoft handles all of the hosting, updates, and maintenance. This makes it an ideal option for small to medium-sized businesses that want to get started with document management quickly without worrying about infrastructure. SharePoint Online integrates seamlessly with other Office 365 applications like Teams, OneDrive, and Outlook, making it easy to collaborate, share, and manage documents from anywhere.
Why choose SharePoint Online?
- No need to manage your own servers or infrastructure.
- Seamless integration with other Office 365 apps.
- Automatic updates and security patches.
- Accessible from anywhere with an internet connection.
- Scalable for businesses of any size.
SharePoint Server (On-Premises)
SharePoint Server is best suited for larger organizations or those that require more control over their data and infrastructure.
With SharePoint Server, you have the flexibility to host the system on your own servers, giving you full control over data storage, security, and customization.
However, this also means your IT team will be responsible for server maintenance, upgrades, and ensuring compliance with security protocols.
Why choose SharePoint Server?
- Full control over your data and servers.
- More customization options for businesses with specific requirements.
- Ideal for industries with strict data security or compliance needs.
- Ability to integrate with existing on-premises systems.
For most businesses, SharePoint Online is the best option. It provides a cost-effective, scalable solution for document management without the burden of managing infrastructure
On the other hand, if your business has specific security or customization needs, SharePoint Server may be the better option.
Now that you know which version to select, let’s move on to how you can set up a SharePoint document management system.
Create a SharePoint Document Management System (Step by Step Guide)
Now that you've selected the right version of SharePoint for your business, it's time to set up your SharePoint document management system.
This step-by-step guide will walk you through the process of creating a structured, efficient system for storing, organizing, and managing your business's documents.
Step 1: Create a SharePoint Site
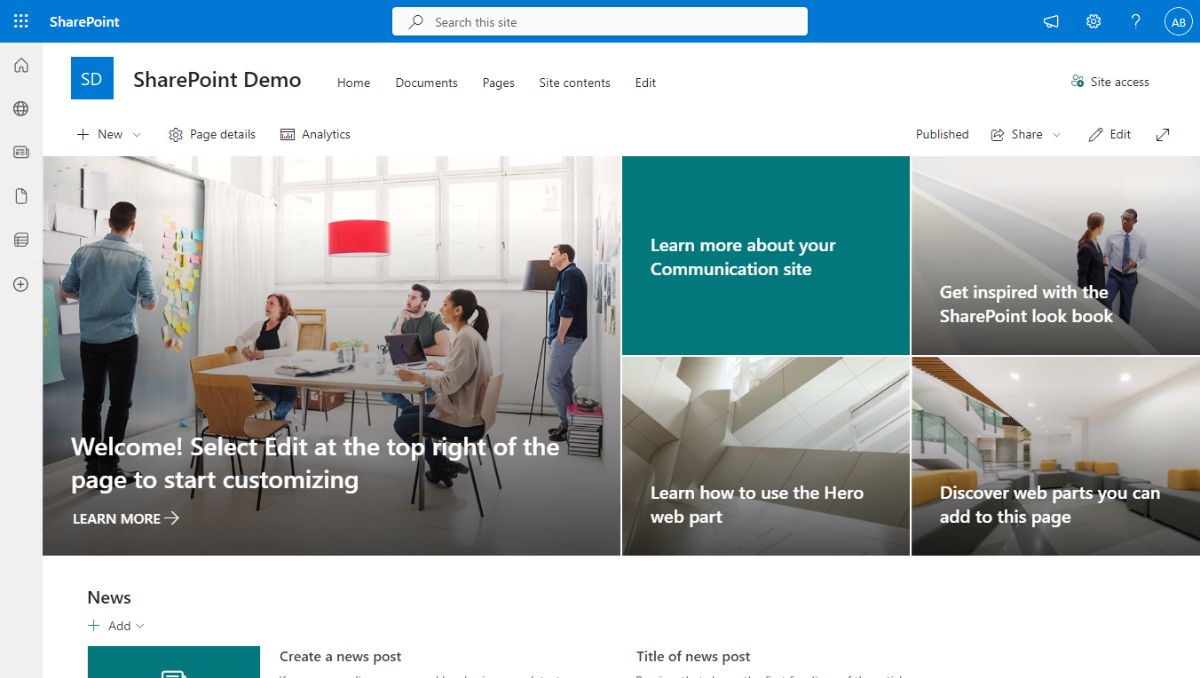
The first step in setting up your document management system is to create a SharePoint site.
This site will act as the central hub for your document storage and collaboration.
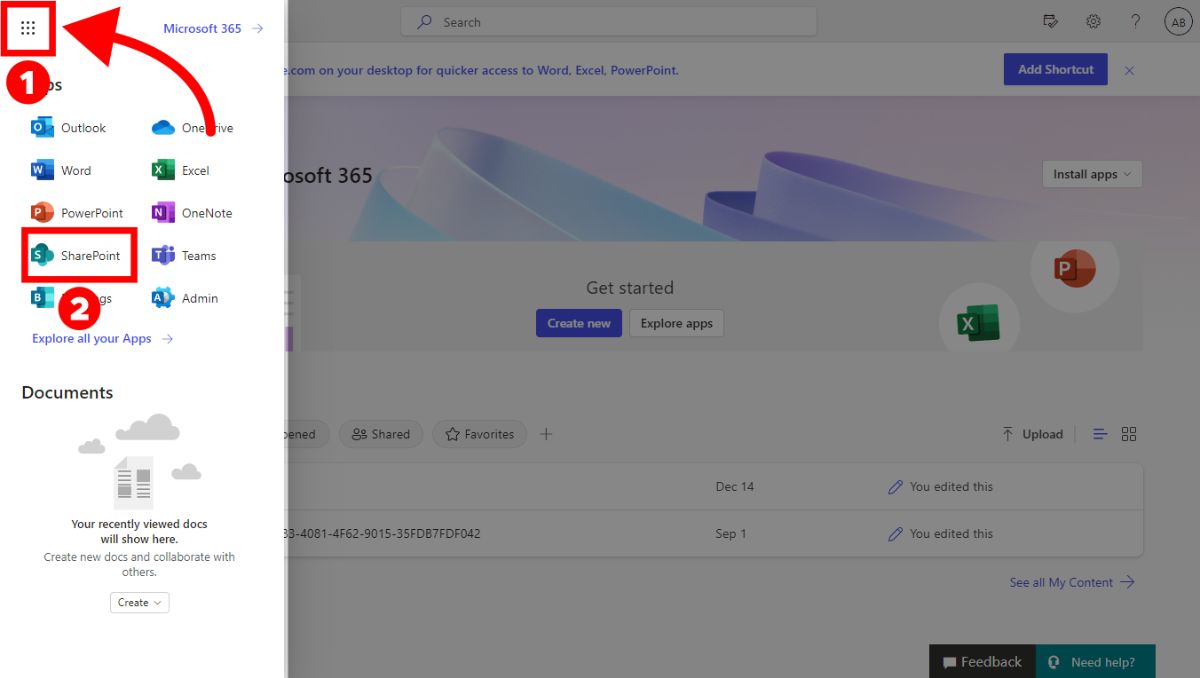
- Log in to Office 365 (for SharePoint Online users) or navigate to your SharePoint Server if you're using the on-premises version.
- Select "SharePoint" from the App Launcher in the top-left corner.
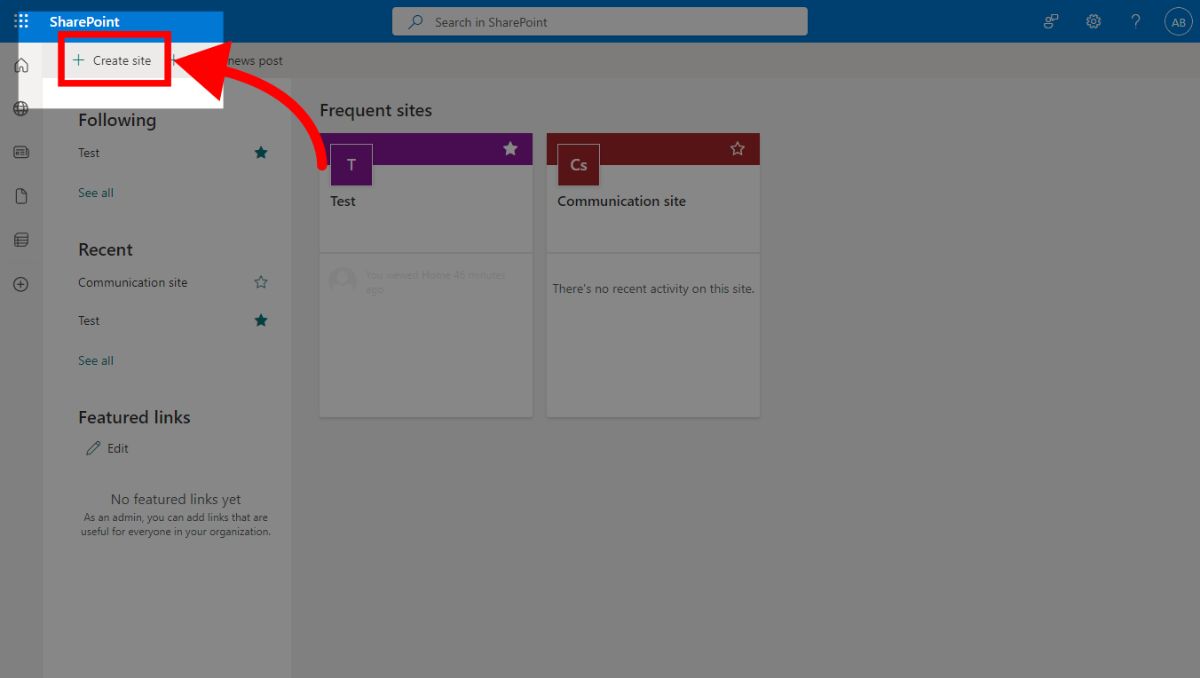
- On the SharePoint dashboard, click the "Create site" button.
- Choose between a Team site (for internal collaboration) or a Communication site (for sharing information externally).
For a document management system, Team sites are typically the best option, as they allow multiple users to collaborate and manage documents within the organization.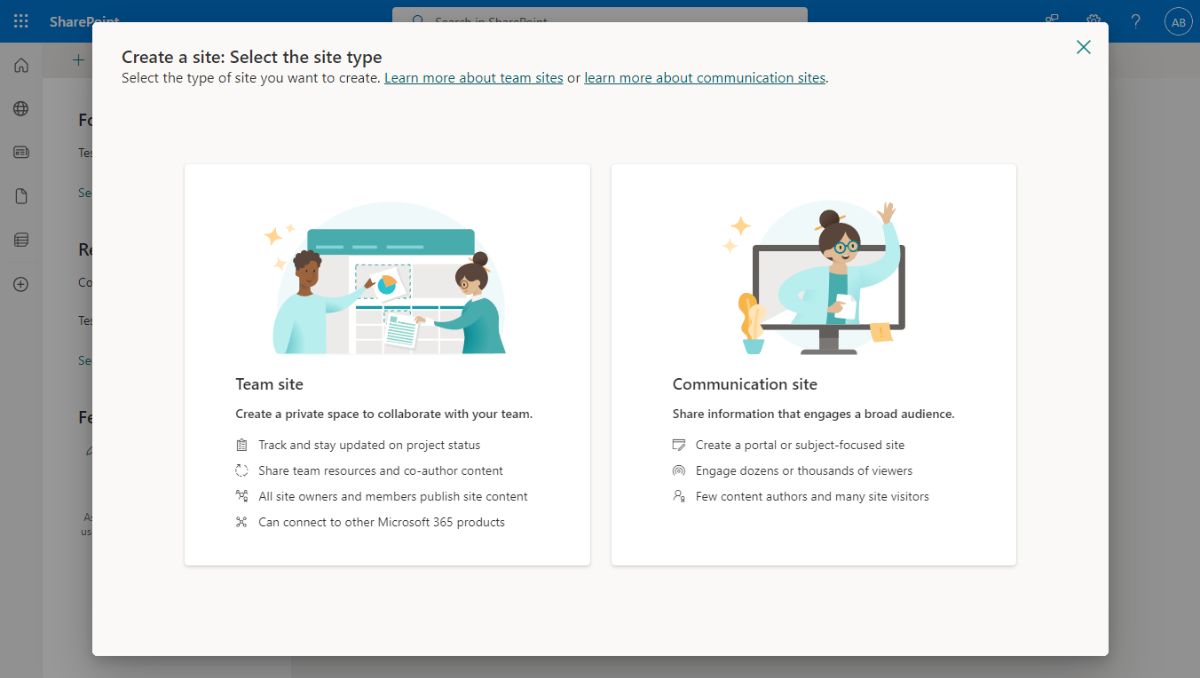
- Give your site a name and a description, then set the site address (URL).
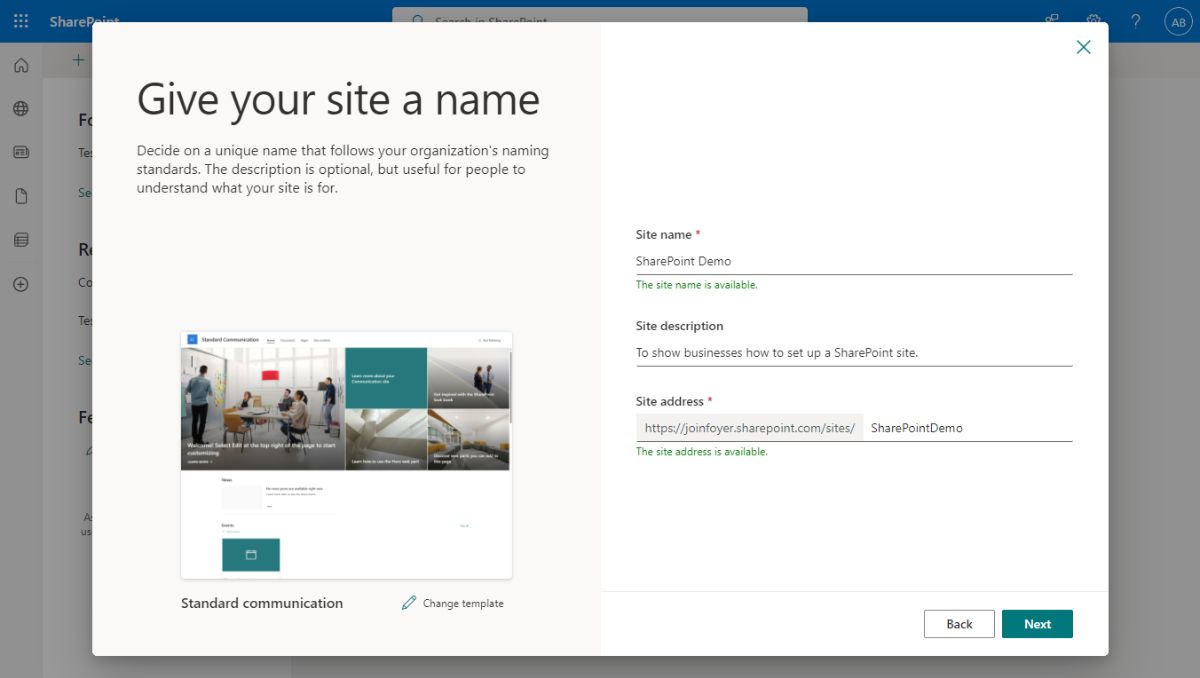
- Click Finish to create your site.
Step 2: Set Up Document Libraries
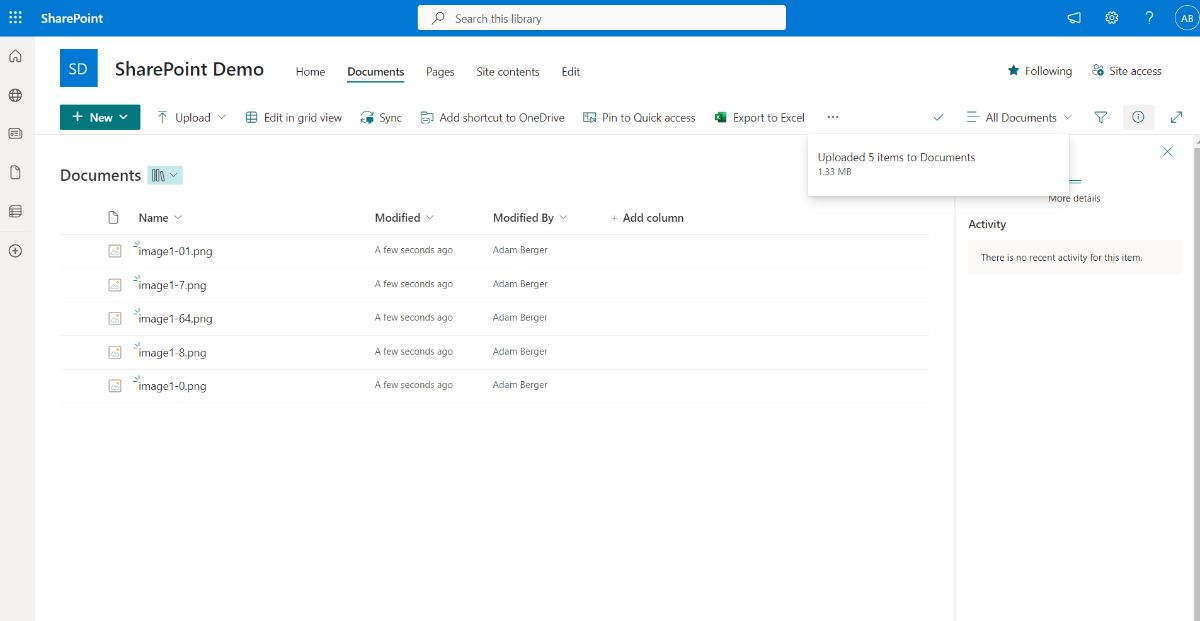 A document library is where all your files and folders will be stored. It's where you'll be able to organize files and turns SharePoint into an effect document management system.
- On your new SharePoint site, go to "Site contents".
- Click "New" and select "Document library".
- Give your library a name (e.g., "Contracts" or "HR Documents").
- Customize your library settings, such as version control (to keep track of changes to documents) and permissions (to control who can view, edit, or manage files).
- Click Create to add the document library to your site.
You can create multiple libraries to separate different types of documents (e.g., Finance, Legal, Marketing). This keeps your system organized and ensures that teams can quickly find the documents they need.
Step 3: Organize Your Documents with Folders and Metadata
Once your document libraries are in place, it's time to start organizing your files. You can organize documents in SharePoint by creating folders or using metadata.
- Create Folders: Inside each document library, you can create folders to further categorize your documents. For example, in a "Contracts" library, you might create folders for each client or project.
- Add Metadata: SharePoint allows you to add custom metadata (tags) to documents, which makes them easier to search and filter. For example, you could add metadata fields like "Project Name," "Department," or "Document Type."
- To add metadata, go to your document library, click on the "Library settings", and under "Columns", click Add from existing site columns or create a new column with your custom metadata.
Step 4: Set Permissions for Document Libraries
SharePoint allows you to control access to your document libraries by assigning permissions to specific users or groups.
- Go to your document library and click the "Settings" (gear icon) at the top-right corner.
- Select "Library settings".
- Click on "Permissions for this document library".
- From here, you can assign different levels of permissions (e.g., Read, Edit, Full Control) to individuals or groups.
By customizing permissions, you ensure that only the right people can access sensitive documents, while allowing collaboration on shared files.
Step 5: Enable Version Control and Document Retention
Version control is essential in a document management system to keep track of document changes and ensure that you always have access to previous versions.
- In your document library, go to "Library settings".
- Under "Versioning settings", choose whether you want to keep Major (published) versions or Major and Minor (draft) versions.
- Specify how many versions you want to retain (e.g., 5 versions, unlimited).
- Enable Document Retention Policies if you need to automatically archive or delete documents after a certain period.
Version control ensures that your team can always revert to previous versions of a document if necessary, preventing data loss or mistakes.
Step 6: Customize Your SharePoint Site
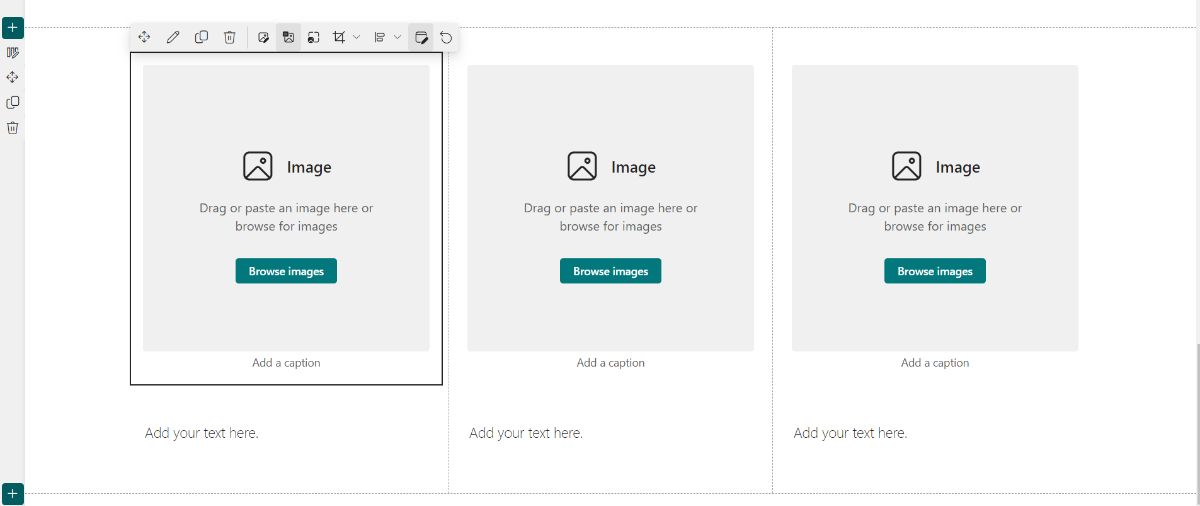
Finally, customize your SharePoint document management system to make it user-friendly for your team. Add Web Parts such as a Document Library Viewer or Recent Documents to the site homepage, so users can quickly access important files.
- Go to the site’s homepage and click "Edit".
- Click the "+" icon to add new web parts.
- Select a Document Library Viewer web part to display the contents of a specific document library.
- You can also add other useful web parts like a News Feed, Quick Links, or Task List to help your team stay updated on important changes and tasks.
How to Share Documents with External Users in SharePoint
Once your SharePoint document management system is up and running, you'll likely need to know how to share documents with external users, such as clients, vendors, or partners.
SharePoint makes this easy, but it's important to configure it properly to ensure your data remains secure.
Here’s how you can share documents with external users in a SharePoint document management system:
Step 1: Enable External Sharing in SharePoint
Before you can share files with external users, external sharing must be enabled in your SharePoint settings.
- Go to the SharePoint Admin Center: From your Office 365 admin dashboard, click on Admin Centers and select SharePoint.
- Navigate to Sharing Settings: In the SharePoint Admin Center, click on Policies > Sharing.
- Enable External Sharing: You will see options to allow or block external sharing. Select "Anyone with the link" or "New and existing guests" to allow sharing with external users. You can also restrict sharing to specific domains for added security.
- Anyone with the link: Users can share links with anyone, even if they don’t have a SharePoint account. This is useful for quick sharing but less secure.
- New and existing guests: Requires the external user to authenticate with an email address, adding a layer of security.
- Save your changes.
Step 2: Share a Document or Folder with External Users
Once external sharing is enabled, you can start sharing specific documents or folders from your document management system.
- Go to the Document Library: Navigate to the document or folder you want to share.
- Click on the "Share" button: Hover over the file or folder and click on the three dots (…) to open the options menu, then select "Share".
- Set Link Permissions: In the sharing dialog, you'll see a setting for who can access the file. By default, it will be set to “People in your organization.” Click this to change it to "Anyone with the link" or "Specific people".
- Specific people: This option is more secure, as it allows only those you explicitly invite to access the document.
- Enter the recipient’s email: If you choose "Specific people," enter the external user’s email address.
- Set Editing Permissions: You can choose whether the external user can edit the file or just view it by toggling the "Allow editing" option.
- Add a Message (optional): You can include a custom message explaining the document or request.
- Click "Send" or "Copy link": If you’re sending an invitation via email, click "Send". If you want to send the link manually, click "Copy link" and share it with the recipient.
FAQs About Using SharePoint as a Document Management System
Can SharePoint Be Used as a Document Management System?
Yes, SharePoint can be used as a document management system.
It offers features like file storage, collaboration tools, and permission management that allow businesses to store and manage their documents.
However, it lacks some specialized features that a dedicated document management solution like Foyer provides. For example, Foyer is designed specifically to simplify document sharing with clients and team members through a secure client portal, making it a better choice for businesses that need seamless, secure document exchange and management.
Is SharePoint a Document Management System?
Technically, SharePoint offers many of the functions of a document management system, such as file storage, version control, and user permissions.
However, it is more of a multipurpose collaboration platform than a dedicated document management system.
Foyer, on the other hand, is built with secure document sharing and management in mind, providing client portal features like e-signatures, encrypted file transfer, and customizable client portals that make it a superior solution for businesses focused on secure and efficient document handling.
Why SharePoint Is Not a Document Management System?
While SharePoint offers some document management features, it is primarily designed as a collaboration and knowledge base platform.
It lacks some of the key capabilities of a dedicated document management system, and it's often seen as cumbersome for both employees and clients.
Foyer fills these gaps by providing an all-in-one platform for managing documents securely with features like end-to-end encryption, audit trails, and customizable user access, making it a more suitable option for businesses needing a complete document management solution.
Can SharePoint Be Used as a Document Management System?
Yes, SharePoint can be used as a document management system, but many find it to be cumbersome and difficult to maintain.
There are plenty of other solutions specifically designed for document management, like Foyer. By using a dedicated document management system, you'll get better features for organization files, collaborating with clients, to make an all together more seamless workflow.
Conclusion
I hope this guide has helped you set up your SharePoint document management system. For more information on SharePoint, check out some of our other guides below.
If you're unsure if SharePoint is the best fit for your business, you should check out our best client portal software list that includes document management systems like Foyer.
Foyer was designed for document sharing and collaboration and can be white labelled for your business. It even integrates with Microsoft products like OneDrive, SharePoint, Power Pages, and more.
Thanks for reading! If you have any questions or feedback please send a comment below.