How to Create a Xero Customer Portal

Xero is one of the most powerful and user-friendly accounting platforms available today, empowering small businesses, accountants, and bookkeepers to manage their finances with ease. With Xero’s intuitive dashboard, advanced reporting tools, and extensive integrations, it’s easy to stay on top of your business’s financial health. But beyond accounting, Xero can also serve as the foundation for a secure, branded Xero Customer Portal—a centralized hub where clients can collaborate, access documents, and streamline communication.
That said, while Xero excels at financial management, its built-in portal functionality is limited—primarily allowing clients to view and sign financial documents. It lacks more personalized client interaction features like robust file sharing options, private messaging, custom forms, and e-signatures. Without these capabilities, managing the full client experience directly within Xero can feel fragmented. A dedicated Customer Portal solves this by bringing everything together in one place, helping you deliver a more organized, professional, and efficient service.
The good news? Xero’s flexibility makes it easy to extend its functionality. With the right third-party tools and integrations, you can build a fully functional Xero Customer Portal that works seamlessly alongside your existing accounting workflows. Whether you're a solo accountant, a growing firm, or a service-based business using Xero to support clients, implementing a Xero Customer Portal can strengthen relationships, improve communication, and boost overall productivity.
In this guide, I’ll walk you through how to create a Xero Customer Portal that can integrate with your with Xero processes—so you can offer your clients a cohesive, secure, and professional experience from start to finish.
How To Create a Customer Portal for Xero
A Foyer client portal gives your business all the essential tools to streamline client interactions—secure file sharing, encrypted messaging, and seamless integration with e-signature solutions like DocuSign. With built-in encryption, both your business and client data stay fully protected at all times.
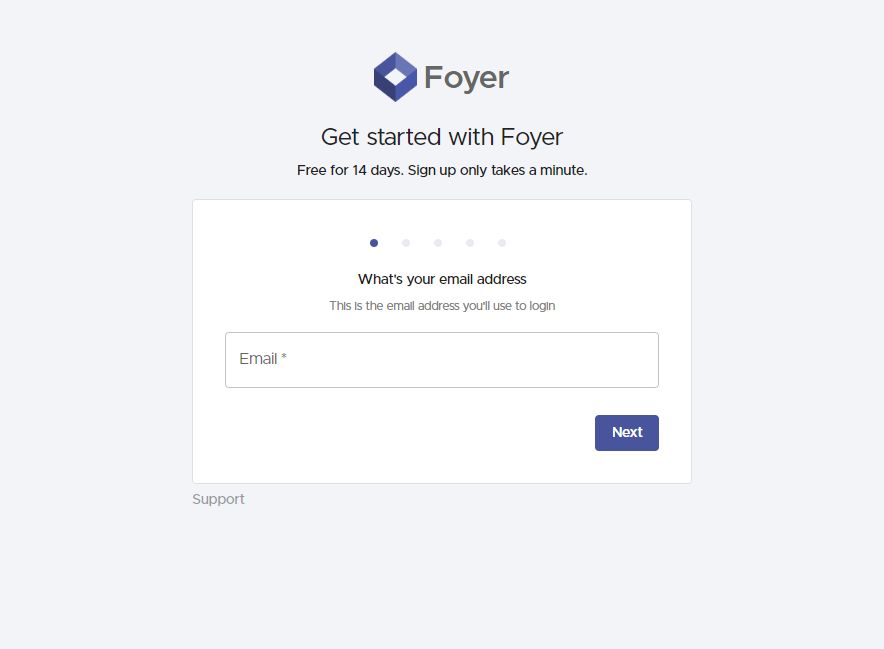
Setting up your Xero client portal is fast and hassle-free. Just follow Foyer's guided onboarding by entering your business name, email, and a few key details. Your client portal will be live in under a minute, with no initial commitment required.
You can launch your portal on a Foyer subdomain, like example.foyer.com, or create a more branded experience with a custom subdomain such as portal.yourbusiness.com. And if you need support during setup, Foyer’s sales team is always ready to help.
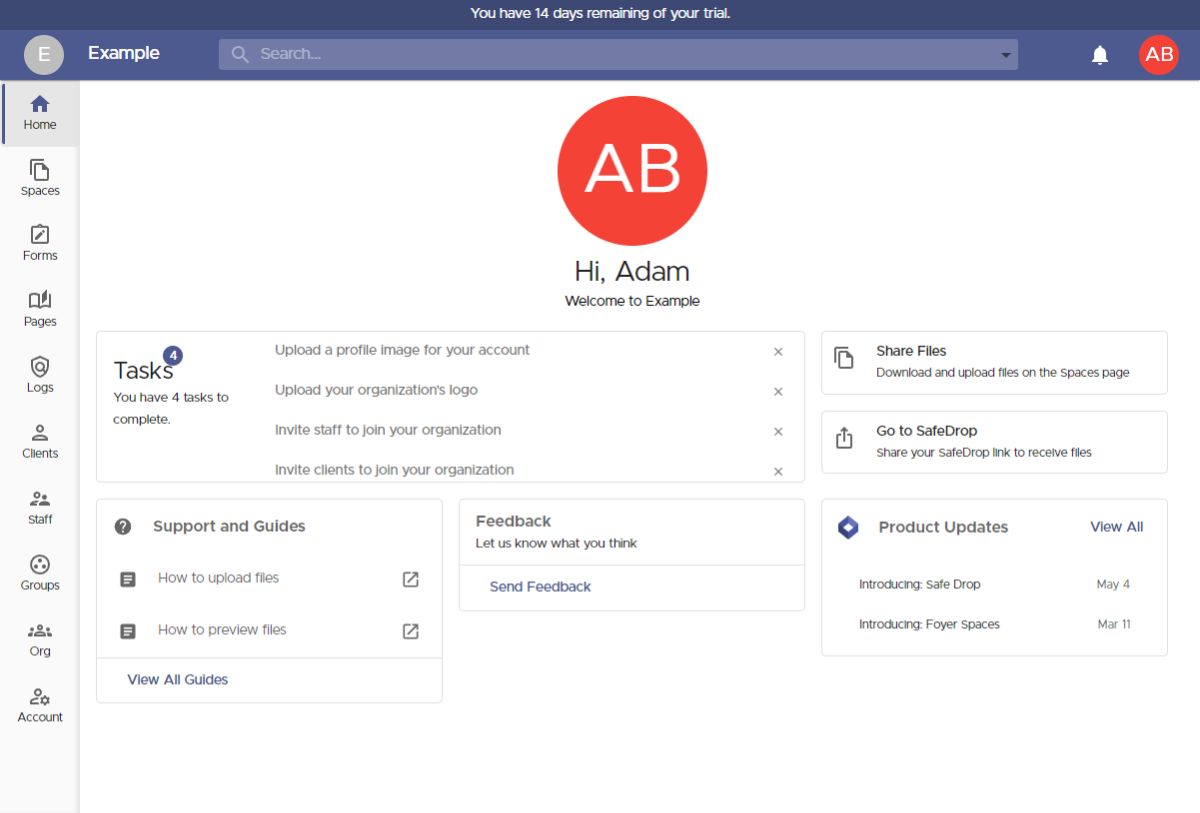
Once you’ve completed the onboarding steps, you'll land on your client portal's homepage. From the navigation menu on the left-hand side, you'll find easy access to customization tools, such as secure file sharing, custom forms, and knowledge base resources.
In this section, we'll focus specifically on securely sharing files with your clients. Later in this guide, we'll dive into other essential features that can further enhance the functionality of your portal.
 Sharing files is an essential part of collaborating with business clients, and Foyer offers two easy ways to handle this:
- You can invite clients directly into a Space using their email address, or
- You can provide them with a link to your SafeDrop page, allowing clients to upload files without needing to log in.
I’ll guide you through both methods, starting with how to invite clients into a Space. But first, let’s briefly clarify what a Space actually is.
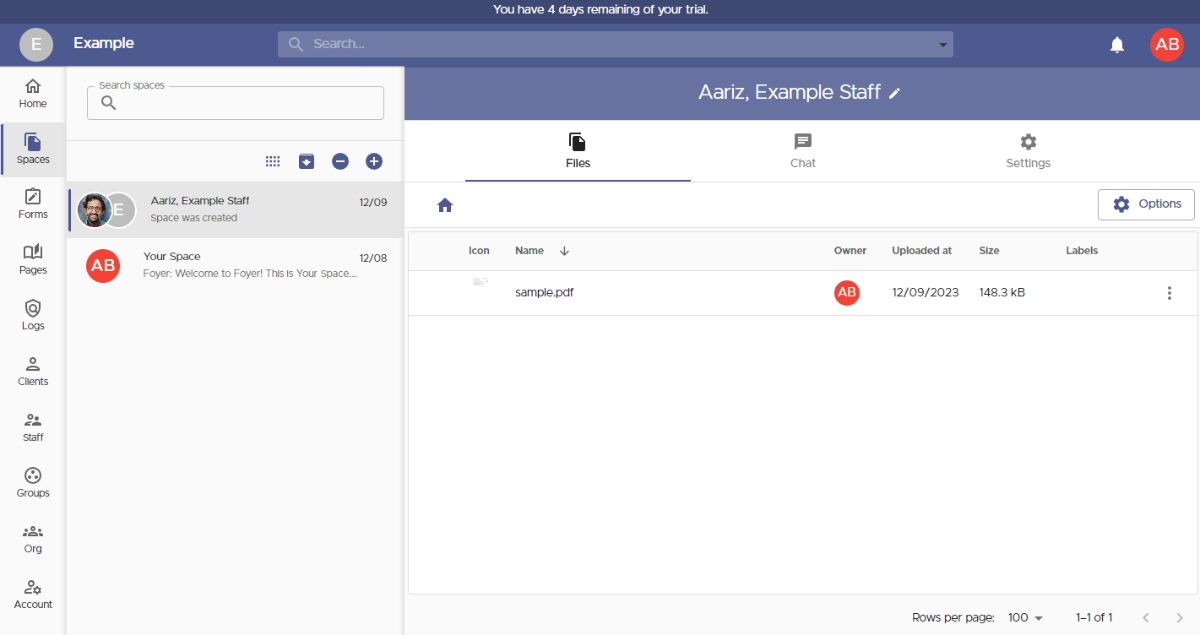
Spaces are secure, private areas within your portal where you can share files and exchange encrypted messages with clients and team members. Only the invited members of a Space can access its content—much like a private group chat on platforms such as Teams, Slack, or iMessage.
To create a new Space, navigate to the "Spaces" page from the left-hand menu, then click the "+" icon to get started.
 When creating a new Space, a dialog box will appear, prompting you to name the Space and select the members who should have access to shared files and messages.
You can also assign Spaces to groups, making it easier to manage your business contacts by granting access to an entire external organization at once.
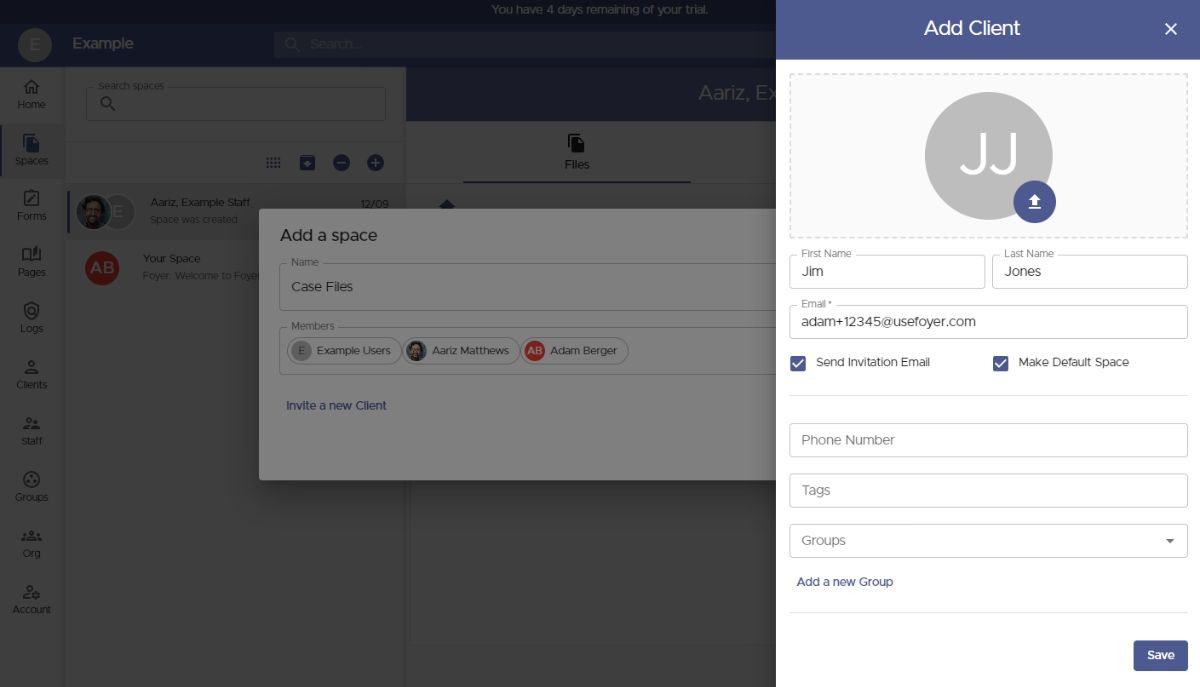
To add a new client, simply click the "Invite a New Client" button.
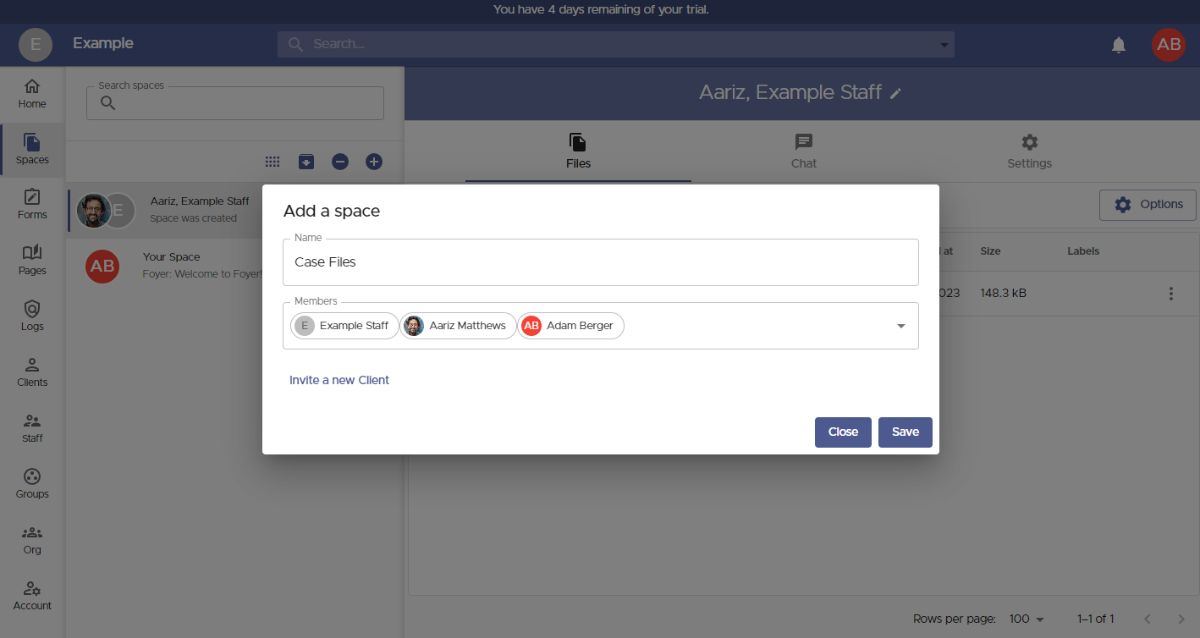 To invite a new client, all you need is their email address. Other details like their name, phone number, and profile picture are optional, and clients can add this information themselves later if they prefer.
Before you save the new client, consider these two useful features: tags and groups.
Tags help you categorize clients by labeling them—for instance, grouping them by industry (e.g., "Law Firm" or "Healthcare").
Groups let you organize clients according to their associated businesses, allowing you to easily grant an entire organization access to resources such as Spaces and Pages. This way, you don’t need to manage each client’s permissions individually.
 When you invite a new client to Foyer, they’ll automatically be added to the Members list and gain immediate access to any files shared within their assigned Space.
To add a group, just start typing the group's name, then select it from the suggested options. Groups can be added exactly like individual clients, allowing you to seamlessly manage access across your portal.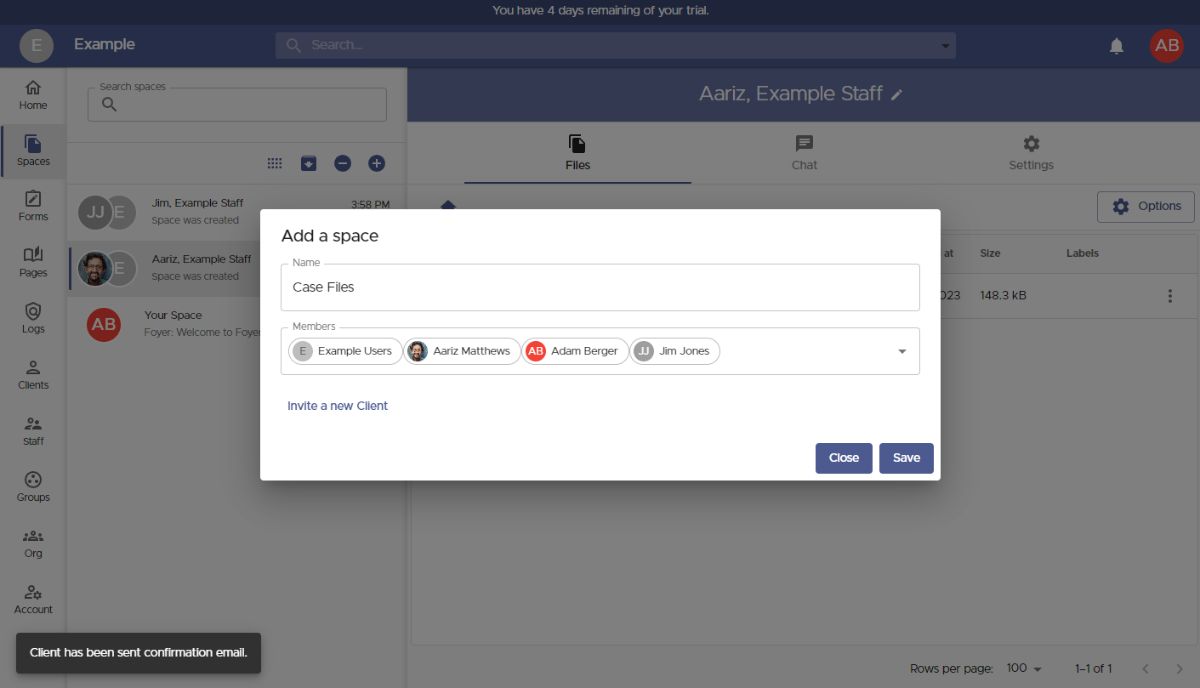 Once you've added all the necessary users and groups, click "Save" to complete the setup and access your new Space.
To share files with everyone in a Space, simply drag and drop your files into the designated area or click the "Options" button. The Spaces you create act as dedicated areas where you can copy and paste files from Xero for easy sharing with your clients. There are no limits on file size or type, and you can even upload entire folders at once.
If you need to modify access later, you can easily add or remove users and groups by navigating to the "Settings" tab and updating the members list accordingly.
 That covers the first method of sharing files through your client portal using Spaces. Now let’s explore the second method, which allows your business clients to send files without logging in.
This feature, called SafeDrop, is integrated directly into your Foyer client portal. Every organization receives its own dedicated SafeDrop page. You can find your unique link on the "Home" tab or by visiting "example.usefoyer.com/upload" (simply replace "example" with your organization's subdomain).
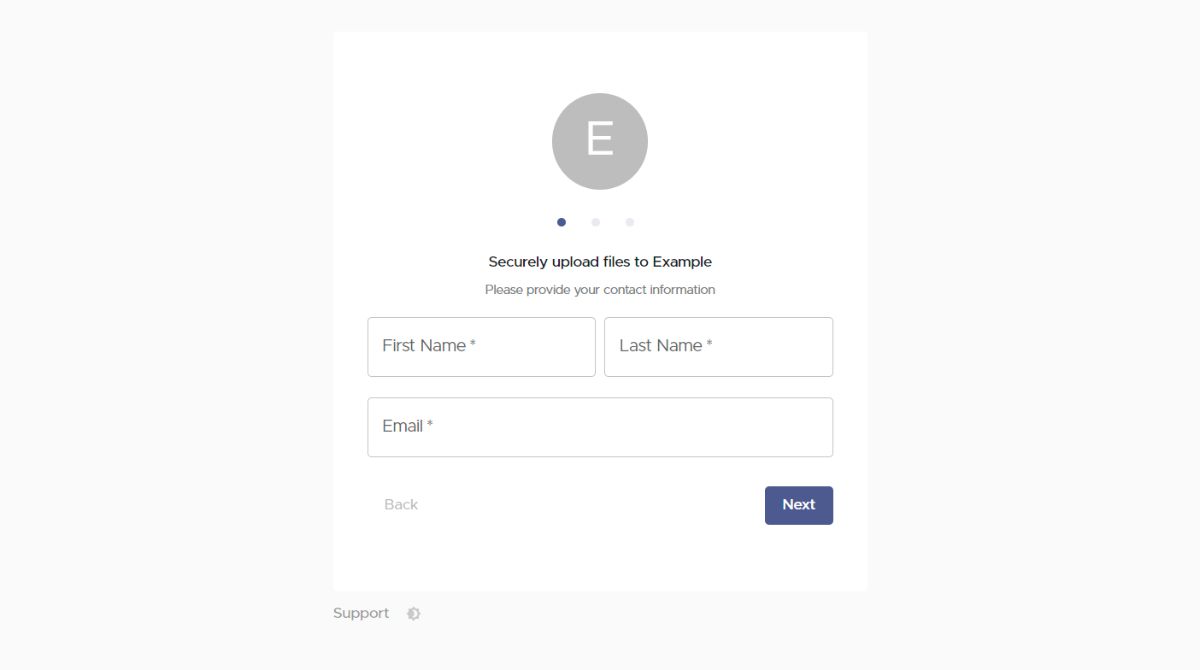 You can share your Foyer SafeDrop link with any client, allowing them to easily upload files from any device. Clients only need to enter their name, email address, an optional message, and select the files they'd like to send.
Files uploaded through SafeDrop will automatically appear on your Spaces page, clearly labeled as "SafeDrop from...". Just like regular Spaces, you and your clients will receive notifications whenever new files are uploaded.
Anyone who submits files using your SafeDrop portal will automatically be added as a "guest" client on your Clients page. To keep your contacts organized, simply click on any guest entry to assign appropriate tags or groups.
White-Labeling Your Client Portal
For any customer portal, consistent branding is essential to creating a seamless client experience. White-labeling ensures that your portal aligns with your brand identity, helping business clients easily recognize and trust your company, while also providing additional professional benefits.
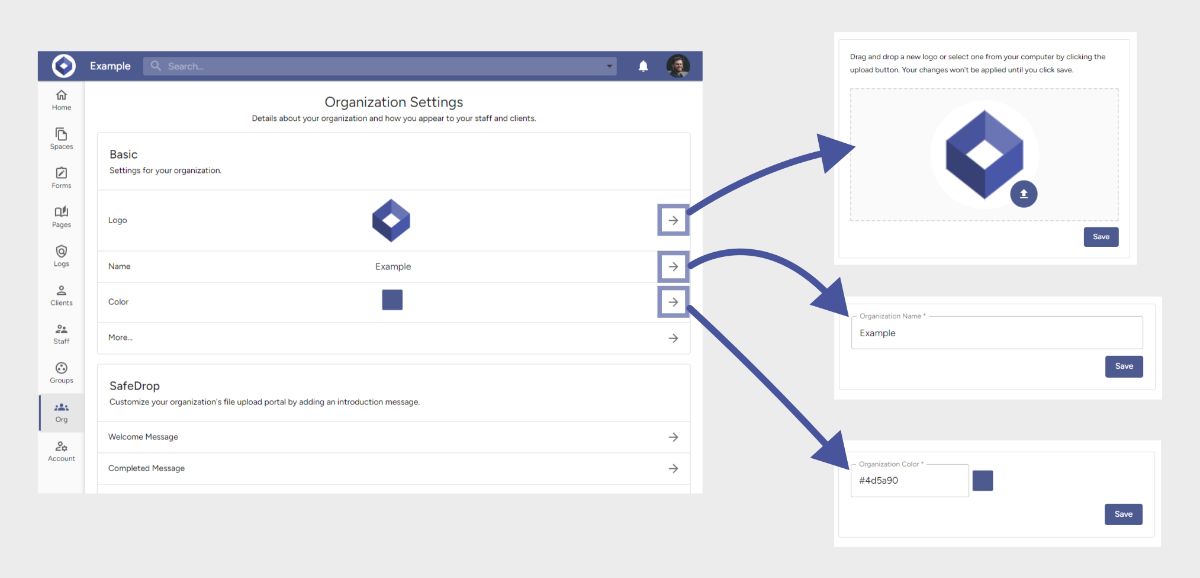
With Foyer’s customer portal, you can personalize key elements such as colors, logos, email templates, and your custom domain.
On the "Org" page, you can customize:
- Your Logo: Displayed prominently on login/sign-up pages, throughout the portal after login, on forms, and your SafeDrop page.
- Name: Shown in the portal header and on login/sign-up pages.
- Color: Applied consistently to the header and all buttons across your portal.
Scrolling further down the Org page, you'll also find Foyer’s customizable email templates. These templates allow you to tailor invitation emails sent to clients and staff, ensuring a cohesive and branded experience throughout.
How to Create Knowledge Bases In Your Client Portal
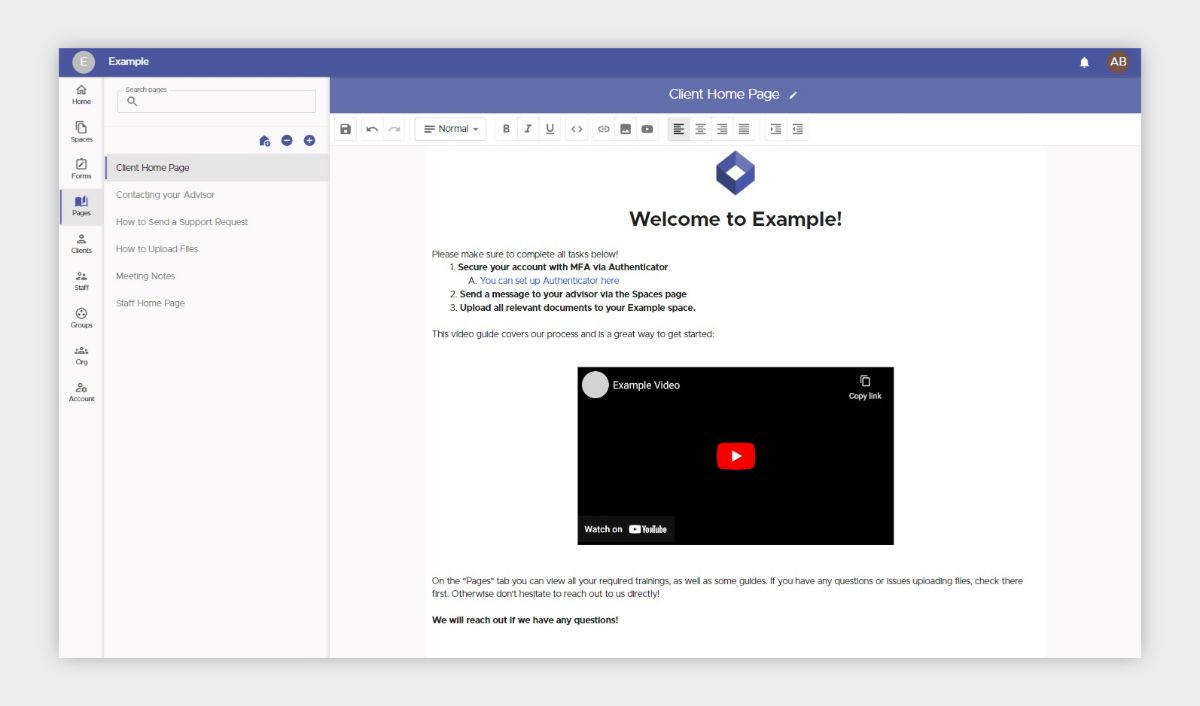
With your Foyer client portal, sharing knowledge between your team and clients is both simple and efficient. To create a knowledge base page, head to the "Pages" section and click the "+" icon in the left-hand menu. Give your page a title, then use the rich-text editor to easily add content like embedded videos, images, and formatted text.
You can control access permissions by clicking the edit icon next to the page title, allowing you to specify exactly which users and groups can view the page. Shared pages will appear in the "Pages" tab for recipients, where staff members can collaborate and clients have read-only access.
Additionally, you can set any knowledge base page as the home page, so specific content is immediately displayed to clients or staff upon login. This is particularly helpful for onboarding new users and providing quick access to essential resources, enhancing your overall portal experience.
While some businesses rely on dedicated knowledge base tools like Notion, having an integrated knowledge base within your Foyer client portal provides added convenience by keeping everything centralized in one secure location.
How to Make Custom Forms For Your Client Portal
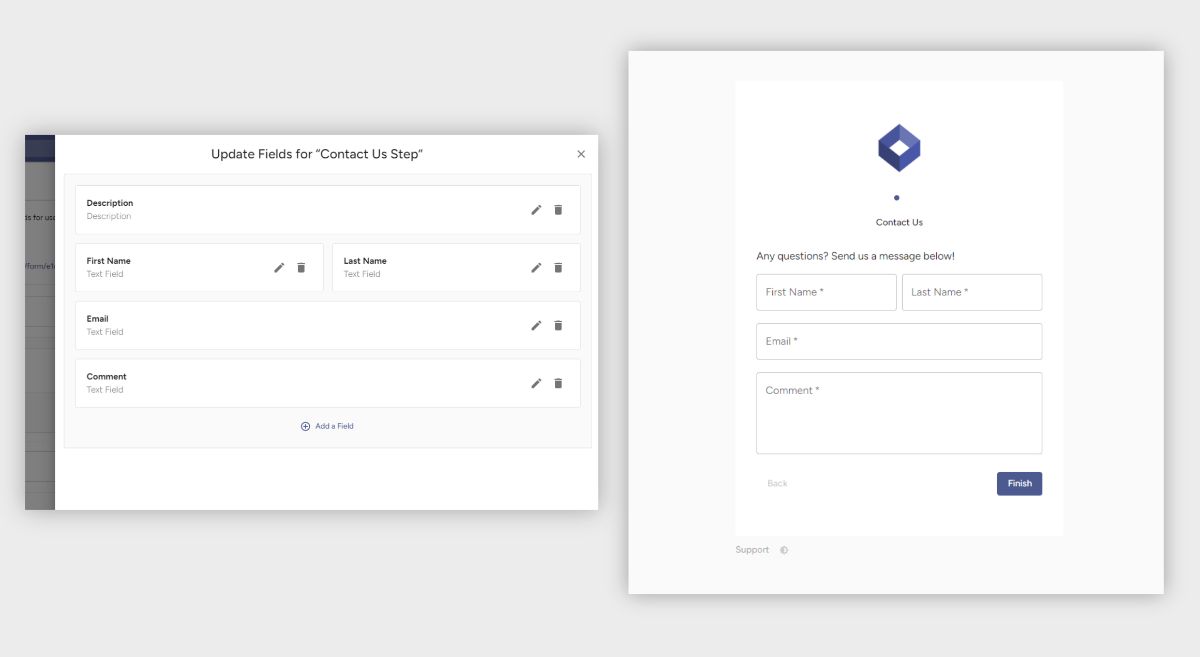
When collaborating with other businesses, you might need to collect custom data for purposes like gathering feedback or onboarding new clients. Foyer offers a built-in solution called Forms that lets you capture specific information by choosing from a variety of field types—such as text entries, file uploads, and multiple-choice options.
All data submitted via your forms is automatically integrated into your customer portal, making it simple to share internally. You can also receive files of any type and size, including large uploads—just add a field, select the "file" option, and save your form.
To ensure you never miss a submission, both you and your team will receive email notifications whenever a form is completed. Users can adjust their notification preferences if needed.
To get started, navigate to the "Forms" tab, click "Form Definitions," and select "Add Form." Each form is organized into "steps," with each step containing various fields such as text boxes, file uploads, or multiple-choice checkboxes.
You can choose between two built-in form styles:
- Stepper – Displays each step as a separate page, which is ideal for mobile-friendly experiences.
- Row – Shows the entire form on a single page, best suited for desktop use.
While some businesses rely on external tools, having a form builder integrated directly into your Foyer client portal offers the added convenience of keeping everything centralized.
How to Keep Your Customer Portal Secure Using Audit Trails
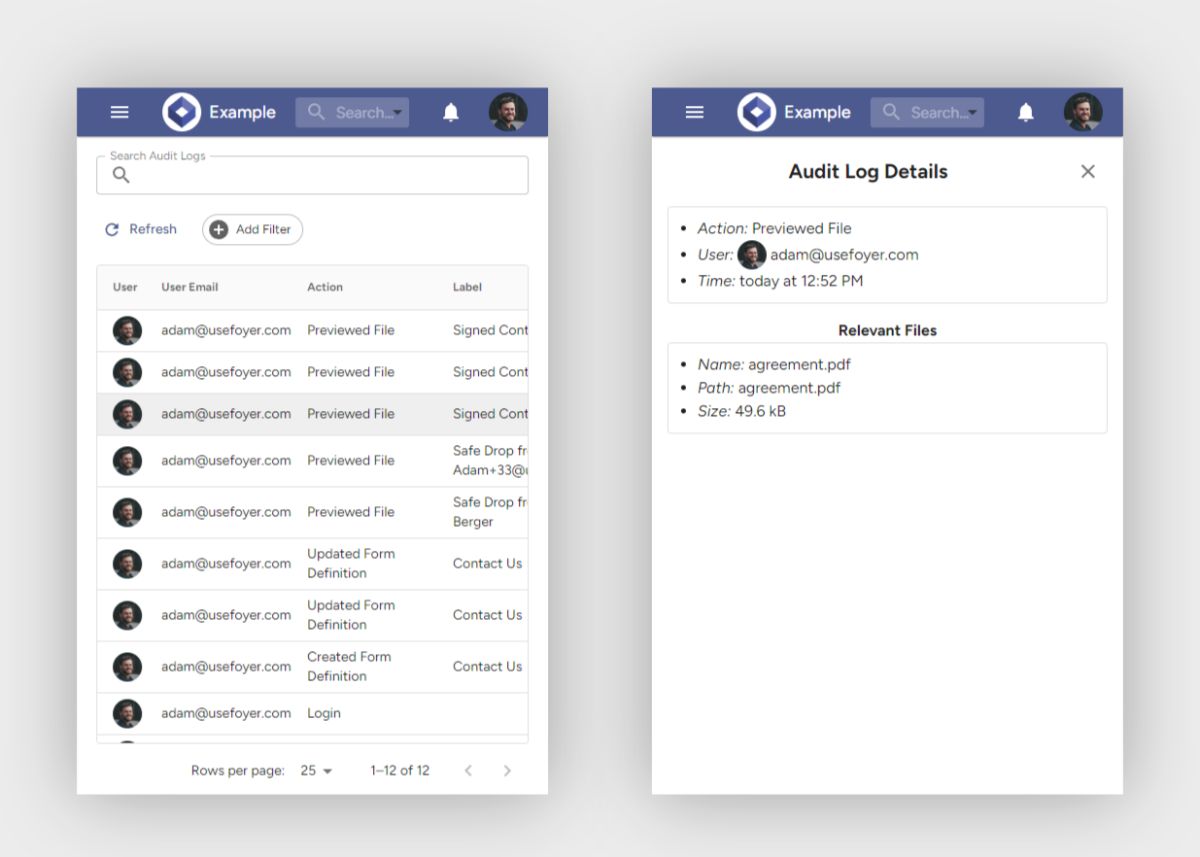
Client portals not only boost efficiency but are also vital for maintaining security. That's why Foyer offers comprehensive audit trails, enabling you to track every security-related event in your organization and ensuring both your business and clients remain safeguarded.
Every audit log captures the exact time of the event, the involved user, and a detailed description of the activity. For security purposes, these logs are immutable, providing a reliable record of past actions. Some key events tracked in the audit logs include:
- File deletions
- File previews
- Enabling or disabling Two-Factor Authentication (2FA)
- Failed login attempts
With over 50 different actions recorded, you'll have full visibility into all activities within your client portal. This level of detail is especially crucial in industries like healthcare, where maintaining thorough audit trails is essential for managing HIPAA-compliant data and other sensitive personally identifiable information (PII).
Additionally, Foyer offers search, filter, and sorting options for audit logs, making it simple to review and manage security events efficiently.
How Will You Use Your Xero Client Portal?
I hope this guide has shown you how to build a client portal with Xero and leverage features like secure file sharing, custom forms, knowledge bases, and secure email to boost your business’s productivity and security.
If you're unsure where to begin, start with a secure file-sharing portal using either Spaces or SafeDrop (as explained above). This creates a reliable, efficient method for exchanging files with your business clients. Once that's in place, you can move on to integrating custom forms for feedback or onboarding, and add e-signature functionality with DocuSign.
If you need to transfer existing data into your client portal, our Support team is here to help you explore migration options.
Thanks for reading! We’d love to hear your thoughts—please share any feedback or questions in the comments below!