How to Create a Customer Portal [In 5 steps]
![How to Create a Customer Portal [In 5 steps]](https://foyercus.blob.core.windows.net/287a2408185e68c371c/blog/697/c/307dbeab-47b9-4a08-b3a6-0224d3a25e57.jpg)
![How to Create a Customer Portal [In 5 steps]](https://foyercus.blob.core.windows.net/287a2408185e68c371c/blog/697/c/307dbeab-47b9-4a08-b3a6-0224d3a25e57.jpg)
A well-built customer portal can be a game-changer for any business, creating a central hub where clients can access everything they need, anytime they need it. Today, customers expect secure instant access to information, seamless support, and intuitive self-service options—all of which a thoughtfully crafted customer portal can provide. Building a customer portal might seem daunting, but with the right approach, you can create an efficient, user-friendly platform that keeps clients engaged, empowered, and satisfied with their experience.
In this blog post, create a customer portal by breaking down the process into five straightforward steps that cover everything from planning and design to launching and optimizing your portal. Whether you're starting from scratch or looking to upgrade your current system, these steps will help you create a powerful customer portal that enhances user experience, streamlines your business operations, and strengthens customer relationships. Let’s dive into this guide to help you create a customer portal that meets your clients' needs, reflects your brand’s values, and supports your business goals.
What is a Customer Portal?
A customer client portal is a secure, web-based gateway that allows clients to access and manage their information, communicate with your team, and utilize essential resources anytime, anywhere. Think of it as a digital front door to your business, where clients can log in to view their account details, retrieve important documents and more—all without having to contact customer support directly. By putting valuable information and services at clients' fingertips, a customer portal empowers them to take control of their interactions with your business, leading to a more satisfying and efficient user experience.
Customer portals are designed to streamline communication and enhance transparency between a business and its clients. Rather than relying on emails or phone calls for updates and inquiries, clients can log into the portal for real-time updates and personalized information tailored to their needs. This centralized approach not only reduces response times and the burden on customer service teams but also ensures clients feel more connected and in control of their relationship with your brand.
For businesses, a customer client portal represents a significant advantage in terms of operational efficiency. By automating routine processes and allowing clients to self-serve, companies can reduce the volume of repetitive tasks, freeing up their teams to focus on more complex issues that require personal attention. Additionally, customer portals can provide valuable insights into user behavior and preferences, enabling businesses to improve their offerings based on data-driven feedback.
What should a Customer Portal include?
A well-designed customer portal should include a range of features that empower clients to access information and manage their accounts independently. At its core, the portal must provide a user-friendly experience that prioritizes security and personalization. Key components include:
- Secure Login and User Authentication: Protects client data by ensuring that only authorized users can access sensitive information.
- Personalized Dashboard: Offers a customized view of relevant account details, recent activities, and quick links to essential resources.
- Self-Service Account Management: Allows clients to update contact information, adjust billing preferences, and manage payment methods without assistance.
- Document Library: Centralizes important files like contracts, invoices, and statements, making them easily accessible at any time.
- Live Chat Options: Provide immediate support to help clients resolve issues quickly.
- Knowledge Base and FAQ Section: Promote self-service by providing answers to common questions and helpful resources.
- Notifications and Alerts: Keep clients informed about important updates, billing notices, or service changes.
- Third Party Integrations: Integrating your crucial business applications in one place for customers to view and interact with
5 steps to create a customer and client portal
Now that we have our requirements identified, we need to create our customer portal. Here are the five essential steps to guide you in building a user-friendly, secure, and efficient customer and client portal.
1. Identify Your Customer Portal Requirements
When creating a customer portal, identifying your specific requirements is crucial to ensure the portal aligns with both your business goals and your customers' needs. Start by analyzing the primary functions you want your portal to serve—whether it's account management, order tracking, payment processing, or customer support. Consider which features are essential versus those that are merely nice to have. Understanding your target audience is equally important; think about what information or services they are most likely to need and the tasks they should be able to complete without direct assistance. This foundational step helps define the scope of your portal and prioritize features that offer the greatest value to your clients.
In addition to customer-focused functionality, you’ll also need to determine technical and operational requirements for your portal. Identify any integration needs, such as CRM, to ensure seamless data flow between the portal and your internal platforms. You'll have to consider integrations into platforms like Canva, Microsoft Power Pages, Airtable, and others. Security should be a top priority, so factor in requirements for secure login, data protection, and access control.
Consider scalability—your portal should be able to grow and evolve with your business. By clearly identifying and documenting your customer portal requirements, you can create a roadmap for creating your customer portal that can guide the design process, minimize unexpected challenges, and help deliver a portal that truly meets the needs of both your customers and your business.
2. Consider an Easy-To-Use Portal Builder like Foyer
When building a customer portal, choosing an easy-to-use portal builder can save time and resources while ensuring a user-friendly experience for your clients. Opting for a portal builder with intuitive, customizable options allows you to tailor the portal to your brand and specific business needs without complex coding or technical expertise - which makes Foyer such a great option. If you're still interested in looking at other client portals, check out our best client portal list. Let's get started with using an easy-to-use portal builder like Foyer.
Setup Your Portal
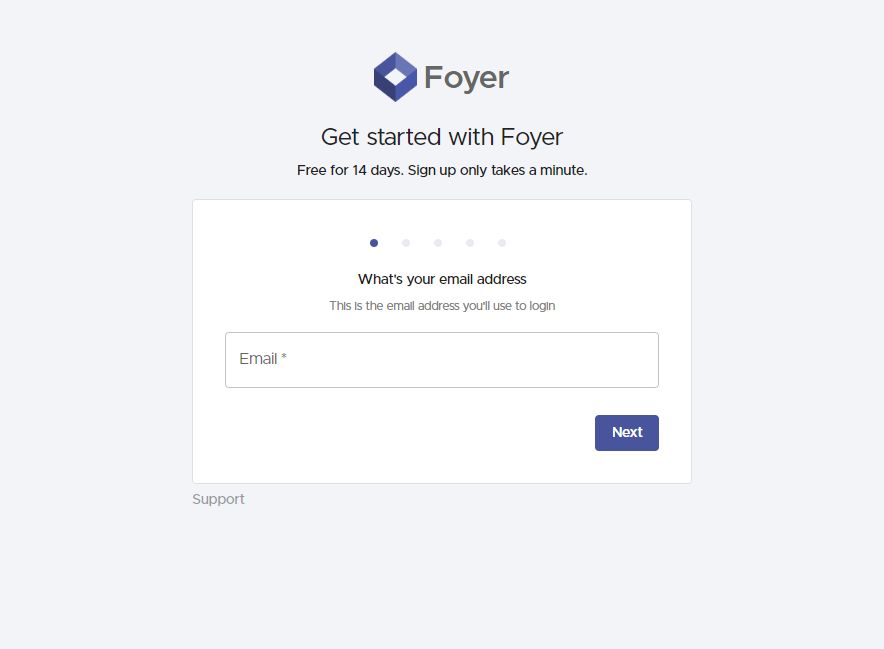
To set up your client portal, simply start by visiting the onboarding wizard and entering your name, email, and business name. In just one minute, you’ll have your own client portal ready to use—no commitment required.
Your client portal will be accessible as a Foyer subdomain, such as "example.usefoyer.com." During onboarding, you can choose the specific subdomain you’d like. If you prefer to host Foyer as a subdomain of your own domain (e.g., "portal.yourbusiness.com"), our Support team can assist with that setup.
3. Customize Your Customer Portal
There's a lot of different configurations that you can make with your client portal. So many configurations, that we have created an entire blog that lists out several of the ways to white label and customize your portal. In case you don't want to check out another guide, we'll list some of the customization options here!
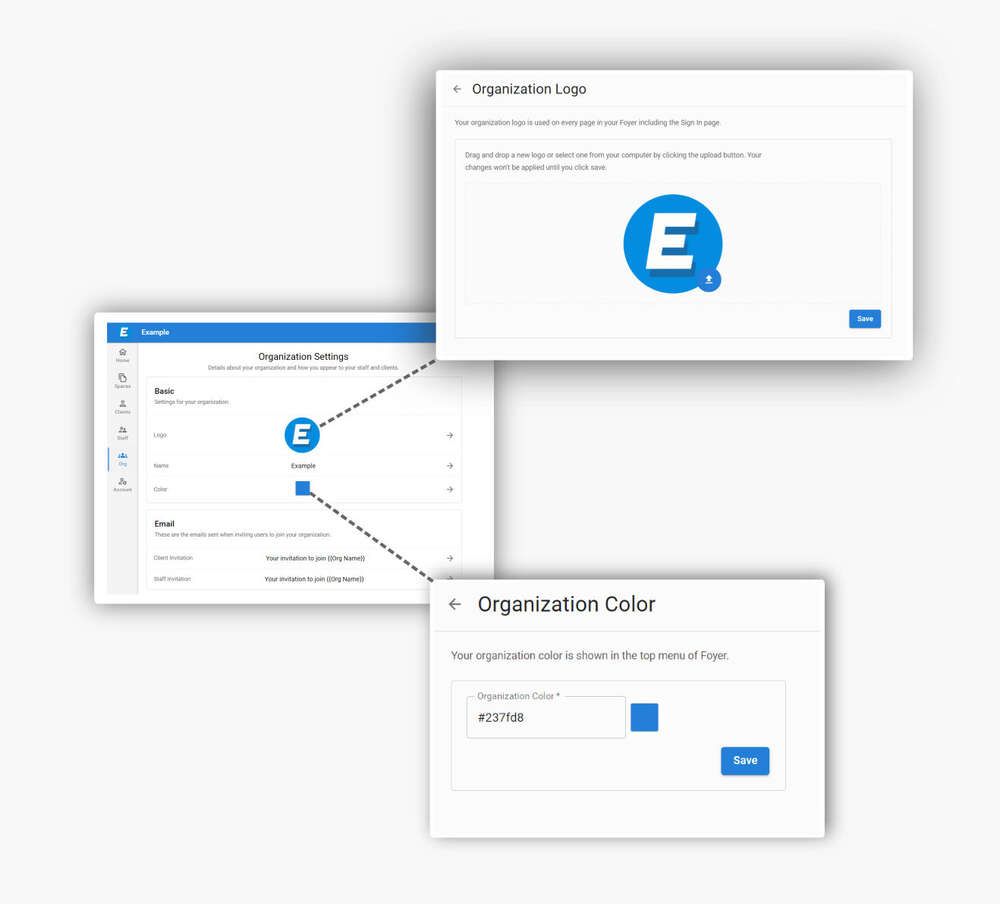
Add Your Logo and Brand Colors.
Maintaining brand consistency is essential when white-labeling your client portal. Personalize the portal with your company’s logo, colors, and fonts to align with your brand’s look and feel.
Customize the Client Dashboard
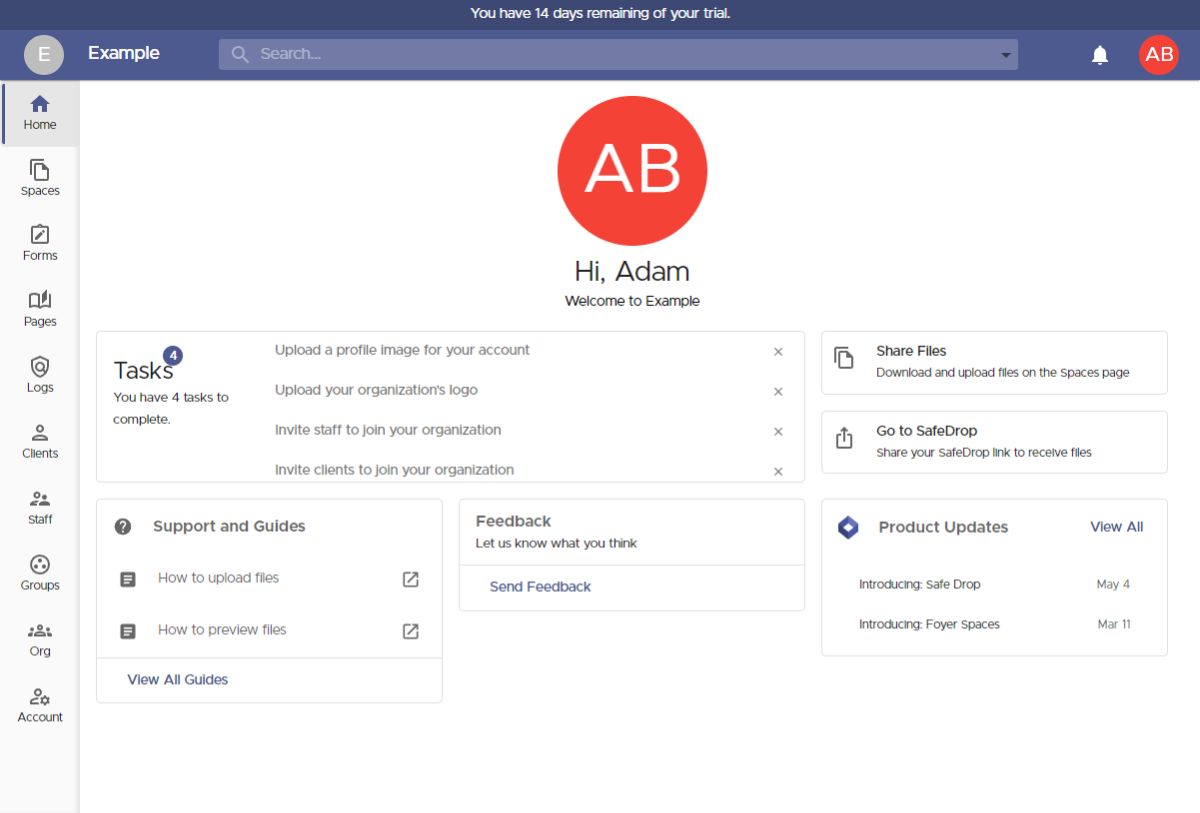
The dashboard is typically the first impression clients get when they log in, so it’s essential to make it informative and engaging. Arrange the layout to highlight key details like recent activity, project updates, or account information. Foyer lets you adapt the dashboard to meet your clients’ specific needs, enhancing their experience and turning the portal into a valuable tool that elevates their interactions with your business.
Boost Functionality with Integrations
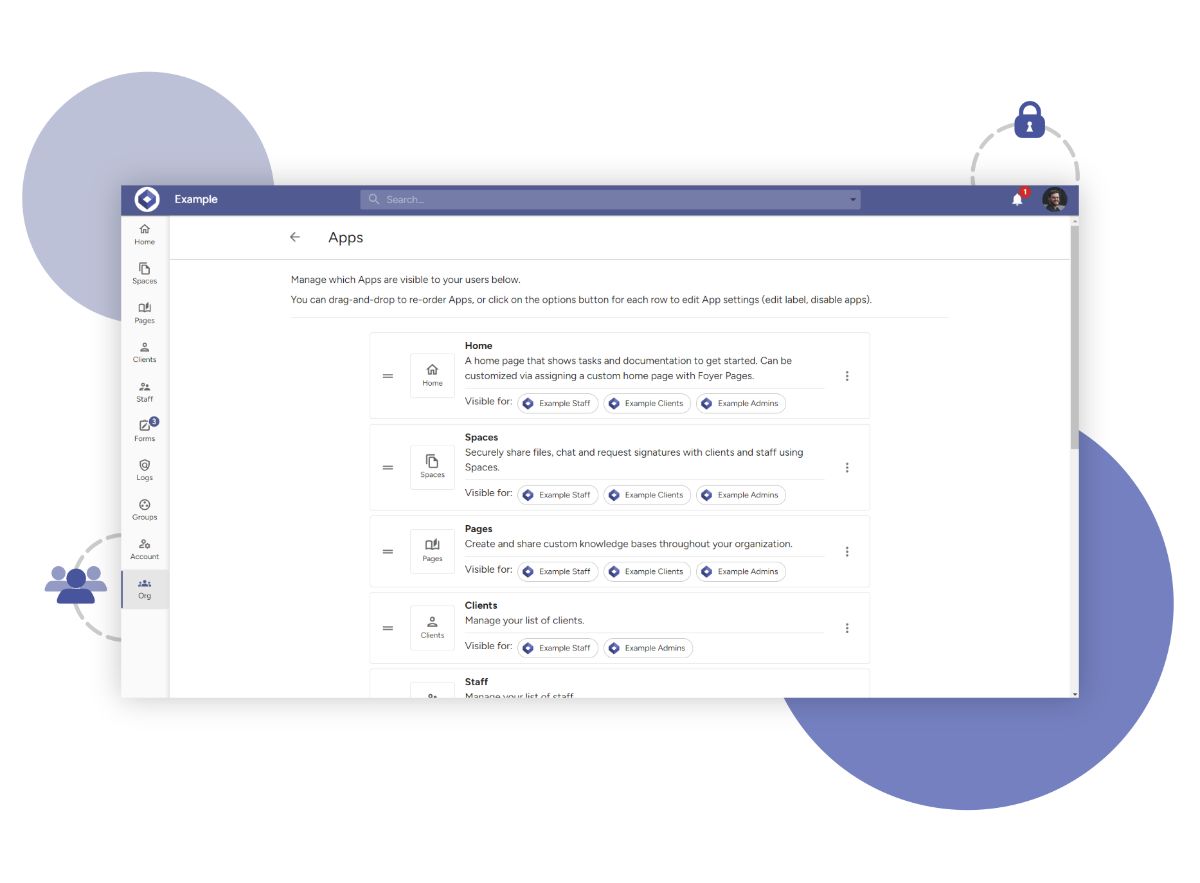
White labeling goes beyond appearance—it’s about delivering practical value. Enhance your portal by integrating key tools like CRM systems, project management software, and payment gateways, creating a more functional experience for your clients. With platforms like Foyer, you can easily add these integrations, incorporating tools your clients already rely on and transforming your portal into an essential part of their daily workflow.
4. Integrate Your Customer Portal on Your Website
Integrating on Your Website
Now that you've got your client portal all setup, lets get it on your website and start inviting users!
The steps will be a bit different depending on what web hosting provider you use, but the general process is the same.
To integrate with your website, you'll want to add a link to your website's navigation bar to either the client portal login page, or your Foyer SafeDrop page (for file uploads).
- If you're linking to your client login page, you'll want to use a link like "https://yourorg.usefoyer.com". Just remember to replace "yourorg" with the subdomain name you chose when you onboarded to Foyer.
- If you want to link to your secure file upload page, you'll want to use this URL: "https://yourorg.usefoyer.com/upload". Again, don't forget to replace "yourorg" with your actual organization's subdomain name.
If you're looking for some instructions for your hosting provider, check out some of our posts below:
5. Inviting Clients
A common use case for Foyer is simply sharing files with a client, and there are two ways to do this.
First, you can invite clients directly to a Space (you’ll need their email address for this option).
Alternatively, you can share a link to your “SafeDrop” page, allowing business clients to send files without needing to sign in.
I’ll walk you through both file-sharing methods! Let’s start by inviting your clients directly to a Space.
To clarify, a “Space” is a secure environment where you can share files and exchange secure messages with clients and team members. Only Space members can see the files and messages within it, similar to a group chat in Teams, Slack, or iMessage.
You can create a Space by visiting the Spaces page (click “Spaces” in the left menu), then selecting the “+” icon on the left.
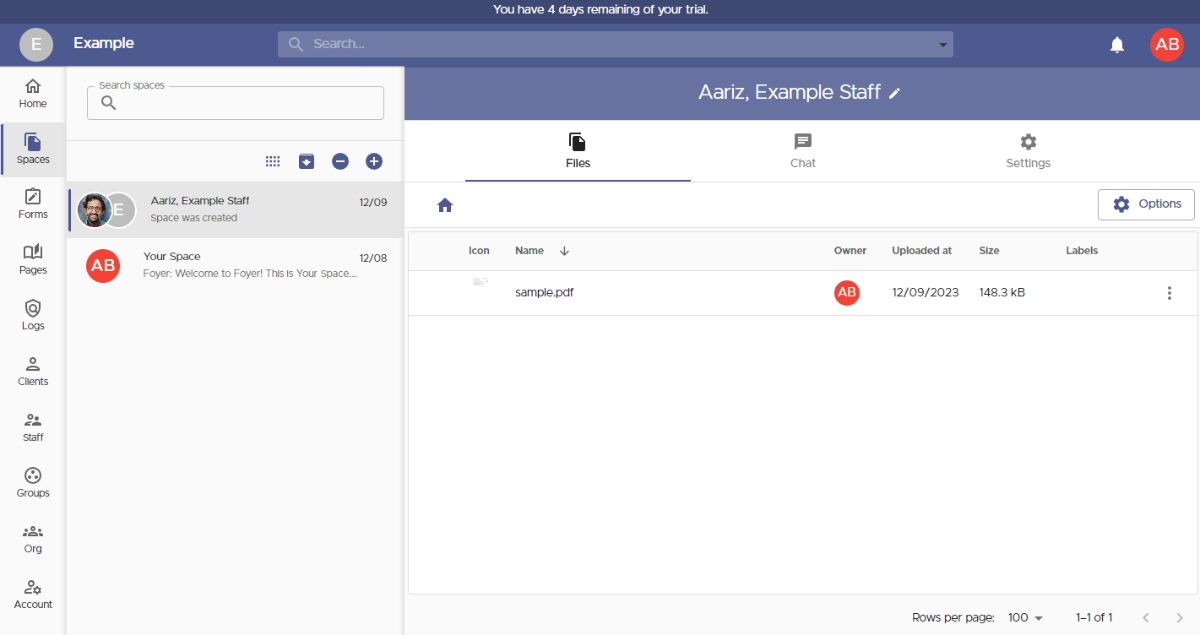
When creating a new Space, a dialog box will appear like the one shown below. Here, you can set the Space’s name and choose which members will have access to any shared files or messages.
You also have the option to share Spaces with “groups.” Groups are an effective way to organize your business contacts, allowing you to grant access to an entire external business in one step. We’ll go over that in the next section!
If you need to invite a new client, simply click the “Invite a New Client” button.
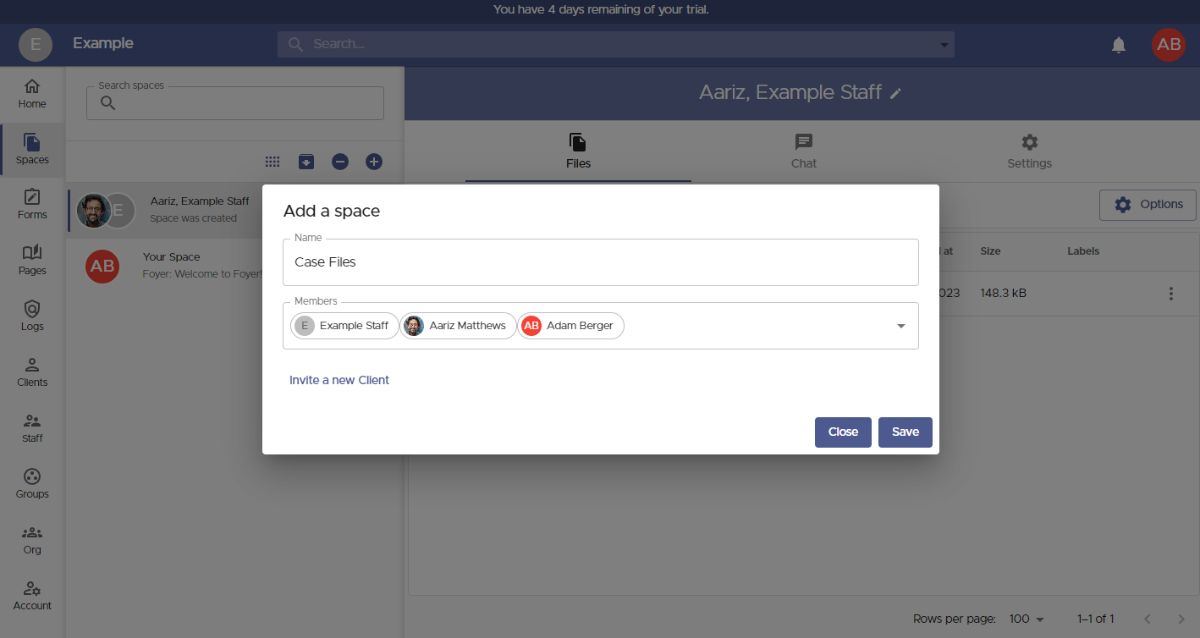
To invite a new client, all you need is their email address. Additional information, like their name, phone number, and profile picture, is optional (they can fill in these details themselves if they prefer).
Before saving the client, there are two useful options you might want to explore for organization.
First, tags. Tags allow you to categorize clients with labels, such as by industry (e.g., "Law Firm" or "Healthcare").
Second, groups. Groups enable you to organize clients by the business they belong to. By using groups, you can easily grant access to resources (like Spaces or Pages) to an entire business at once, without needing to track individual client affiliations.
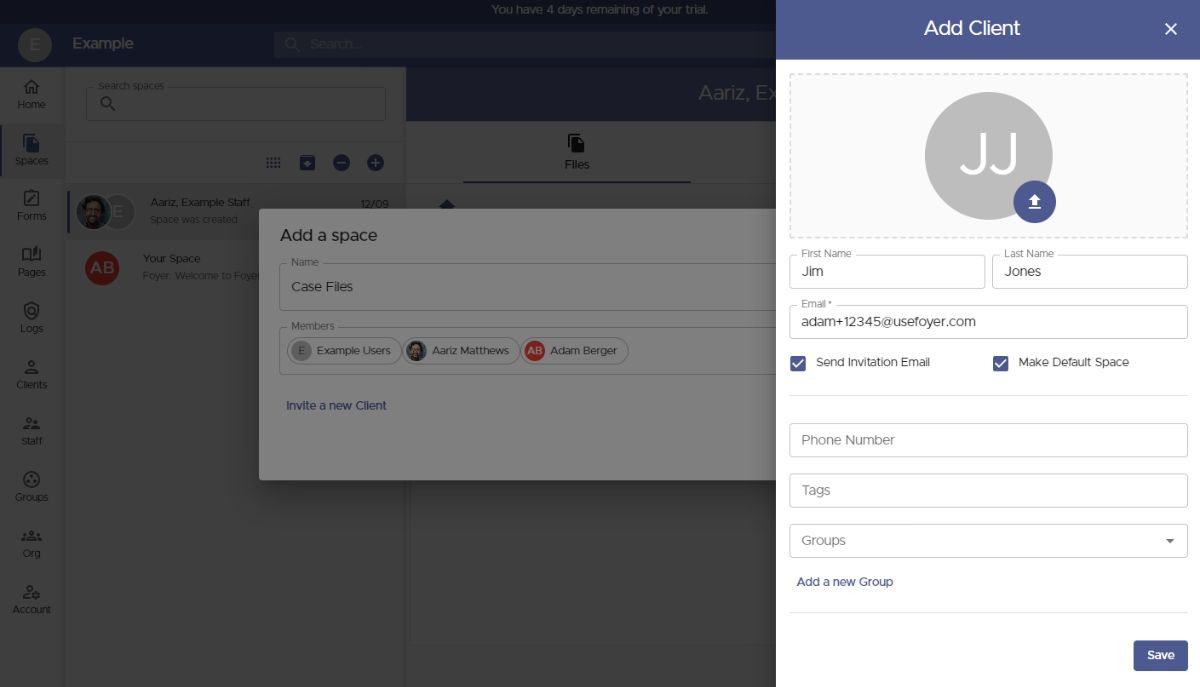
Any new clients you add will automatically appear in the "Members" list and will have access to any files you create within the new Space.
To add a group, simply start typing the group’s name and select it from the results. Groups are added to this list in the same way as individual clients.
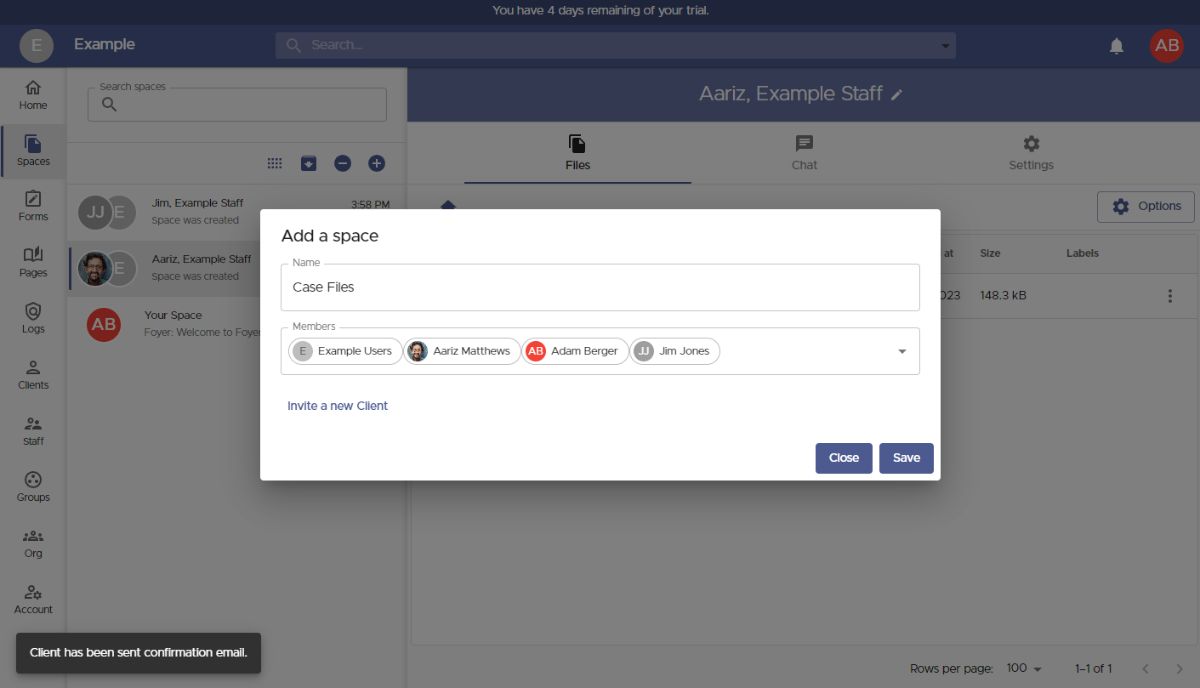
Once you've added all the necessary users and groups, click "Save," and you’ll be taken to your new Space.
To share files with everyone in the Space, simply drag and drop a file or use the "Options" button. You can upload files of any type, any size, and even entire folders!
If you need to add or remove users or groups later, go to the "Settings" tab to edit the members list.
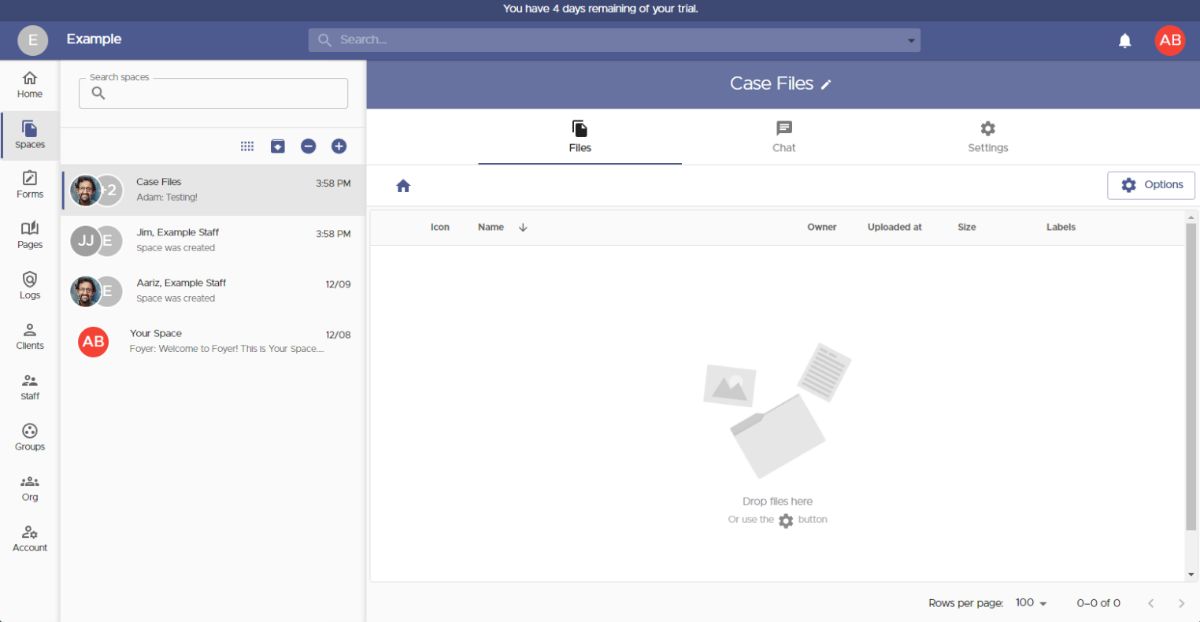
That completes the first option for sharing files with your client portal using "Spaces." Now, let's explore the second option: enabling business clients to send you files without needing to log in.
In your Foyer client portal, this feature is called SafeDrop.
Each organization has a SafeDrop portal by default. You can find your link on the "Home" tab or by visiting "example.usefoyer.com/upload" (replacing "example" with your organization's specific subdomain).
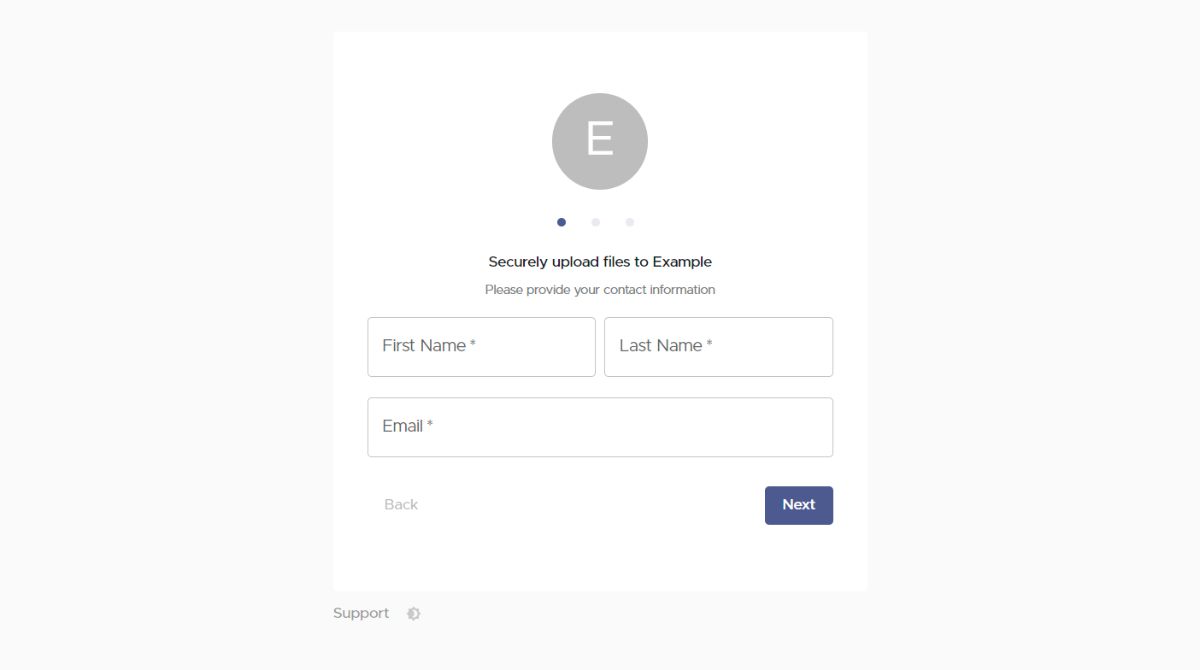
You can share your Foyer SafeDrop link with any client, allowing them to easily send files from any device. They simply need to enter their name, email, an optional message, and then upload any number of files.
Files uploaded via SafeDrop will appear on your Spaces page, labeled with names like “SafeDrop from ...”. As with regular Spaces, both you and the client will receive notifications for any files uploaded.
Anyone who has used your SafeDrop portal will be listed as a "guest" client on your Clients page. To help organize your business contacts, you can click on any entry in the Clients page and assign relevant tags or groups.
Final Thoughts
Finding the ideal client portal for your customers can be a challenge. With so many options limiting tool integration and others, discovering a platform that works seamlessly with your existing systems can be tough.
With a powerful client portal, excellent customer support tools, and a host of impressive portal features, Foyer’s free trial is definitely worth looking into!
If you’re looking to create a custom client portal that integrates effortlessly with your website without any coding required I highly recommend giving Foyer a try.


