Create a Client Portal for Your Wix Website (Step-by-Step)
Wix is a great platform for businesses to build professional websites. It comes loaded with features like invoicing, appointment booking, marketing tools, analytics, and more.
It’s no surprise that it’s one of the most widely used website builders out there.
However, while Wix aims to be a complete solution for small businesses, it can fall short in key areas like secure file sharing and client collaboration.
The good news is that Wix makes it easy to integrate a dedicated client portal into any site.
In this guide, I’ll walk you through how to set up a client portal for Wix. But first, let’s take a moment to consider your business goals and what you want to get out of a portal.
What Do You Need From a Wix Client Portal?
What do you actually want from a client portal? What problems are you trying to solve?
It’s worth taking a moment to list out the must have features along with a few nice-to-haves. For instance, you might absolutely need secure file sharing and e-signatures, while messaging could be less important.
Getting clear on your priorities will help you decide whether you need a dedicated client portal solution or if it’s worth trying to build one directly within Wix.
Your budget matters here too. Dedicated client portals typically come with an extra cost. But if you're already using a Wix Business plan or higher, you might want to explore building a simple client portal using Wix tools. It won’t add anything to your monthly bill.
Let’s take a closer look at how you can set up a client portal with Wix.
Can You Make a Client Portal Only Using Wix?
Some basic client portal features can be had just by using some tools already provided by Wix.
However, they will require that you are at least on the Business pricing (which is currently $39/mo), and it will require some extra setup.
For example, if you need to securely receive documents from your clients, and you want to just use Wix, you could follow their guide on how to create a form that accepts file uploads.
Some of the other client portal features like e-signatures, audit trails, secure messaging won't be ideal for Wix. While technically you could make anything using Wix (using custom code), it is not advised due to the amount of set up.
What's the Best Client Portal to Use With Wix?
When it comes to Wix client portals, I strongly suggest checking out Foyer. Foyer is low cost ($19 per internal user per month) and includes every feature you'd need out of a client portal.
You can even try it out for free without a credit card. Onboarding to Foyer is quick (takes 1 minute) and their support will help you migrate any existing data you have.
Here's a list of some of Foyer's client portal features:
- Secure file sharing with clients
- A secure messenger to send clients encrypted messages
- Email and desktop notifications for all portal activity
- Audit trails for every action (login, file download, file upload, etc...)
- Client multi-factor authentication (MFA/2FA) support
- Requesting e-signatures from clients
- Custom forms to collect specific client information
- Secure email via Microsoft Outlook
- An internal knowledge base builder to share internal business documents and trainings
- Desktop and mobile support
You can integrate Foyer into any Wix website to have a fully featured client portal while saving you time, and keeping your monthly costs low.
Let's get right into how you can use Foyer to make a client portal for Wix.
How to Create a Client Portal for Your Wix Website
In this section, we will go step-by-step on how you can create a client portal and integrate it with your Wix website.
Step 1: Create a Client Portal With Foyer
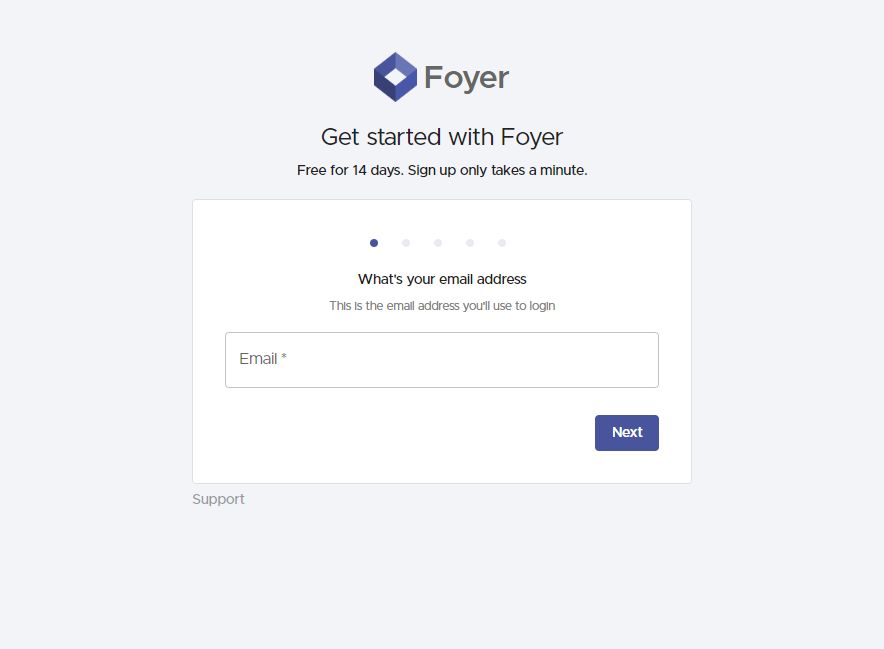
Foyer has an onboarding wizard that makes it easy to create a client portal. It is completely free for 14-days (with no credit card required at all).
First, head to the onboarding wizard and enter your name, email, and business name. Your client portal will automatically be created, it takes around 1 minute.
Your portal will be accessible as a "subdomain" of Foyer, like this: example.usefoyer.com. You can choose which "subdomain" you want in the onboarding wizard.
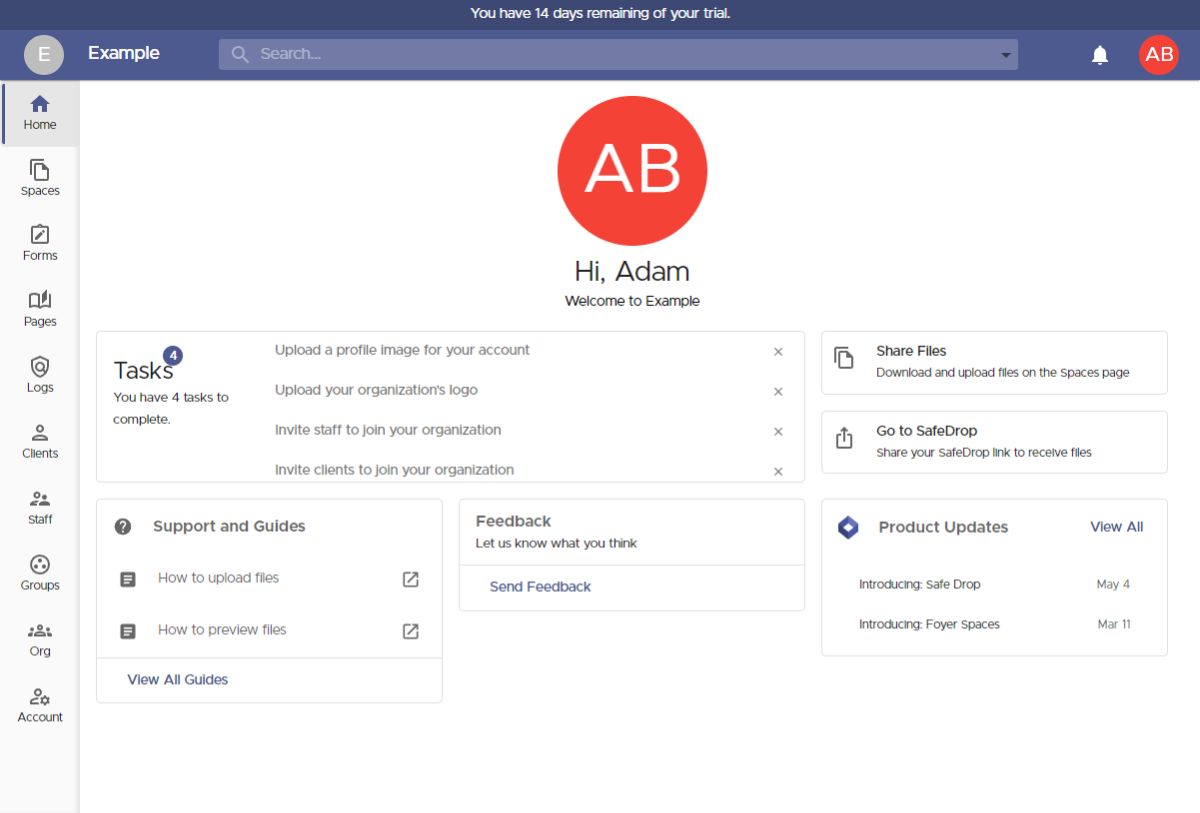
After making your client portal, you'll be automatically logged in. There's a lot of features to take in, but here's a quick breakdown of all the pages on the left drawer:
- Spaces: secure file sharing and messaging for clients or staff
- Forms: Custom forms (similar to Wix's Forms) for collecting specific data from clients
- Pages: A knowledge base builder for you to create and share internal documents and trainings
- Logs: A full audit trail of all activity within Foyer
- Clients: This is where you can view, and invite new clients to your client portal.
- Staff: This is where you can view, and invite employees or staff to your client portal.
- Groups: For creating groups of clients and staff that you can use throughout Foyer.
- Org: This is where you can white-label your client portal (change color, business name, customize emails)
- Account: Where you can set your notification preferences, and configure multi-factor authentication
Step 2: Invite a Client
To invite a client to your client portal, click on the "Clients" page on the left drawer. Then click on the "Invite Client" button on the top of the page. Using the "Add Client" drawer on the right, you can enter the email of the client you'd like to invite.
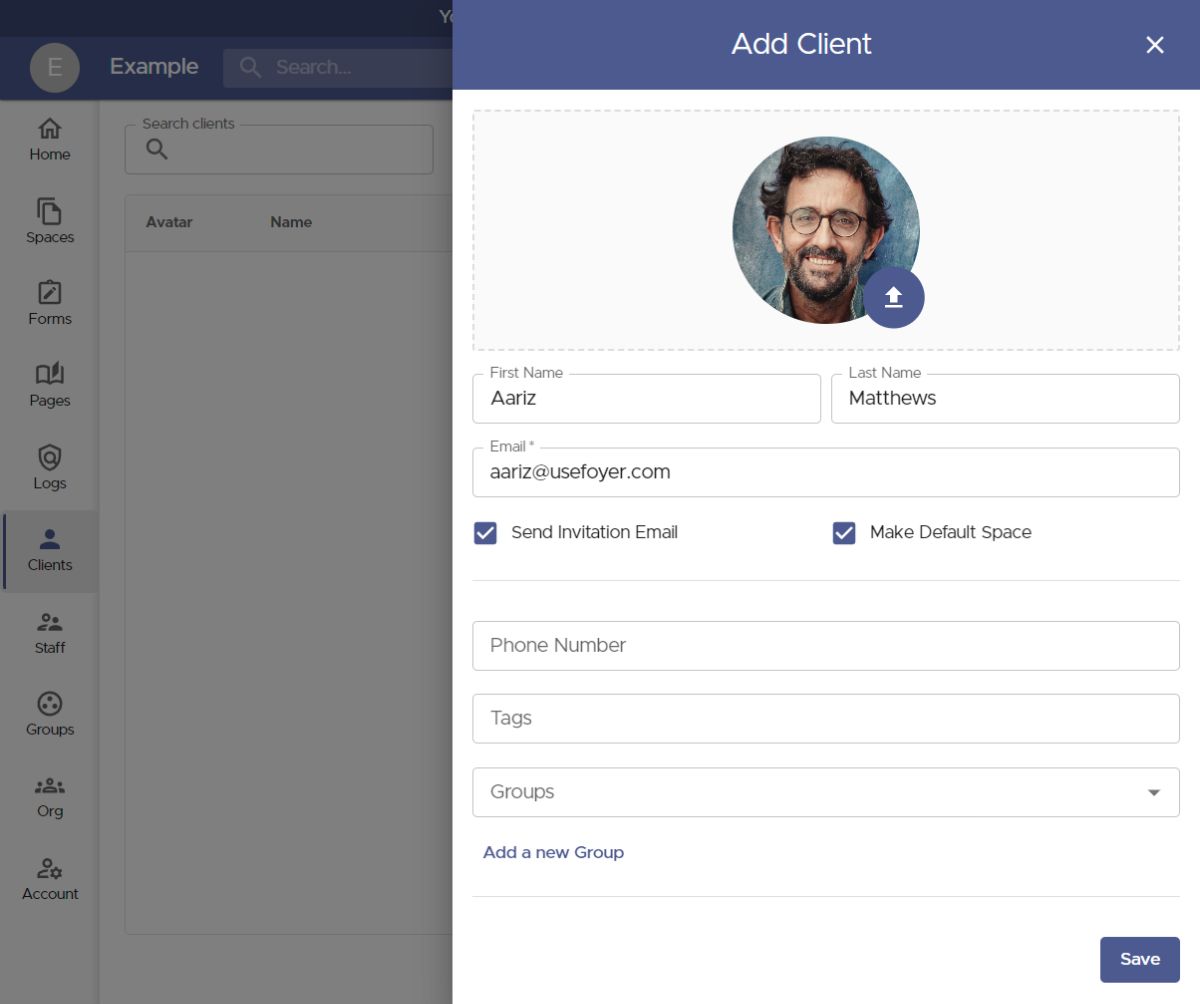
The client's email is the only required field. If you'd like you could also add a first name, last name, or profile picture. If you have several clients belonging to the same business, you could click "Add a new Group" to add them all to a group. This will make sharing files with the whole business easier.
When inviting a client you have two options:
- If "Send Invitation Email" is checked: the client will be sent an email where they can set a password for their account.
- If "Send Invitation Email" is unchecked: the client will not be notified that they were added, but they can still login without a password (using email verification).
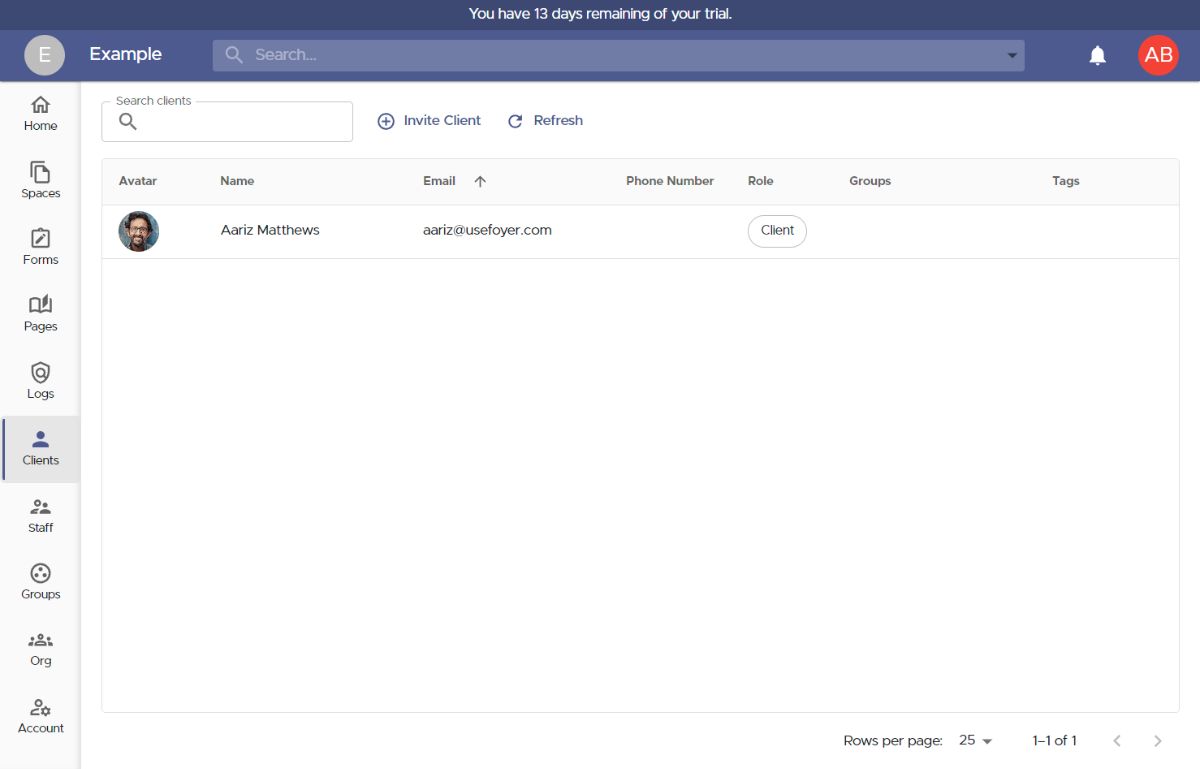
All clients that are invited, and registered will show up in the clients table. Because we left "Make Default Space" enabled when inviting our first client, there will be a new space created in the "Spaces" tab. Let's head over there to see how we can share files.
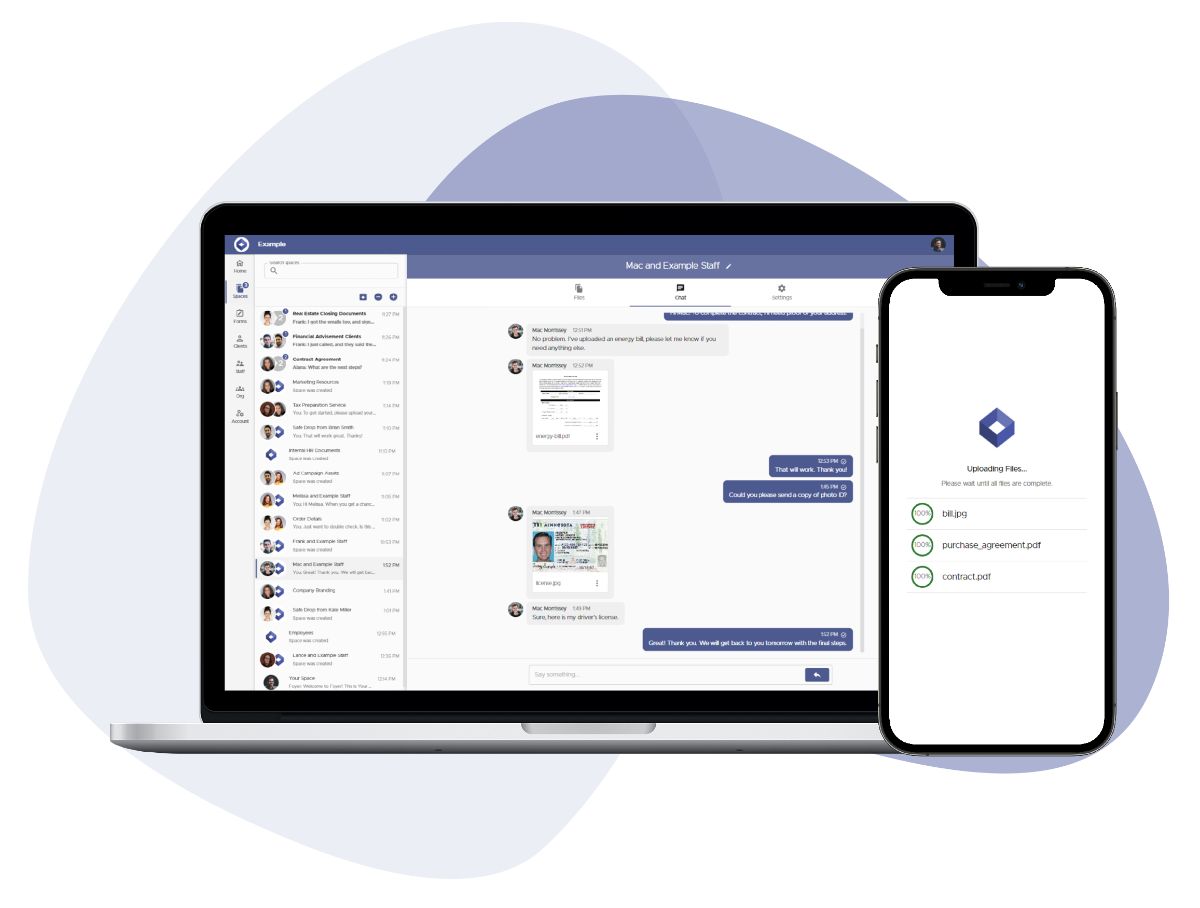
Step 3: Sharing Files with Clients
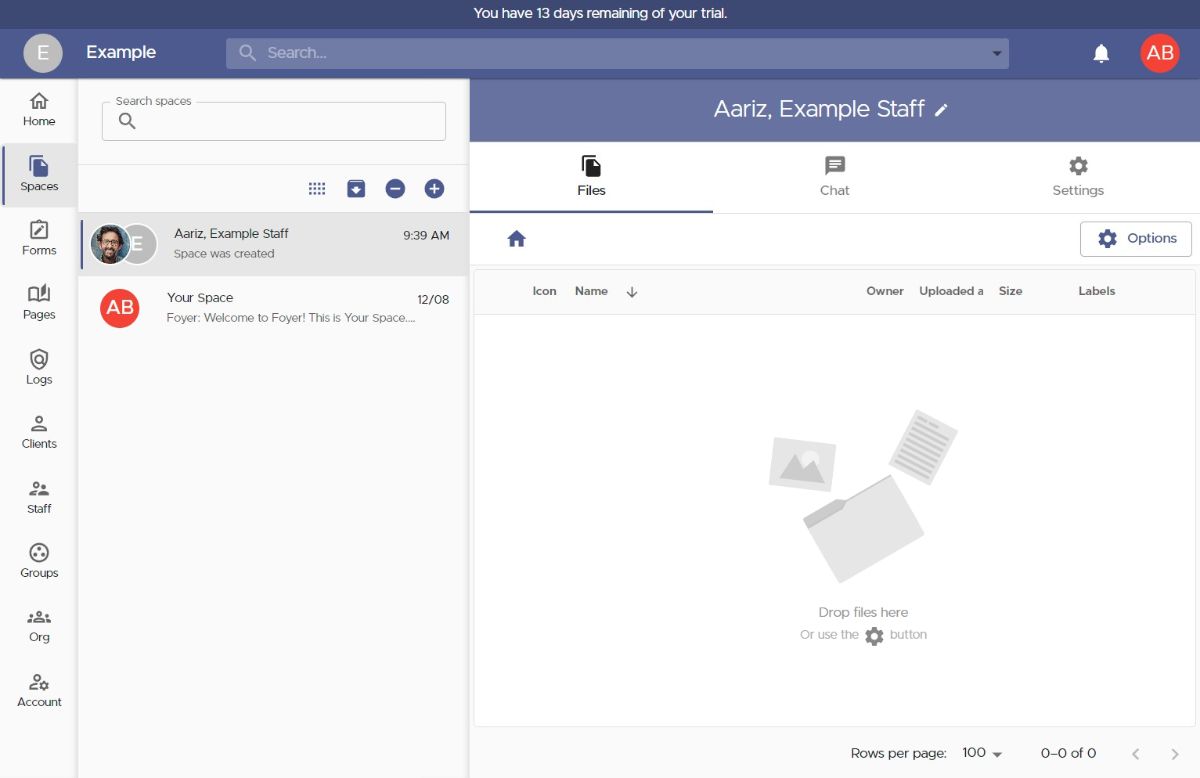
On the "Spaces" page, you'll find all the conversations you're a part of. This includes both files shared with your clients and secure messages.
In the screenshot above, you can see that the client we invited has a default space. To share files with that client, all you do is click on their space, then drag-and-drop files into the "Files" page. You can even upload entire folders.
You and your clients will be notified via email whenever there is a new file upload or unread message.
The Files page is also where you can request e-signatures from clients. If you need to collect file signatures from clients, check out this guide on how to send file signature requests.
Step 4: Use Foyer's SafeDrop to Receive Files Without Client Login
For some workflows, it is easier to skip the process of inviting clients, and just allow them to upload files without an account. Foyer has a solution to this called Foyer SafeDrop.
Every Foyer organization has a SafeDrop portal included. You can find you link on the "Home" tab, or by visiting "example.usefoyer.com/upload" (replacing "example" with your org's subdomain name).
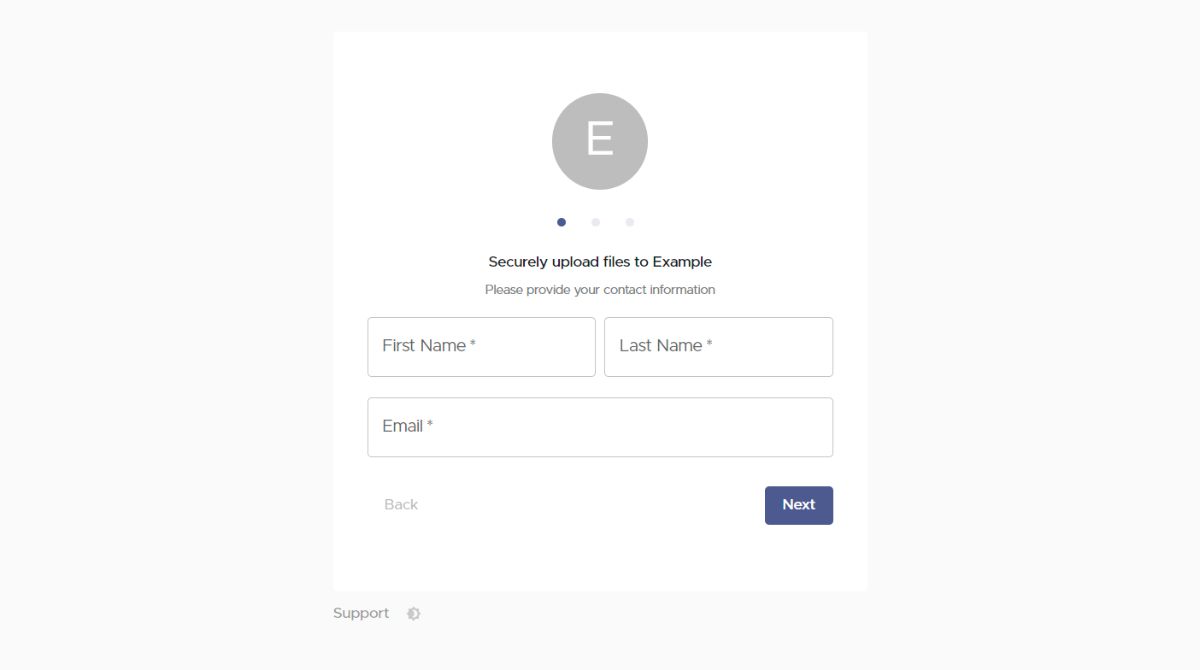
All files uploaded with Foyer SafeDrop will be added to a new Space, and the name will start with "SafeDrop from ...". Just like normal Spaces, you and the client will receive a notification for any files that are uploaded.
Step 5: How to Integrate Your Client Portal With Your Wix Site
The easiest way to integrate Foyer with your Wix Website is to add a link to your subdomain "example.usefoyer.com" right in your website's top menu.
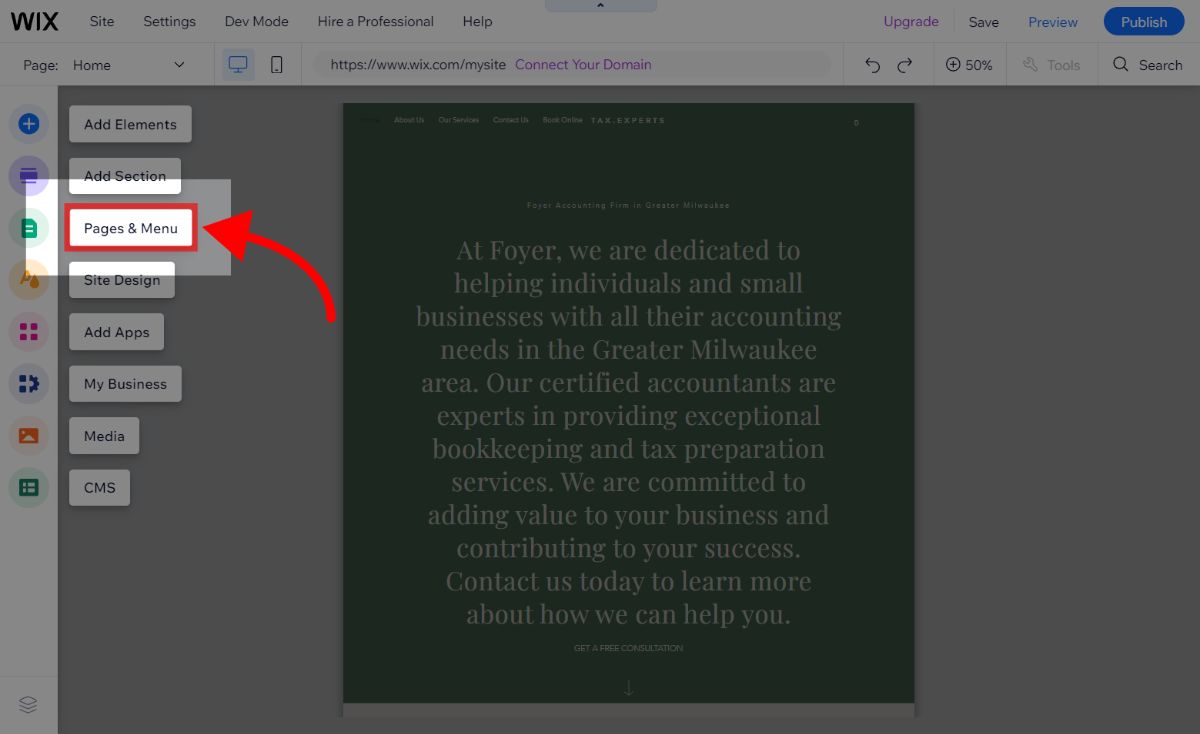
To get started, click the "Pages & Menu" option (its the green icon that looks like a file).
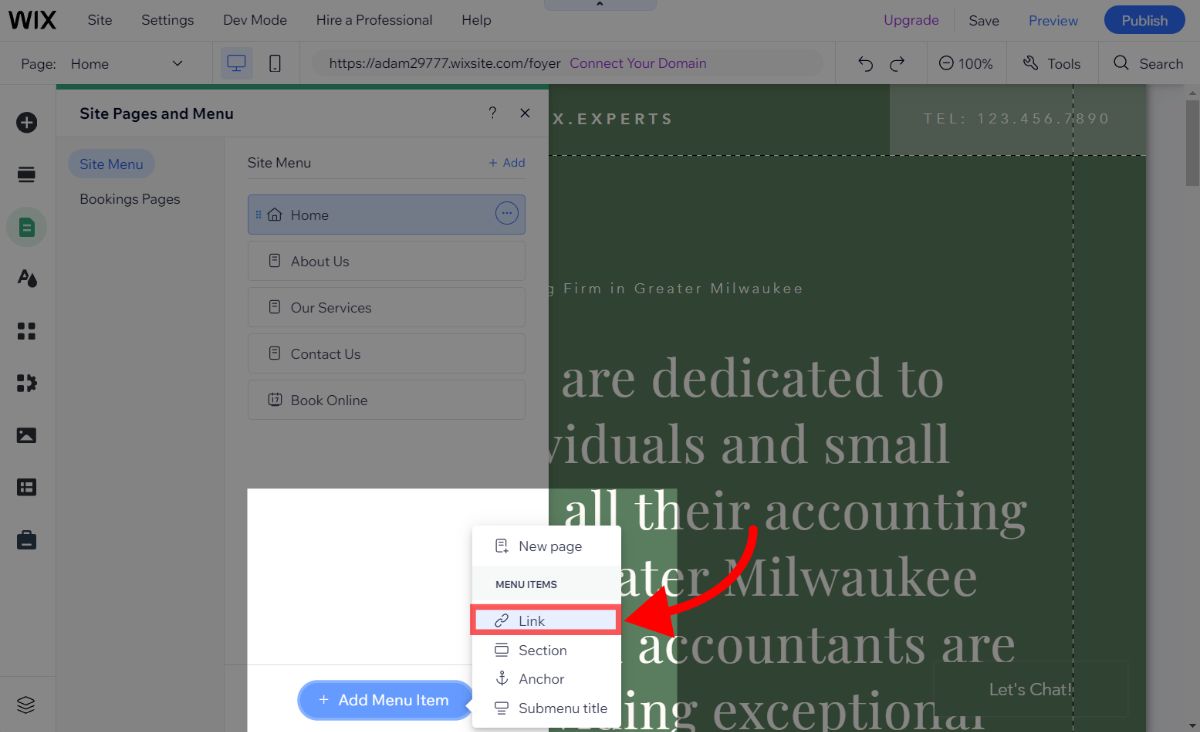
From there, a drawer will swing open. On the bottom of the drawer, click the "Add Menu Item" button, then select the "Link" option.
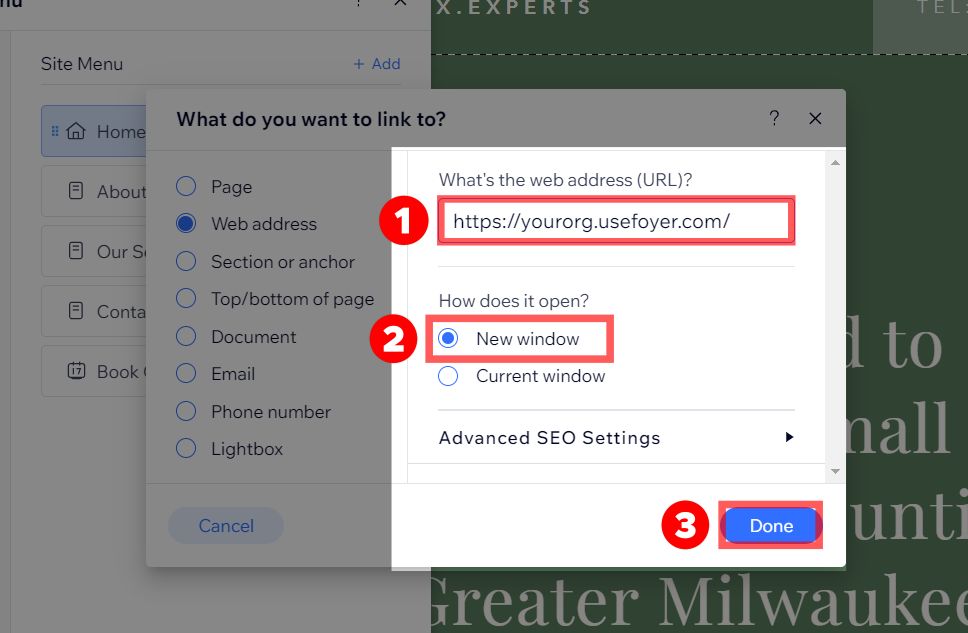
A dialog will popup asking what web address (URL) you'd like to use, and if you'd like the link to open in a new tab or not.
For the web address, you have two options:
- If you'd like your clients to login to access their files, enter your Foyer subdomain like this: example.usefoyer.com
- If you'd like your clients to only be able to upload documents (not view), enter your Foyer SafeDrop link: example.usefoyer.com/upload
I suggest you have your client portal open in a new tab, so your clients can easily navigate back to your site.
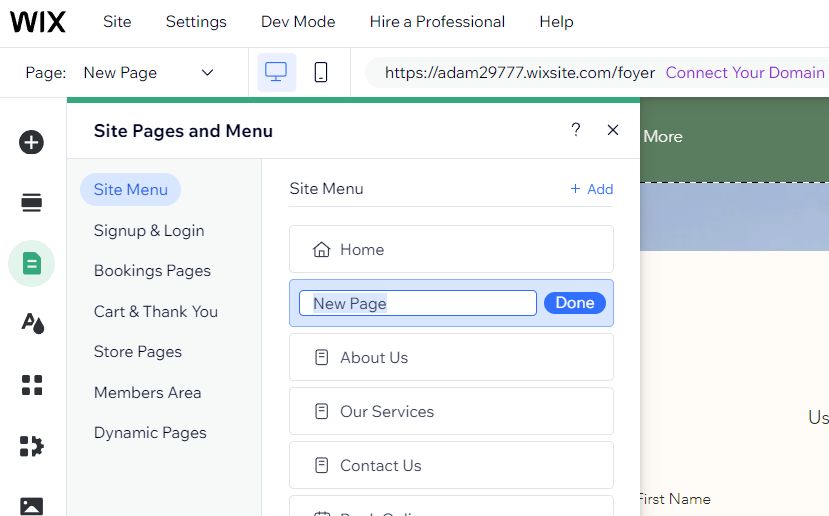
Click done, and the new link will appear.
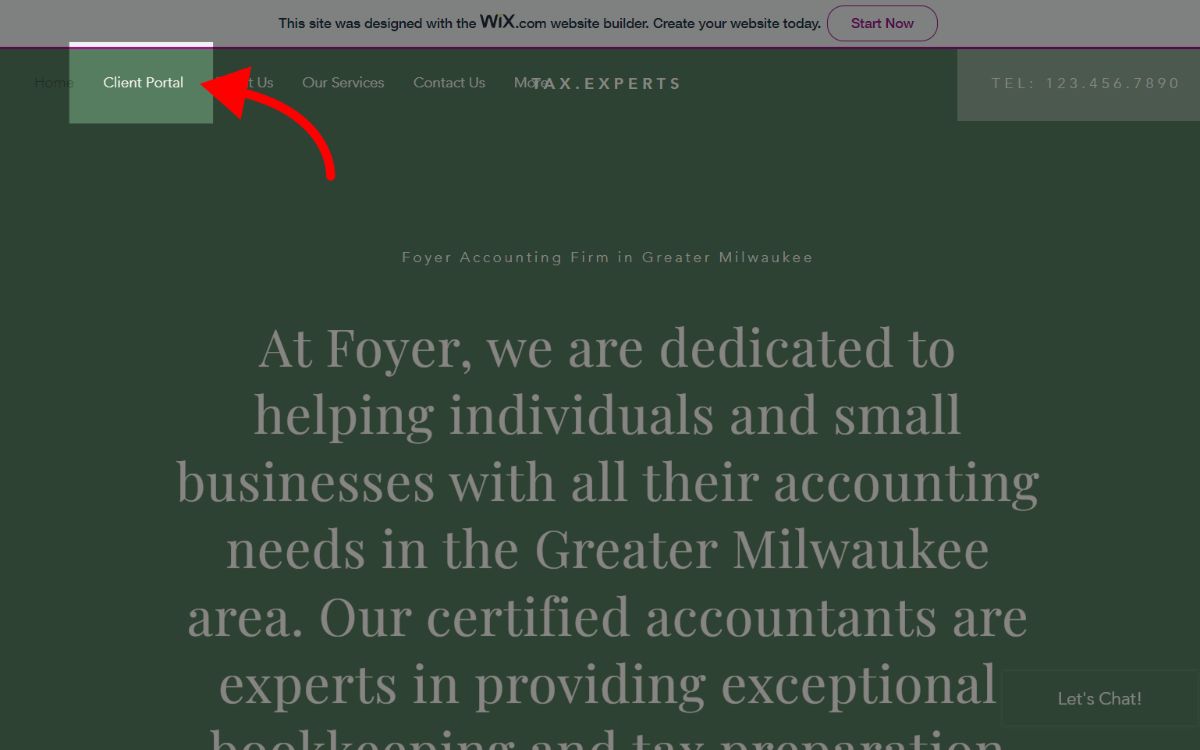
You'll want to update the name of the link too. If you linked to Foyer SafeDrop, it makes sense to call your link "Send us a File", otherwise, most websites name the link "Client Portal"
Your client portal is fully integrated with your Wix site! Check out the screenshot below to see the final product.
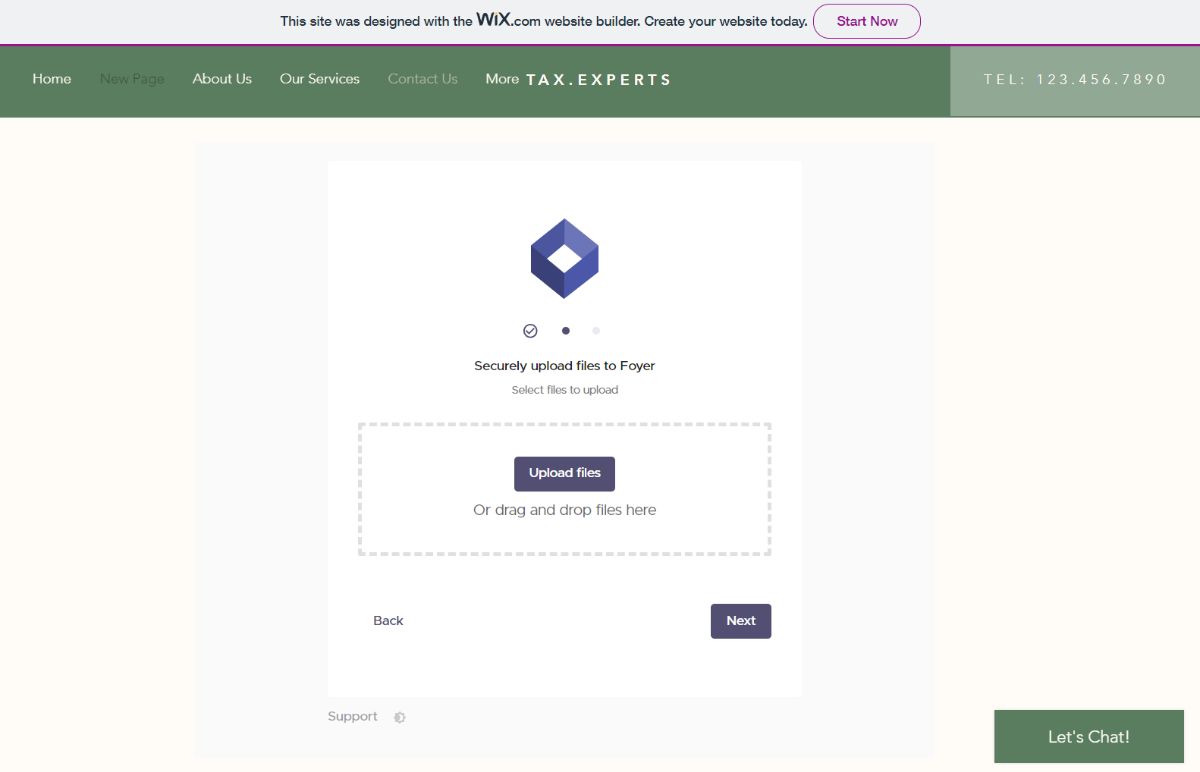
A link works great, but if you wanted a more seamless integration, you could also embed Foyer directly into any Wix page.
Wix has instructions found here on how to embed a site. It's the same process as the link, all you need to do is enter your client portal web address.
Below is a screenshot of a client portal we embedded into a Wix site:
You can even customize the colors and logo in your Foyer client portal to match your Wix site. Check out all the white-labeling options in the "Org" tab within your Foyer organization.
Explore All the Features of Your New Client Portal
Now that you've integrated your client portal into your Wix site, you're all ready to securely share files, and chat with your clients.
If you don't know which client portal to use, check out Foyer's comparison of the best client portals available today.
As always, you can reach out to support@usefoyer.com for any questions.
I hope this guide was helpful. If you have any comments of feedback, don't hesitate to send a comment below.
Frequently Asked Questions about Wix Client Portals
Does Wix have a client portal?
No, Wix doesn't have a built-in client portal, but you can easily integrate client portals like Foyer into Wix via embedding or just using links.
Can you add a client portal to a Wix website?
Yes, you can easily integrate client portals into Wix. However, Wix itself doesn't have a dedicated client portal, so you'll have to go with a separate client portal service like Foyer.
Can you create a free client portal for Wix?
If you're already paying for Wix's business license, you may be able to create a free client portal for Wix using features like their file upload feature, and by password protecting pages in Wix.
Can a Wix website have a customer portal?
If you're looking for a client portal, you'll have to go with a separate client portal service like Foyer. With Wix's support for integrations, you'll certainly be able to add a customer portal. If you're looking for a customer portal for selling products or services, Wix has plenty of templates to create your own online shop.